Create an Oracle.com Account
An Oracle Account (oracle.com account) is a unique identifier that gives you access to all of Oracle Cloud’s website. You need this account when making purchases through Oracle Store, or when logging support requests through My Oracle Support. This is also known as Oracle Single-Sign on (Oracle SSO) account.
Note that this is different from your Cloud Account, which hosts your Oracle Cloud services and enables you to log in to Infrastructure Classic Console or Applications Console.
If you don’t already have an Oracle Account, then you can create it from the Oracle Cloud website (http://www.oracle.com) or from the My Oracle Support page.
To request an Oracle Account from the Oracle Cloud website:
- Go to the Oracle Cloud website.
- Click
 View Accounts.
 - Click Create an Account.
- Enter your email address and other details in the appropriate fields. Be sure to complete all the required fields.
- Click Create Account. After your account is created, you’ll receive a confirmation email at the email address that you provided.
- Follow the instructions in the email to verify your email address.
- After creating your account, you can access the oracle cloud home page
To get one example of provisioning a virtual machine on Oracle Cloud, let’s start with this 14 minute video tutorial:
Creating an instance
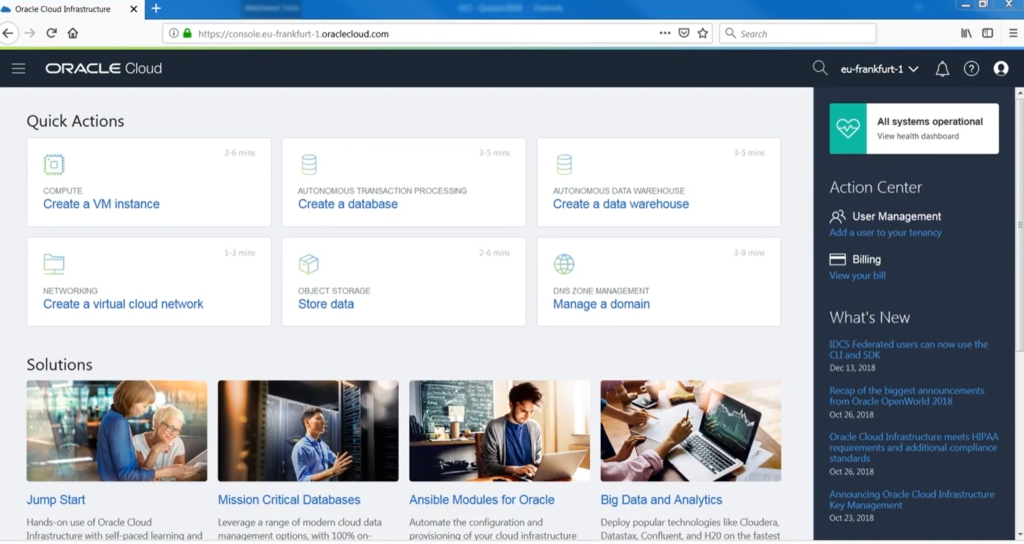
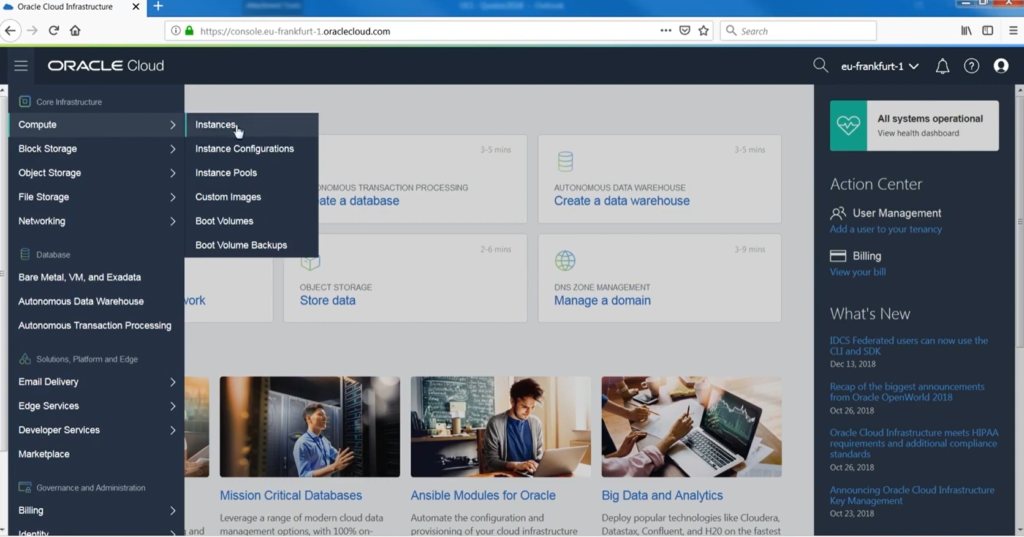
- From the Oracle Cloud home page, click on the hamburger menu on the top left side of the page
- Click on Compute -> Instances
- Click on Create Instance button
- or you can click on the “Create a VM instance” button on the Quick Actions page.
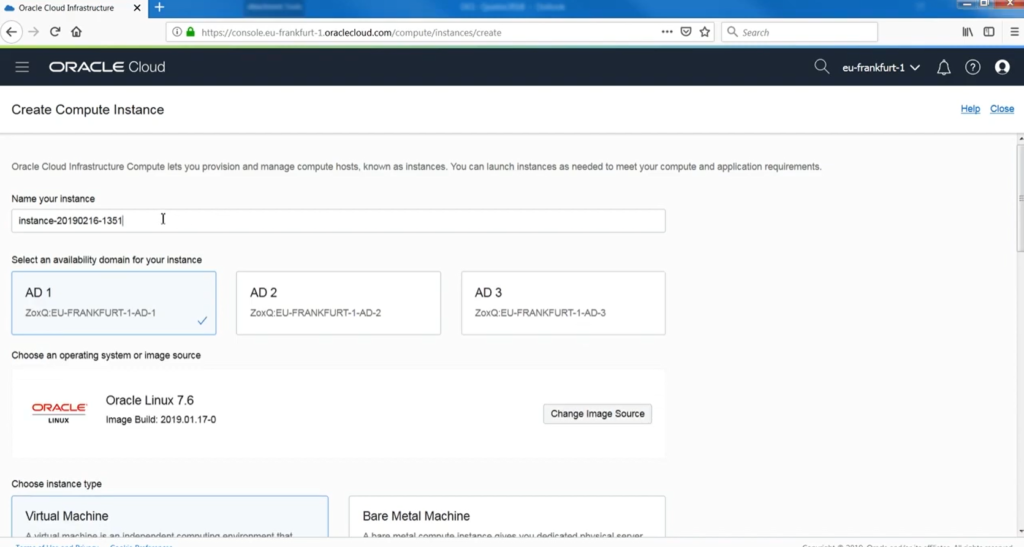
- You can select a compartment in which to create an instance.
- Enter a name for your instance
- Select the image of the operating system.
- In the Name field, enter a name for the instance. For example, SalesVM.
- Oracle Cloud Infrastructure is hosted in Regions, which are localized geographic areas. Each Region contains three Availability Domains which are isolated and fault-tolerant data centers that can be used to ensure high availability. In the Availability Domain field, select the Availability Domain in which you want to run the instance. For example, scul:PHX-AD-1.
- From the list of options in the Image pull-down, choose an operating system to use. This can be an Oracle-provided image, of which there are multiple Linux and Windows options, or you can choose a custom image that you created. For example, Oracle-Linux-7.4-2017.08.25-0.
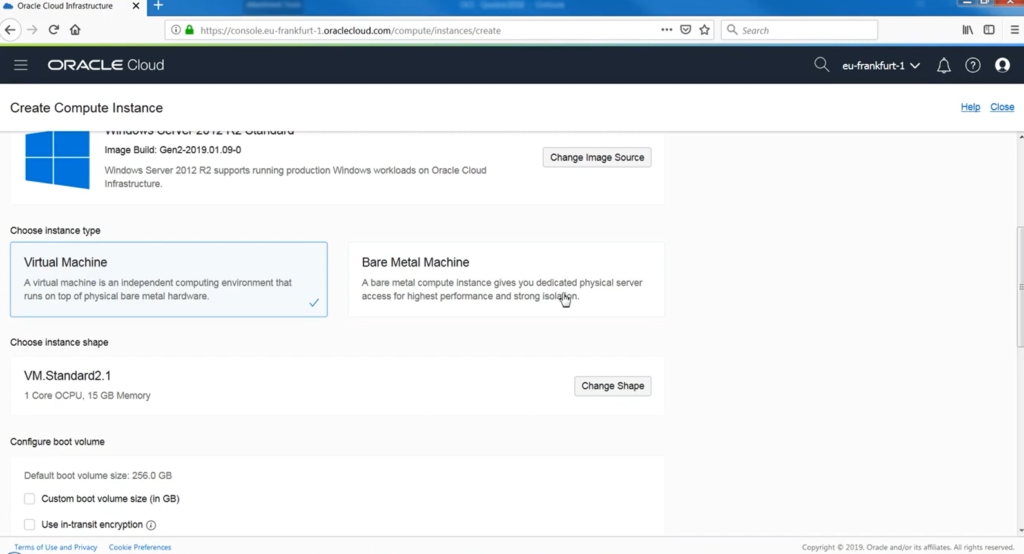
- The shape of an instance determines the number of CPUs, the amount of memory, and how much local storage an instance will have. Shape types with names that start with VM are Virtual Machines, while shape types with names that start with BM are Bare Metal instances. Choose the appropriate shape for your Virtual Machine instance in the Shape field. For example, VM.Standard1.4.
- In the Virtual Cloud Network field, select the Virtual Cloud Network for the instance. For example, QA_VCN. This is a software-defined version of a traditional on-premises network in the cloud. It includes subnets, route tables, and gateways in which your instances run. You must create a Virtual Cloud Network in a compartment before you can add an instance to that compartment.
- (If you have not created a Virtual cloud network in your selected compartment, the system will create it for you.)
- In the Subnet field, select the subnet to which to add the instance. For example, the public subnet scul:PHX-AD-1.
- You can optionally enter a private IP address in the Private IP Address field. For example, 10.0.0.50.
- Select Assign IP Address to make the instance publicly accessible. Otherwise, deselect this option.
- You can optionally enter a hostname in the Hostname field. For example, sales-server.
- If you set a value for Hostname, then that name sets a read-only Fully Qualified Domain Name (FQDN) in the Fully Qualified Domain Name field. For example, sales-server.sub08242009230.qavcn.oraclevcn.com.
Create an SSH Key Pair
You can create an SSH Key Pair within Azure as part of the virtual machine setup process. However, we are going to do it a different way by creating an SSH key pair on our client computer. By doing it this way, you can add a passphrase to the private key. As of this writing, the Azure virtual machine setup page does not allow you to add a passphrase, and this makes your key less secure. Create an SSH key pair for your virtual machine using these instructions:
Creating an SSH Key Pair Using ssh-keygen
- If the operating system image for your instance uses SSH keys for authentication (for example, Linux instances), then you must provide an SSH public key. To choose a public key file, ensure that Choose SSH Key Files is selected, then click Browse.
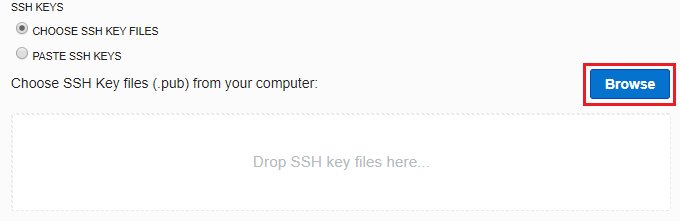
- Choose the public key to upload (for example, id_rsa.pub), then click Open. Note: some operating systems may use a different interface for file selection.
- Alternatively, select Paste SSH Keys and then copy and paste your SSH public key into the field.

- After reviewing your choices, click Launch Instance.
The virtual machine state will show as provisioning as it is being created. Once the virtual machine is ready, it will show as running.
Next Steps
- After the instance is provisioned, details about it appear in the instance list. To view more details, including IP addresses and the initial password (for Windows instances), click the instance name.
- When the instance is fully provisioned and running, you can connect to the instance using SSH (for Linux instances) or Remote Desktop (for Windows instances).
- You can attach a volume to the instance, provided the volume is in the same availability domain. For background information about volumes, see Overview of Block Volume.
- For steps to let additional users connect to the instance, see Adding Users to an Instance.
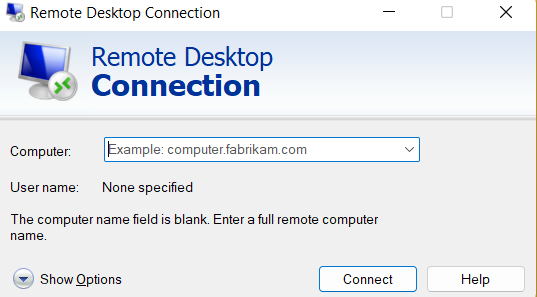
There are multiple ways to connect to the machine such as using client software. You can also connect to the machine running windows operating system using the Windows Remote Desktop Connection.
Enter the public IP address of the virtual machine in the computer field and click connect.