back to main page
In this section we will enable versioning on an S3 bucket from AWS S3 console.
Step 1: Login to AWS Management Console and open S3
Login to AWS Management Console and open S3 service.
You can either go to Services -> Storage -> S3
or
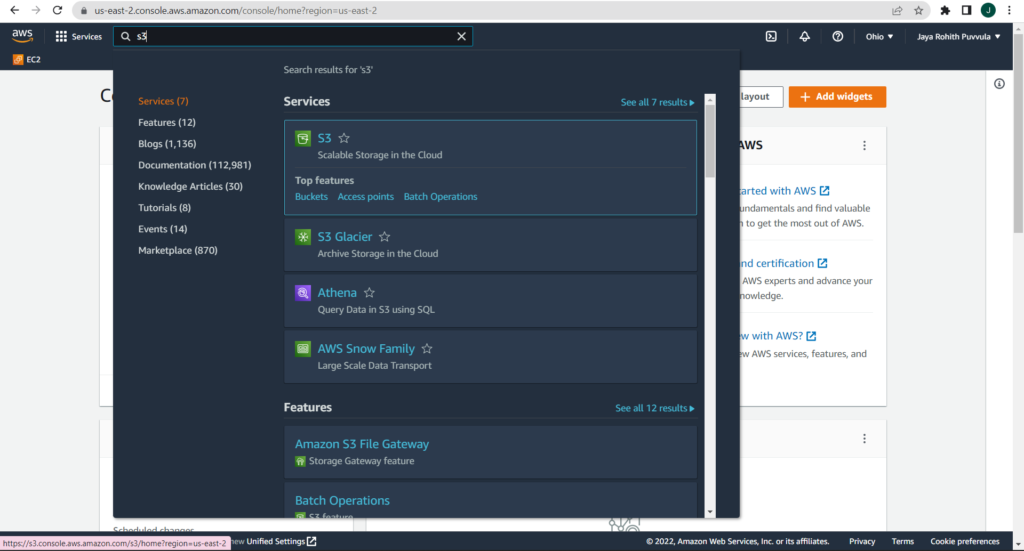
Type s3 in the search bar and hit enter. Once you see S3 option click on that.
Step 2: Choose the bucket on which you want to enable versioning
The list of your buckets will appear once you click on S3, as seen below.
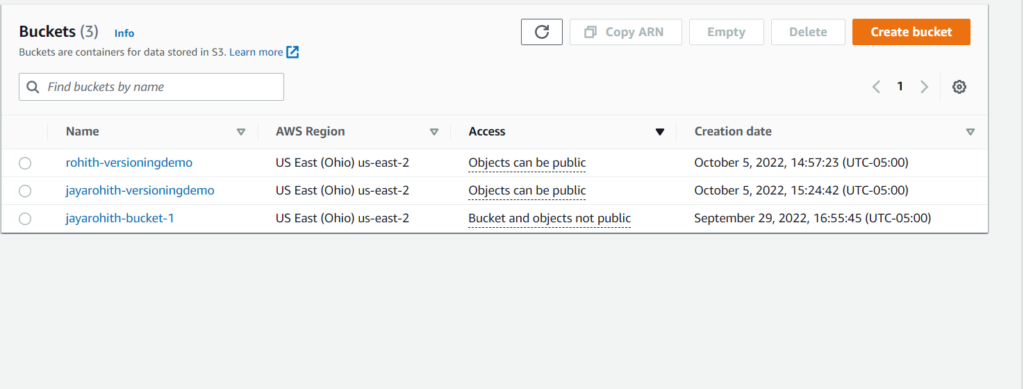
Click on your bucket name on which you want to enable versioning and for this tutorial I am enabling versioning on jayarohith-versioningdemo bucket using console.
Step 3: Select the Properties tab and change the Bucket’s versioning status.
When you click on the name of your bucket, information like the one below will appear. On the Properties tab, click. Once there, you’ll find Bucket Versioning and an option to Edit the bucket’s versioning status.
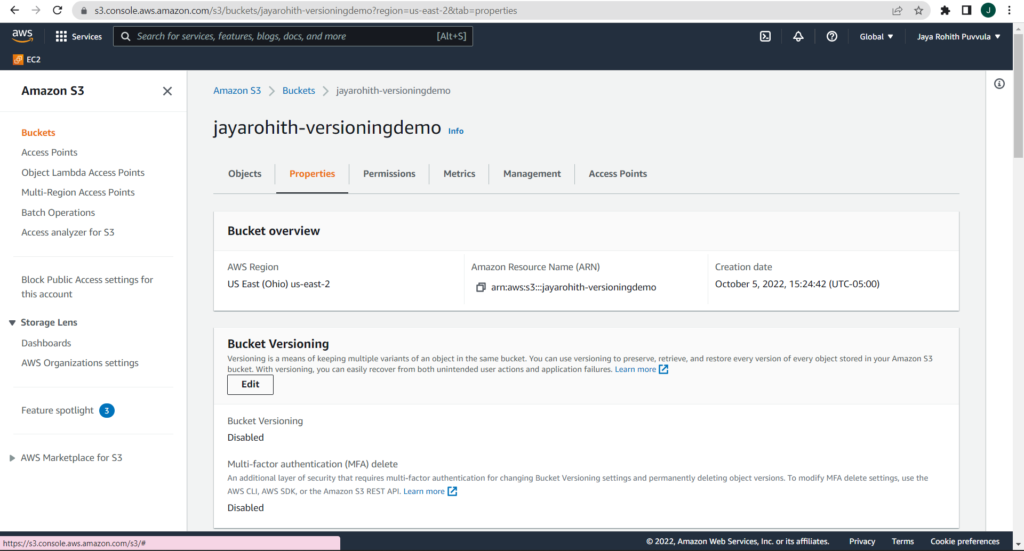
As you can see, the status is currently disabled. Let’s modify it to make this bucket versionable.
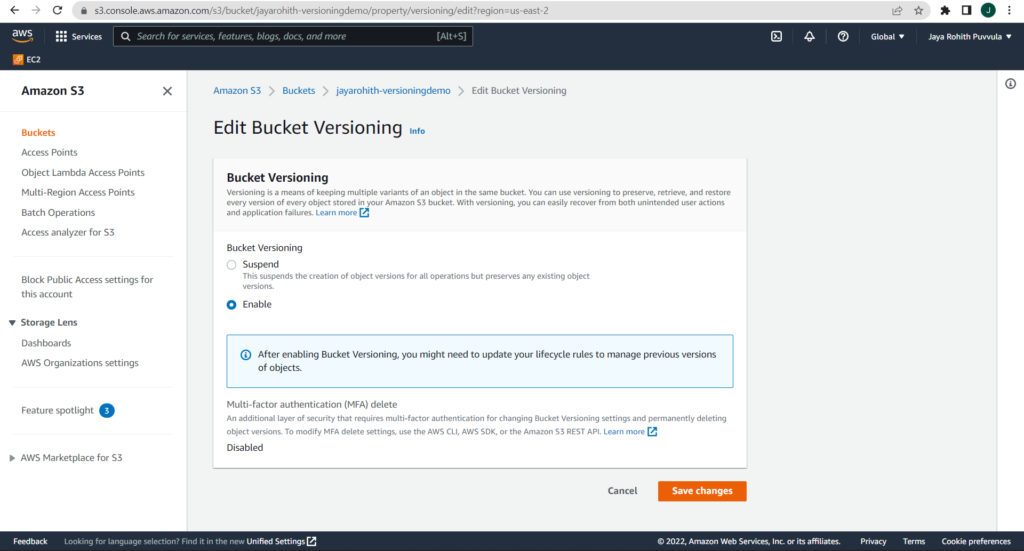
Select Enable in bucket versioing and click on Save changes
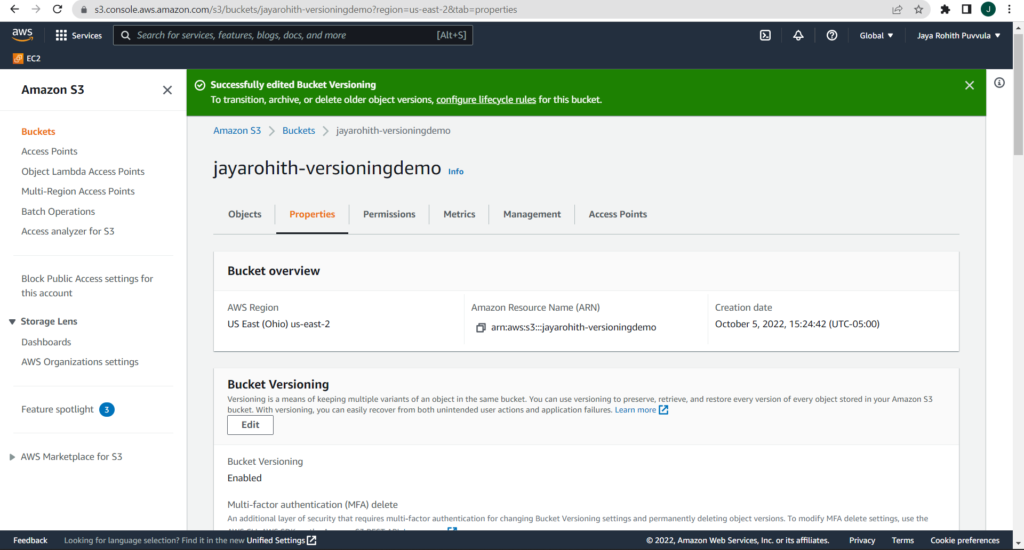
One you click Save changes, versioning is enabled as you can see in below screenshot and is it effect.
Step 4: Verify If Versioning is working fine
You can verify versioning by uploading two objects with same name. With versioning enabled, S3 will not override the object rather it will create a new version each time.
Create a text file with name demo.txt with below content
- Hello, here is a version 1 demo file.
Save the file and upload into jayarohith-versioningdemo bucket. Later,Now update the same text file with below content and upload it again to the same bucket.
- Hello, here is a version 2 demo file.
Let’s observe what happened in console.
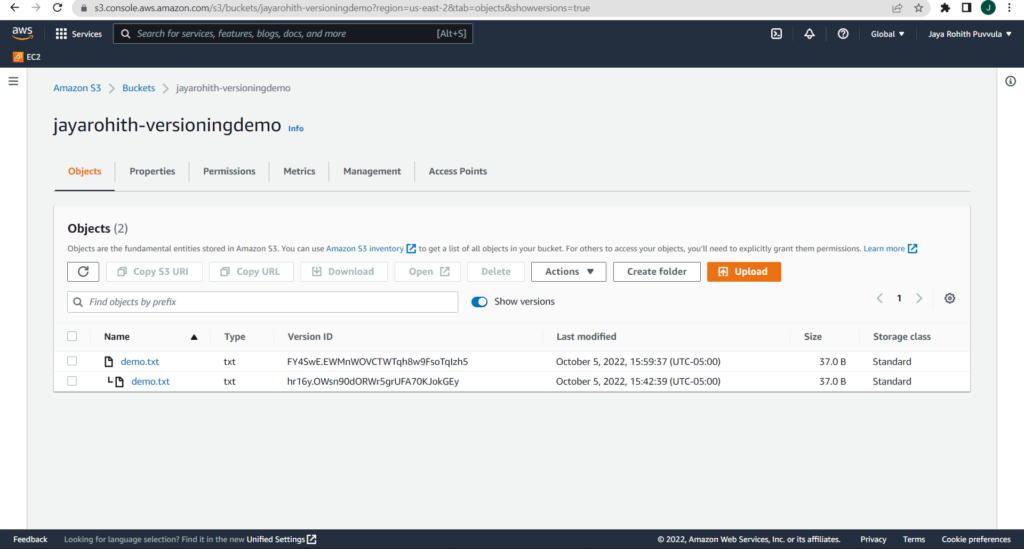
If you toggle Show versions button as highlighted below, you can see both the versions of file present in s3. So, object was not overwritten instead both the versions were saved, which verifies that versioning is working fine.
