In this article we will take a look at AWS FSx, a feature that has been a huge hit since its launch in reInvent 2018. FSx stands for File System server and enables us to set up our windows compatible file system with just few mouse clicks. File systems are used to store the files that are used by multiple users across the network. To set up a normal file system we need to set up the hardware, which is limited to a certain storage limit and install the required software into it manually and then we need to lay down the maintenance plans along with the backup plans. Not only this process takes time and effort it comes with a major disadvantage of limited memory. Initially we might procure the hardware for some xGB and sometime down the lane
we might need to expand the storage capacity as the data keeps coming into the file system. In this scenario we are forced to expand the storage capacity by adding new software and setting it up manually, but we are now paying an extra amount for the memory that is not being used yet. All these disadvantages can be overcome if we switched to FSx that offers file system storage for windows-based applications in the cloud. Some of the major advantages of FSx are as follows:
Speed: FSx is build using SSD technology which makes not only the operations fast but there is a guaranteed performance throughout its lifetime.
Backup: The backup services are integrated into FSx by default, which means that we no longer have to write scripts for backing up our files manually and keep them UpToDate.
Cost cutting: We pay only for what we use. We often buy hardware by considering the amount of data that will flow into the system in the future and end up paying a lot of money on the
memory that is not used currently. This can be overcome by using FSx as we pay for only what is used. This cuts the costs for the company hugely.
Secure: Data in the file system is an encrypted form so we don’t have take extra care for the security of our data stored in the server.
Integration with AWS services: The main advantage of FSx is that it is very easy to integrate Fs with our other AWS services such as S3, CloudTail, CloudWatch.
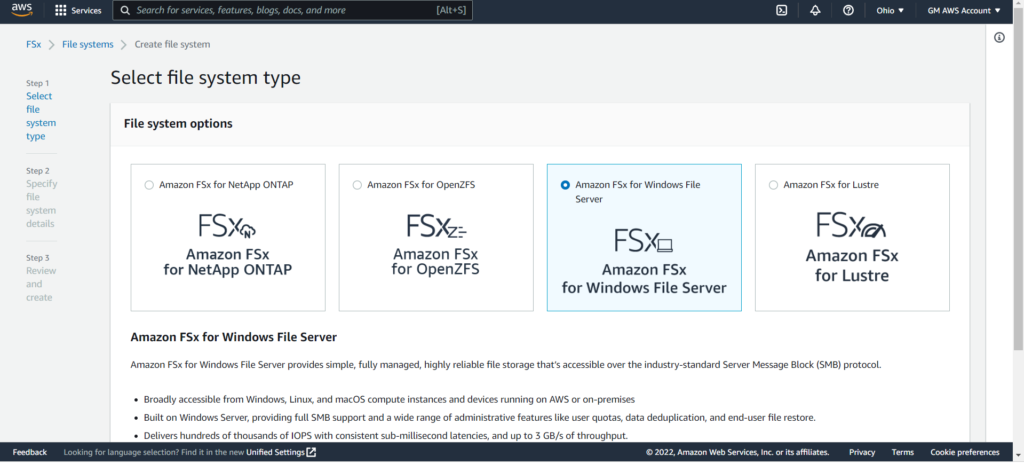
FSx provides us with 4 widely used file systems and we can pick one based on our familiarity with a particular file system or based on the workload of our application.
- NetApp ONTAP – Built on NetApp’s popular ONTAP file system.
- OpenZFS -Built on the popular OpenZFS file system.
- Windows File Server – built on Windows Server.
- Lustre – Built on the world’s most popular high-performance file system.
In this article we will see how a Windows file server can be created from the AWS console.
Prerequisites
1- Create an EC2 Instance and start it. You can find the steps to create an EC2 instance using the following link.
2- Create Windows Active Directory (AD) – Create a windows directory using this link .
Once you are done creating an instance and active directory follow the steps below to create a Amazon Fsx for windows file server.
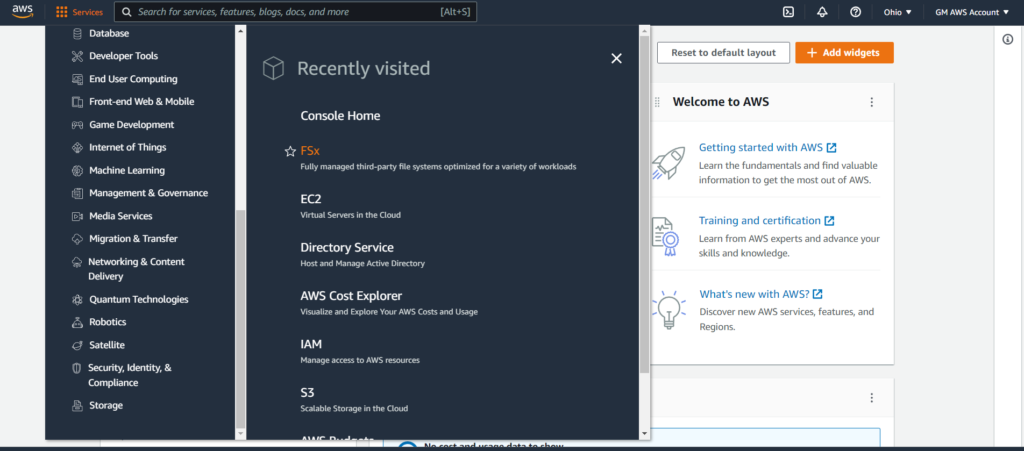
1.In the AWS management console select Services and select Storage> FSx
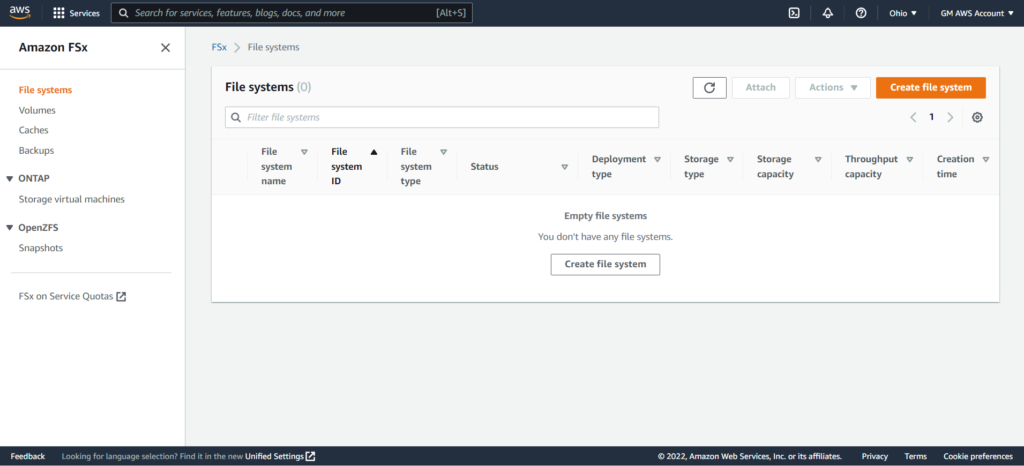
2.This will take you to the file systems page. Click on Create File System button.
3.Select Amazon FSx for windows file server.
4.Give the name of the file system that you want to create and select Multi AZ as they have 2 file servers in separate availability zones.
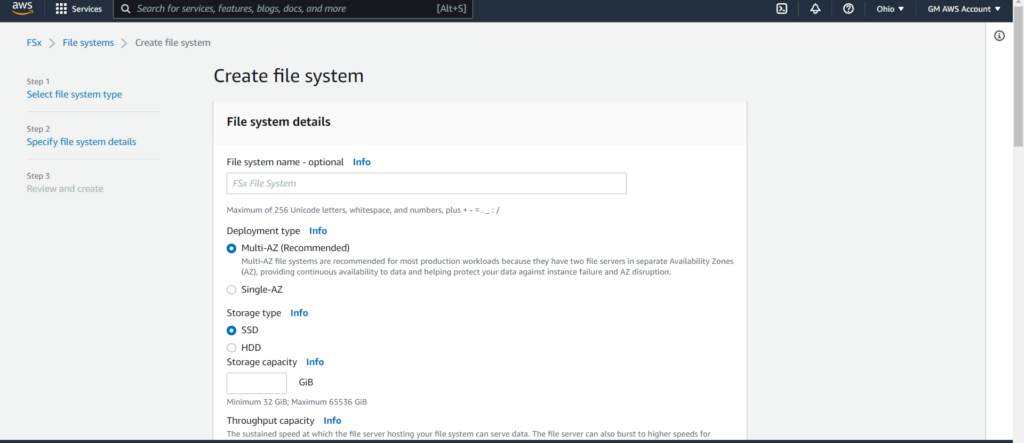
5 select storage types as SSD and min storage as 300 GiB
6.In the network and security select the default VPC and select the security group you have created previously and leave the other settings to its default values.
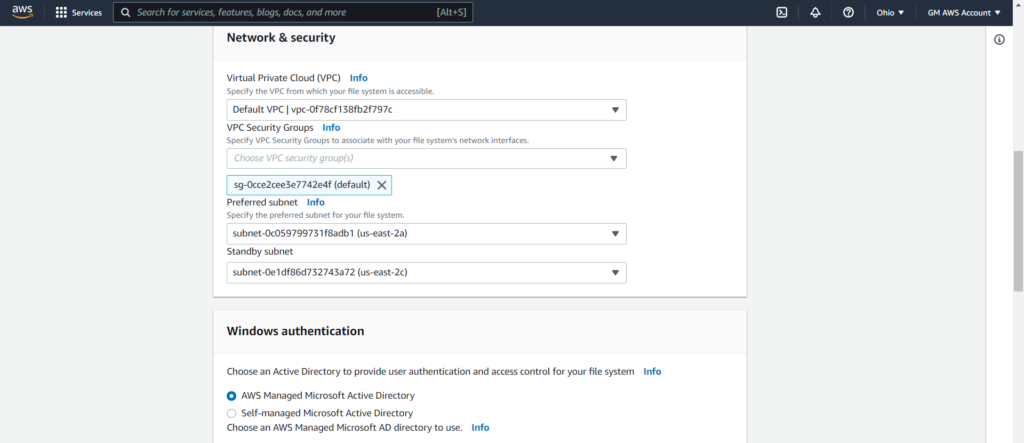
7.In the windows authentication select the AWS managed Microsoft active directory and set the default value for encryption.
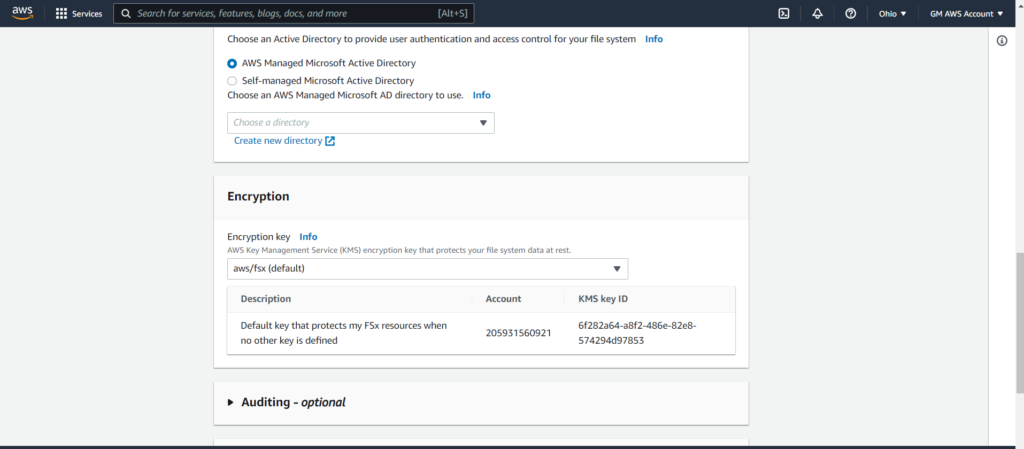
8.Click on next to create the file system. You can view the newly created file system in the File System dashboard.
We will see how to upload files to the file system and how to access them across multiple EC2 instances in our next blog article.