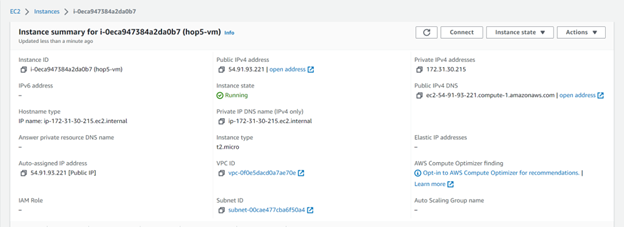
In this blog we are going to allocate an elastic IP and associate and disassociate it with an EC2 Instance by using AWS management console and boto3 python SDK.
What are EC2 Instances:
Amazon Elastic Compute Cloud – EC2 – a service offered by AWS allows users to rent virtual computers on which to run their own computer applications. EC2 encourages scalable deployment of applications by providing a web service through which a user can boot an Amazon Machine Image (AMI) to configure a virtual machine, which is called an “instance”, containing any software desired. A user can create, launch, and terminate server-instances as needed, paying by the second for active servers, hence the term “elastic”.
What is an Elastic IP:
An Elastic IP address is a reserved public IP address that you can assign to any EC2 instance in a particular region, until you choose to release it. Whenever an EC2 instance is stopped and restarted a new public IP address is assigned to it from a pool of free IP address. This rapid remapping of the address could be problematic as we might end up mapping with a different instance in our account. To avoid this situation, we use AWS Elastic IP address service that associates an IP to your account and cannot be used by any other users until you choose to release it. Another important advantage of this service is that we can map our Elastic IP with a DNS record for our domain which results in the domain pointing to an instance in our AWS account.
Boto3
Boto3 is a AWS Software Development Kit for python that allows the developers to design software that utilizes services such as Amazon EC2, Amazon S3, Amazon DynamoDB and more than 50 other AWS services. Boto3 also helps us to write scripts that would manage complex setups in the AWS.
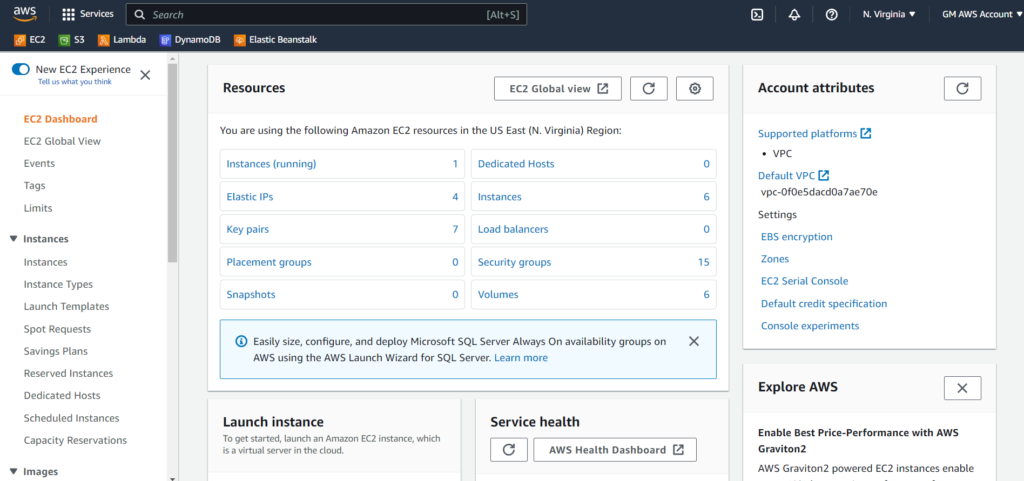
Step 1: Log in to AWS management console and navigate to the EC2 service. You will be redirected to the EC2 dashboard like below. Select Elastic IPs option.
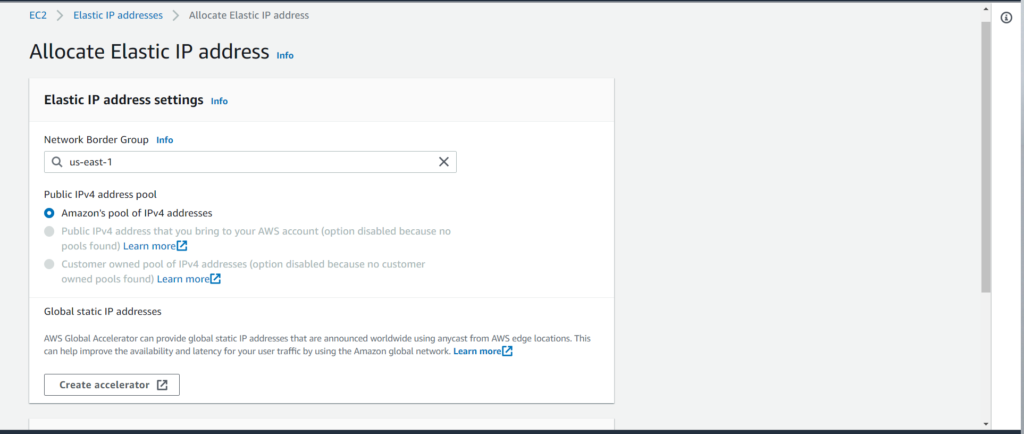
Step 2: Select Allocate Elastic IP address option and select a Network border group. Network border groups are zones from where public Ipv4 addresses are advertised. Selecting the address pool as Amazon’s address pool will give us a free address that is available in the Amazon’s pool of Ipv4 addresses and click on Allocate
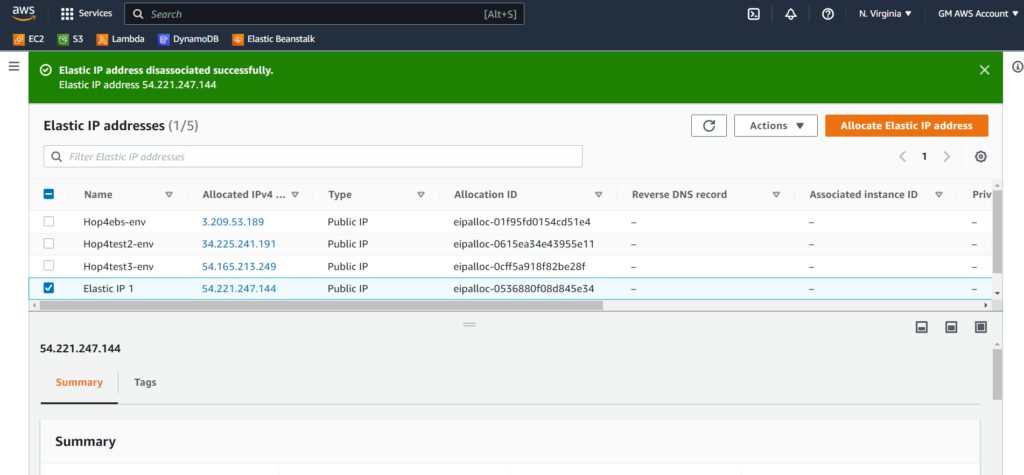
Step 3: The allocated IP information is shown in table. This IP is now allocated to your account and will not be available to others until you release it. You can now map this IP to any of the EC2 instances and it remains the same even after restarting the server. Note that the Associated Instance ID in the table is null at this moment. The next step is to associate this IP to our Instance.
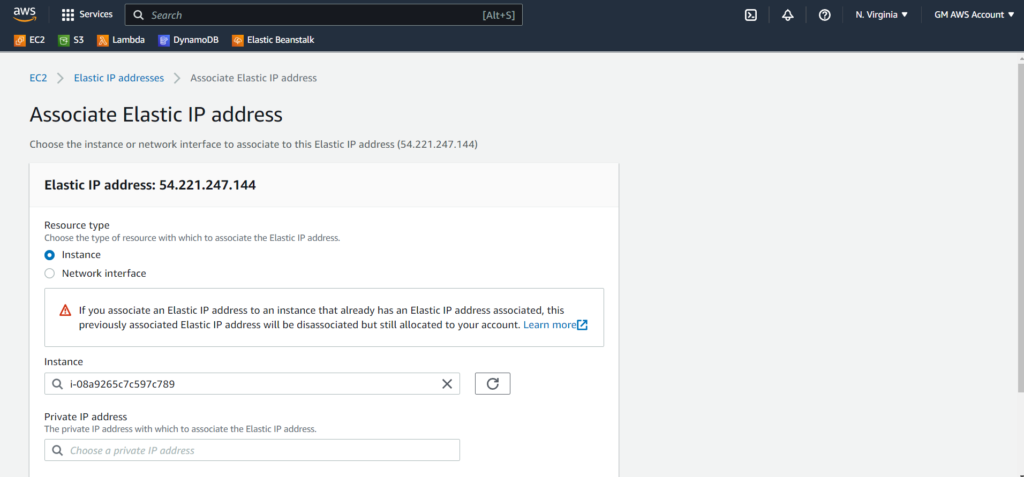
Step 4: Under the actions for any Elastic IP, select Associate Elastic IP address option and select the instance that you would want to map the IP with. In case the select instance is already associated with a different Elastic IP then it will be disassociated, and the new IP will be mapped to the instance.
We can also mention if we want this current Elastic IP to be mapped to a different resource if it is already mapped to a resource by clicking the Reassociation check box.
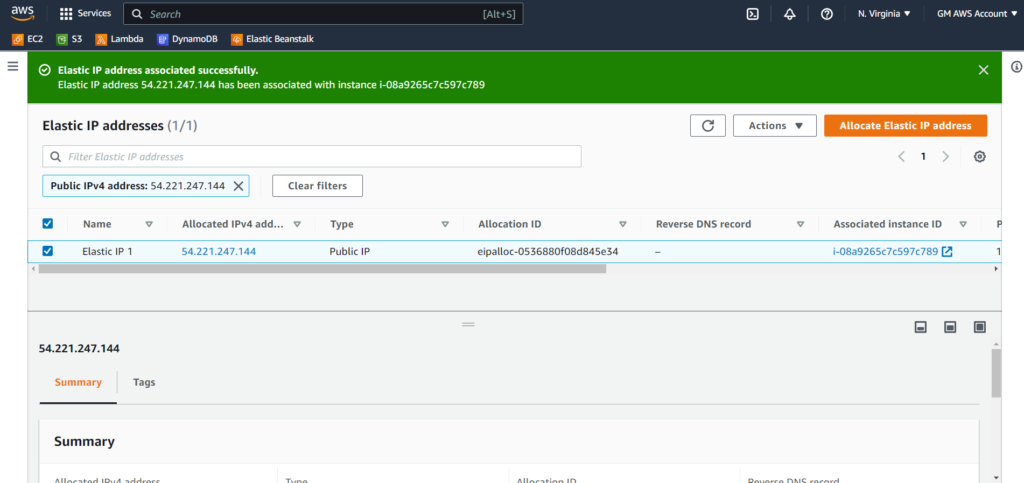
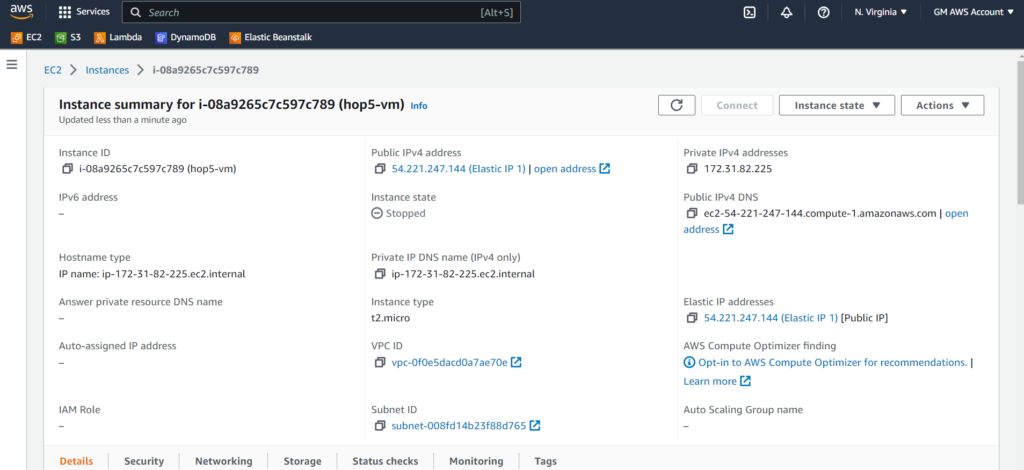
Click on Associate. The associated instance id can be viewed in the table, and we can also go to the Instance details to check the Public Ipv4.Even though the server is in stopped state we can see an IP attached to it.
Disassociating an Elastic IP with an EC2 Instance:
Step 1: Go to the Elastic IP addresses from EC2 dashboard and select the IP that you want to disassociate with the EC2 instance and select Disassociate Elastic IP address from the actions option and select disassociate.
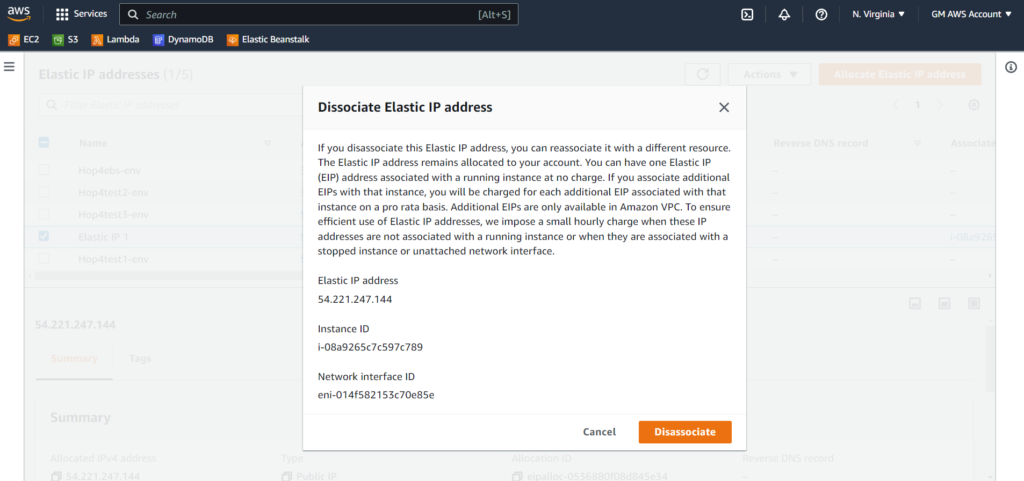
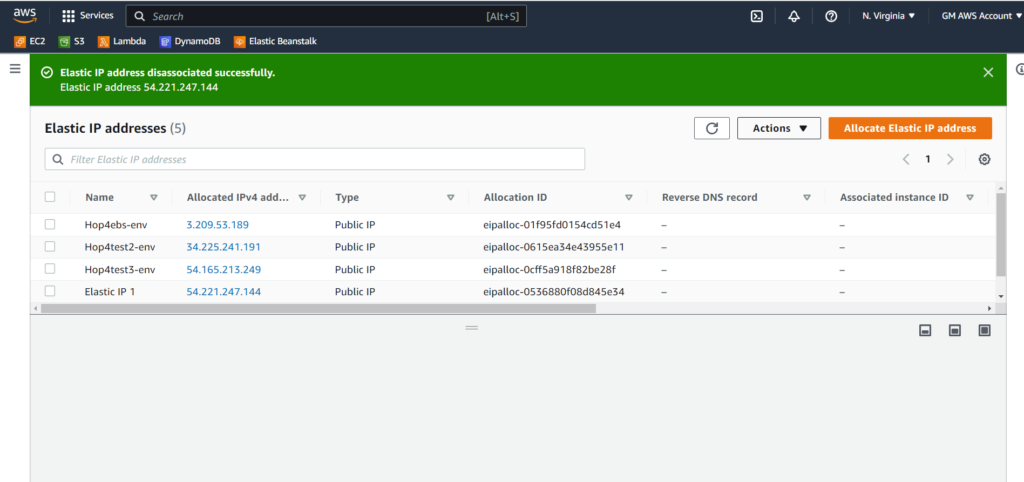
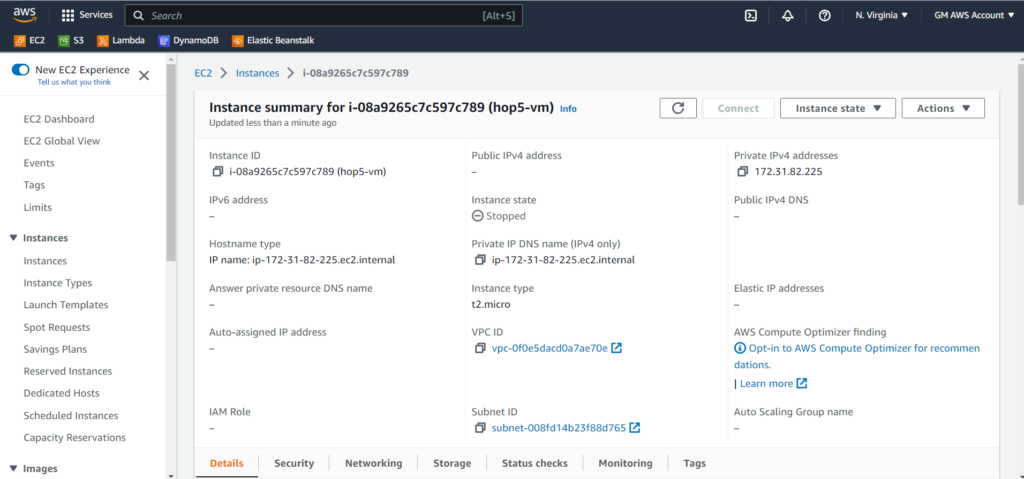
You can still view the IP in the table as this is still allocated to your account, but the instance id would be null. You can check the details of the EC2 instance that it was previously associated with and find the public Ipv4 address as null as the server is currently not running.
Release the Elastic IP address:
To ensure that efficient use of Elastic IP’s AWS imposes a small hourly charge when these IP addresses are not associated with a running instance or when they are associated with a stopped instance or unattached network interface.
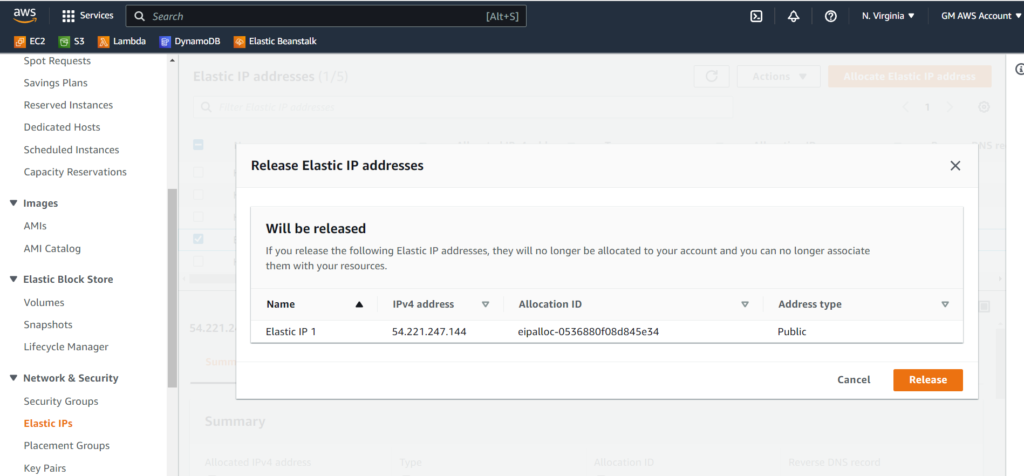
If you want to minimize you costs you can release the IP’s back into the AWS pool by simply selecting the Elastic IP and click on Release Elastic IP addresses in the actions. Before releasing the Elastic IP make sure there are no Instances associated with it. This IP is back into AWS pool of public IP’s and can be used by other users.
Associate and disassociate Elastic IP using Boto3 SDK:
Step 1:Make sure that you have an EC2 instance up and running by creating it from AWS Management console

Step 2: Make sure that you have all the requirements needed to run the boto3 SDK on your local work machine. This usually involves configuring the AWS credentials and installing the boto3.
You can find the detailed instructions for installing and configuring Boto3 SDK here

Step 3: As you see in the code above, we are first creating an elastic IP using `allocate_address` method.
Step 4: We are also associating the newly created Elastic IP with EC2 instance we created earlier. For the association we use `associate_address` method to which we pass InstanceId and allocationId.

Step 5: The above image shows that we have associated the Elastic IP with the EC2 instance

Step 6: Now we will disassociate the Elastic IP using the `release_address` method by passing the allocationId parameter that we can find from the AWS Management Console in Elastic IP section of the left pane of EC2 service. Once we run the program if there is no error the address will be released, and the log will be printed in the console.
