Azure DDoS (Distributed Denial of Service) protection is a security feature offered by Microsoft Azure to protect websites and applications hosted on the Azure platform from DDoS attacks. DDoS attacks are a type of cyber attack in which the attacker attempts to overwhelm a website or application with traffic from multiple sources, rendering it unavailable to legitimate users. This can cause significant disruption and damage to the affected website or application.
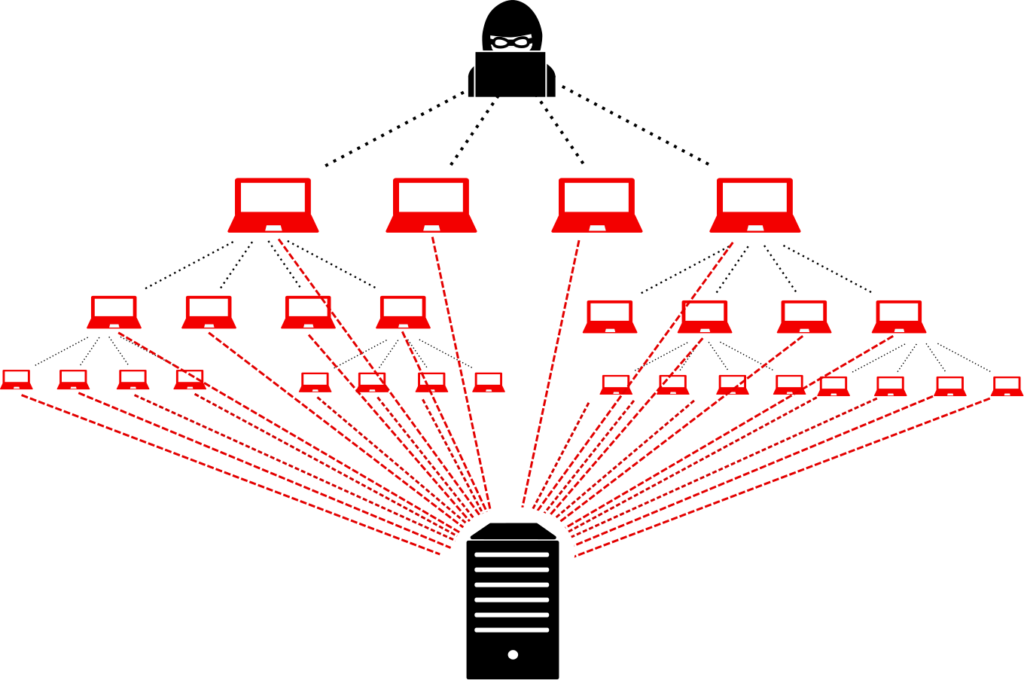
Azure DDoS protection uses a combination of technologies to identify and mitigate DDoS attacks in real time. The first line of defense is Azure’s network infrastructure, which is designed to absorb large amounts of traffic without impacting the performance of the protected website or application. In the event of a DDoS attack, Azure’s network infrastructure automatically redirects the malicious traffic to Azure’s DDoS protection system for further analysis.
Once the traffic has been diverted to the DDoS protection system, Azure uses a combination of machine learning and custom rules to identify malicious traffic and filter it out. This allows legitimate traffic to continue to reach the protected website or application while the malicious traffic is discarded.
Here’s a 3-minute video by Kaspersky discussing DDoS.
Let us also take a moment to listen to what the developers have to say about it.
Let us begin by creating a DDoS protection plan.
Creating a DDoS protection plan:
- Navigate to the home page in your azure portal.
- Click on ‘create a resource’. This will direct you to the marketplace.
- Search for ‘DDoS’ in the search bar and select the DDoS protection plan.
- Here is what our protection plan looks like.
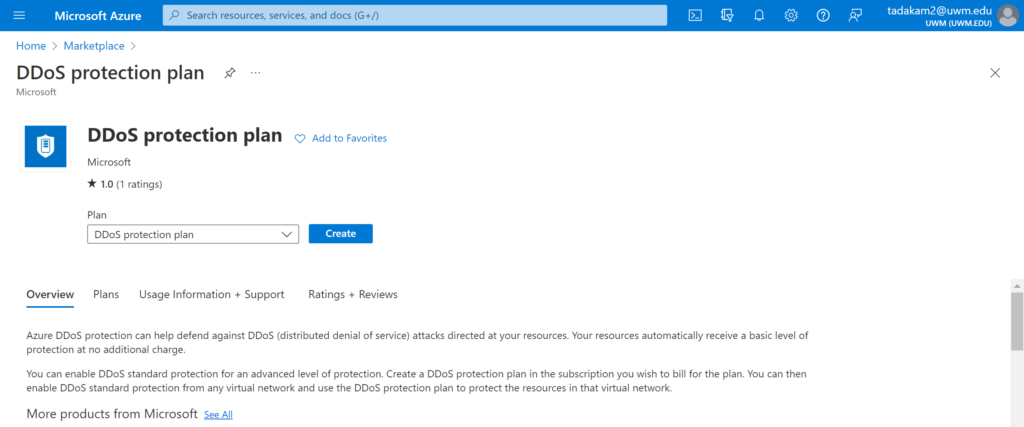
Proceed to click on ‘Create’ and follow the steps below:
- Select the target resource group that consists of the resources you want to protect.
- Give your plan a name.
- One suggestion is to name your plan after the resource group you are protecting. This practice helps in distinguishing between plans if you have different plans for different resource groups.
- It is advisable to select the same region of your resources for the plan.
- If your resource group has resources across multiple geographical locations, select a region for your device where most of the resources in your resource group are present.
- Skip the ‘tags’ section and proceed to the ‘review+create’ section.
- Click on create and wait until the deployment is completed.
- If you navigate to the resource, your screen looks similar to this.
Protect your Virtual Network using the DDoS Protection Plan:
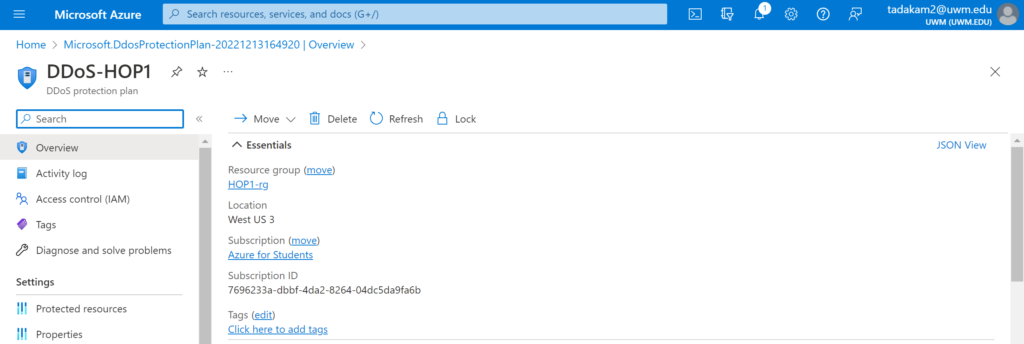
- Once the deployment is successful, navigate to the ‘protected resources’ on the left side of your screen under the ‘settings’ section.
- This section allows you to protect multiple resources with your DDoS protection plan.
- Stay in the VNET section and click on ‘add’, which will open another window on the right.
- Select your resource group and the Virtual Network belonging to the resource group.
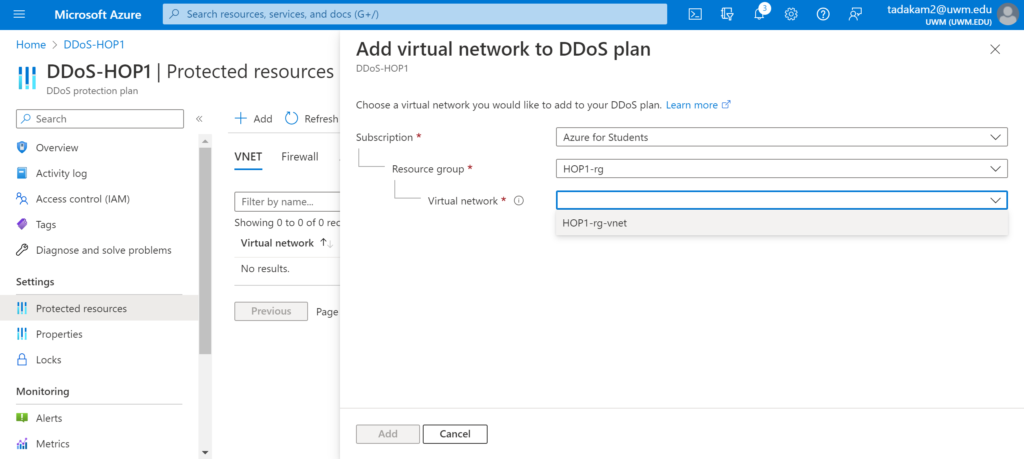
- In my case, I have selected a resource group named ‘HOP1-rg’, and the default Virtual Network of that resource group named ‘HOP1-rg-vnet’.
- Proceed to click on ‘Add’ and wait until the Virtual Network is updated.
If you have followed every step until now, you have successfully created a DDoS protection plan for your resource group and have protected all the resources that are using the selected Virtual Network.
Testing the DDoS Protection Plan:
There are several ways available to test our plan’ss stability against malicious attacks. One of the ways I have found to do this is through BreakingPoint Cloud. This software is defined as a self-service traffic generator where your customers can generate traffic against DDoS Protection-enabled public endpoints for simulations.
To run this test you will first have to sign up for a BreakingPoint Cloud account. Here are the resources if you want to run tests against your DDoS plan:
How can I monitor and validate when my resource is under attack?
Here are the steps to monitor and validate your resource during an attack:
- Navigate to your azure portal and go to your subscription.
- Choose the resource that is under attack.
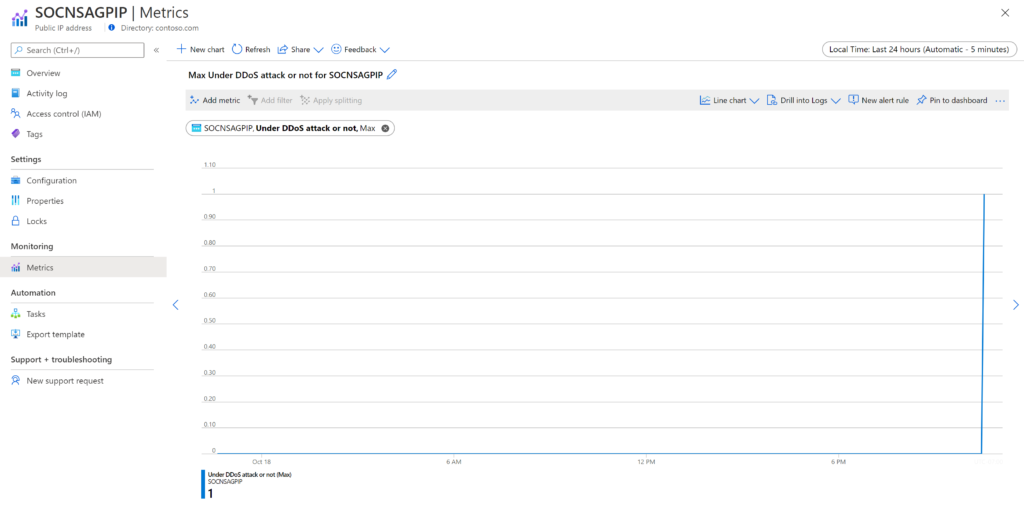
- On the left side of the screen, under the ‘Monitoring’ section, select ‘Metrics’.
- If your network is under DDoS attack, you can see the values change from 0 to 1.
Regardless of having a variety of next-gen security software in the market, the best way for cloud providers to stay away from DDoS attacks is to implement a combination of prevention measures. This can include using firewalls to block suspicious traffic, monitoring network activity to detect potential attacks, and implementing rate-limiting to prevent overwhelming amounts of traffic from reaching the network. It is also important to have a plan in place to quickly respond to any attacks that do occur, and to regularly test and update the network’s security measures to ensure that they are effective against the latest threats.