In this blog we will learn how to Create the Http Trigger Azure Function in Azure Portal.
What is an Azure Function?
Azure Functions is a serverless computing service, hosted in the Microsoft Azure public cloud. It was designed to speed up and simplify application development. The cloud provider handles all issues related to server operations, dynamic management of machine resources, etc. It also provides automatic scalability.
They enable you to run small pieces of code, or “functions,” in response to events. HTTP triggers are a type of Azure Function that can be executed when an HTTP request is received. This means that you can use HTTP triggers to build HTTP-based APIs that can be called from any client that can make HTTP requests, such as a web browser or a mobile app.
Serverless applications, also known as Function-as-a-Service or FaaS, are services offered by most enterprise cloud providers that only allow users to write code and the infrastructure behind the scenes is managed by the provider.
The serverless application framework called Azure Functions is event-based and scales up and down automatically depending on the executions that are being triggered. Small amounts of Node.js, C#, Python, PHP, and Java code can be run using this Microsoft Azure service without the need to modify your infrastructure.
Purpose:
You can use Azure Functions to run your code in a serverless environment without first creating a virtual machine or publishing a web application.
Key Characteristics:
- The user interface is simple and based on a browser, and it allows you to write code.
- use a variety of programming languages to create code.
- When numerous triggers are triggered, pay per function execution is paralleled.
- Supports Integrate and deploy continuously.
Prerequisites:
- An Microsoft Azure account with an active subscription.
Create the Http Trigger Azure Function in Azure Portal:
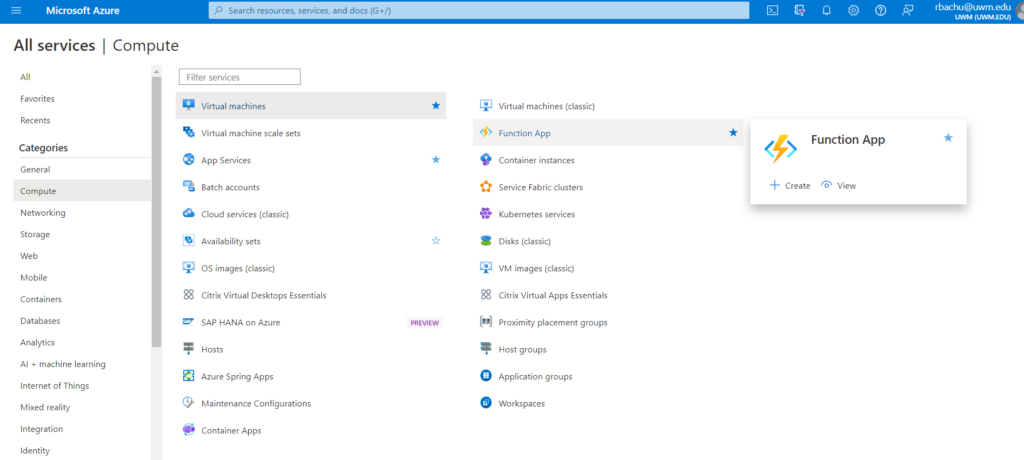
Step 1: Login here https://portal.azure.com/#home Select Create resource from the dashboard and click Compute. Then select “Function App”.
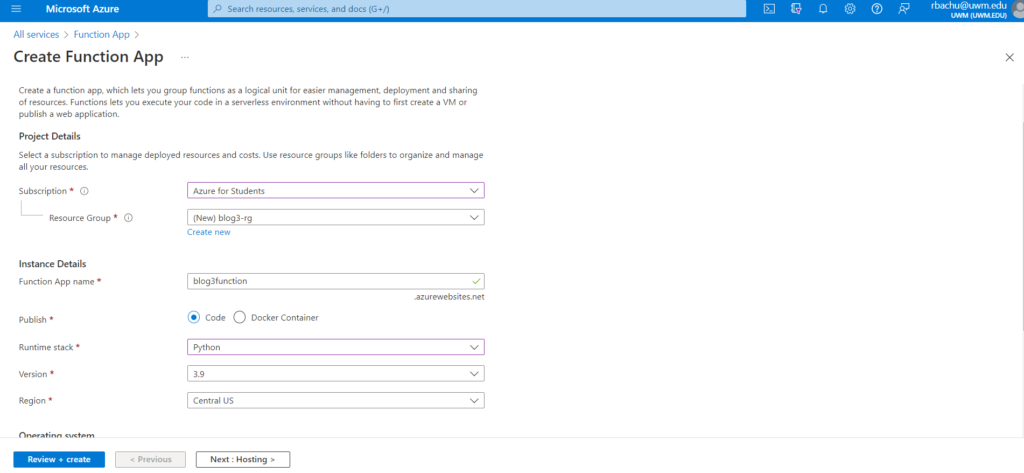
Step 2: In the Function app, create a new function and select the subscription, resource group, function app name, runtime stack, version. click on the “Review+Create” button.
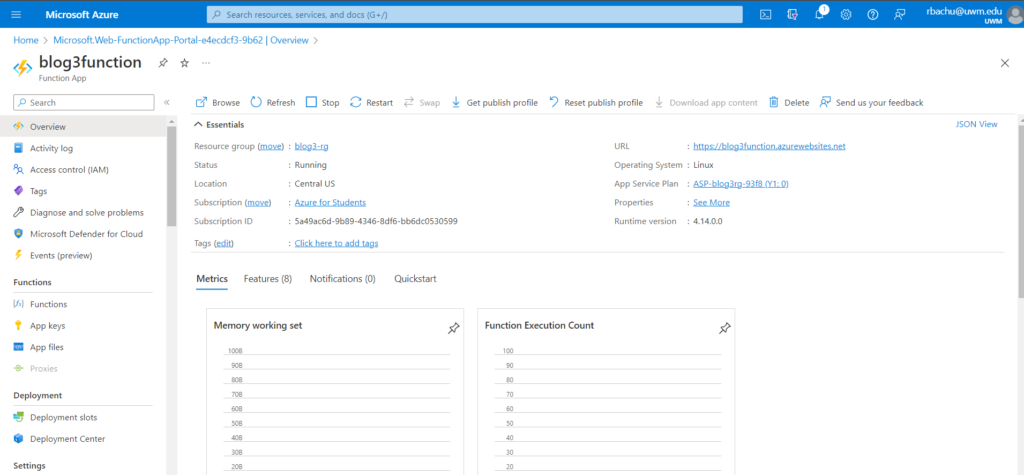
Step 3: Once the function app has been created, click on the “Function App” in the resource group to open it.
Step 4: Click on the “+” button to create a new function, and select the “HTTP trigger” option.
Function: The default authorization type available is function. This is the type of authorization that uses keys. This authorization type necessitates the use of a function-specific API key.
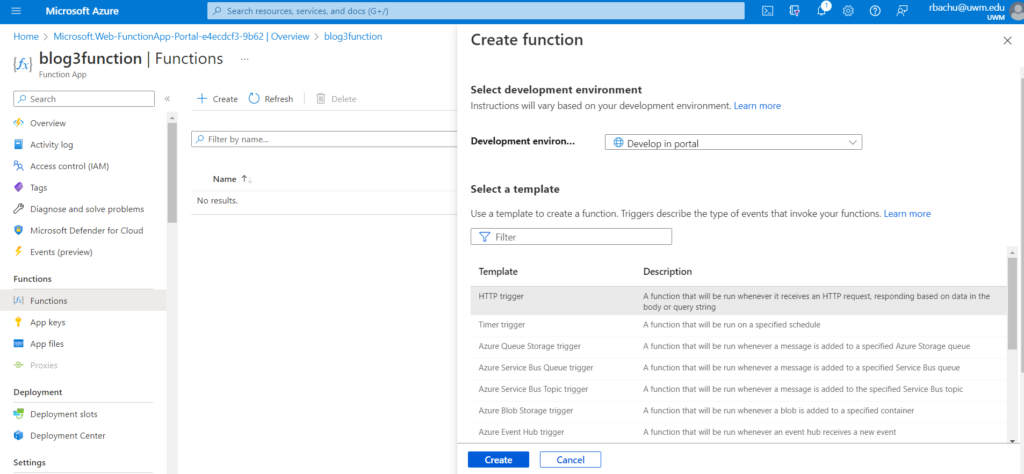
Step 5: Enter a name for your function, select the “Anonymous” authorization level, and click on the “Create” button.
Anonymous: There are no restrictions; anyone can access and use it. In the case of Anonymous Authorization, no API key is required.
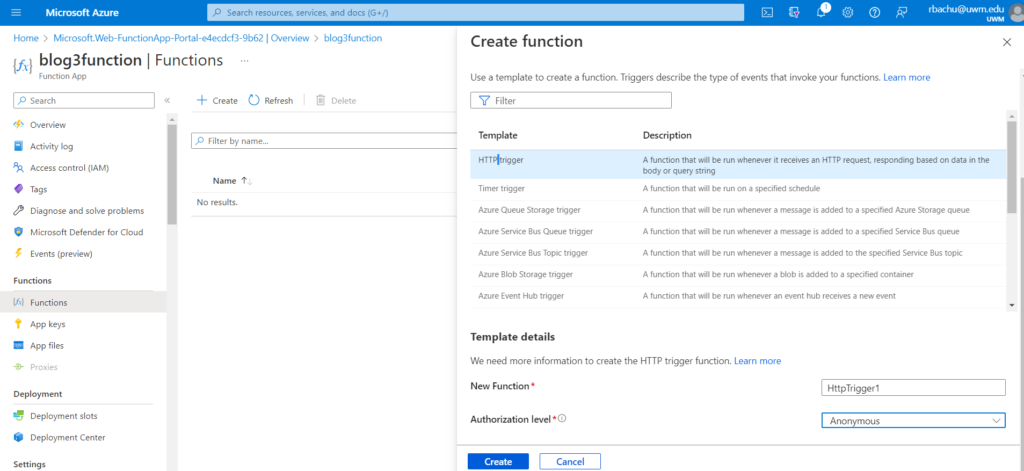
Step 6: This will create a new function with an HTTP trigger.
Here are some options:
- Code + Test – To add your personalized code.
- Integration – To add your input and output bindings.
- Monitor – To track your function insights.
- Function Keys – The keys are available to access your functions.
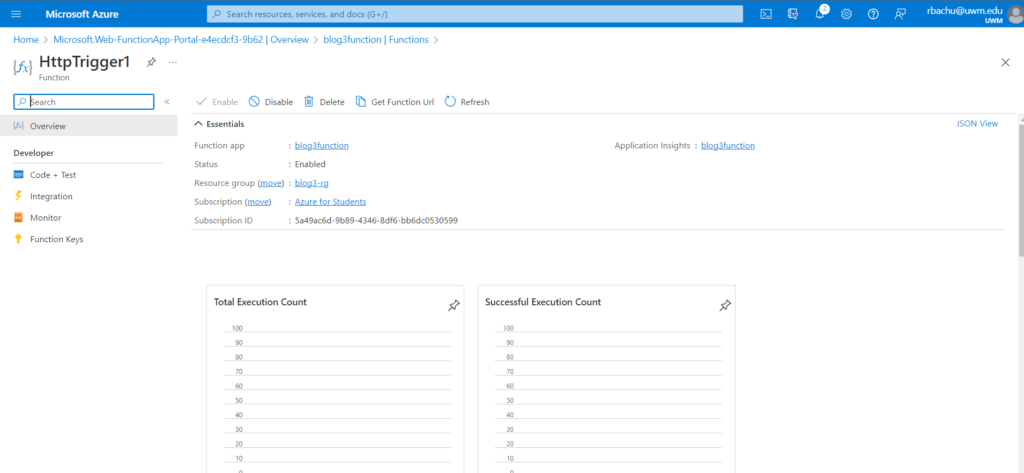
Step 7: Click on code + Test option. Then we can find some default template for Http Trigger
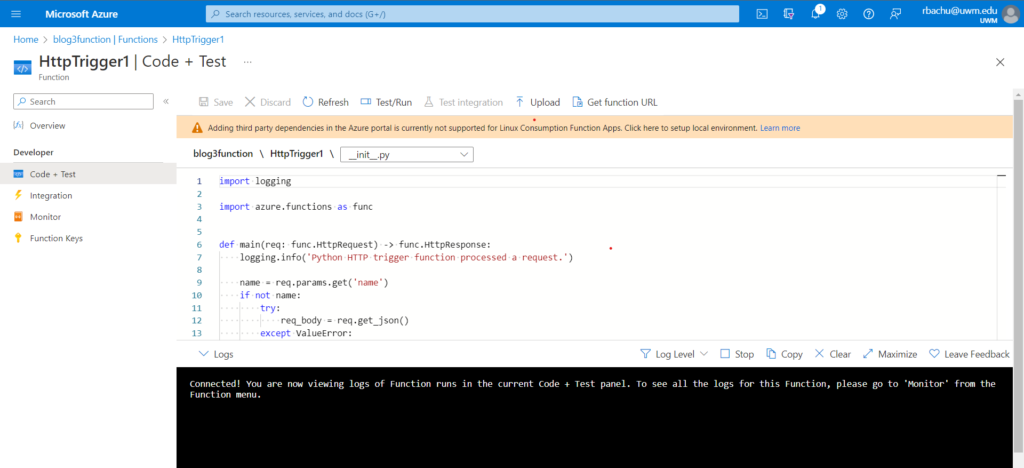
Step 8: Replace the code with the below mentioned code and click on save.
import logging

import azure.functions as func


def main(req: func.HttpRequest) -> func.HttpResponse:
    logging.info('Python HTTP trigger function processed a request.')
name = req.params.get('companyname')
if not name:
    try:
        req_body = req.get_json()
    except ValueError:
        pass
    else:
        name = req_body.get('name')

if name:
    return azure.functions.HttpResponse(f"Congratulations! You have been selected for the job")
else:
    return azure.functions.HttpResponse(
         "This HTTP triggered function executed successfully. Pass a name in the query string or in the request body for a personalized response.",
         status_code=200
    )
Step 9: To open the test window, choose Test/Run. We can see that our function is running within our portal.
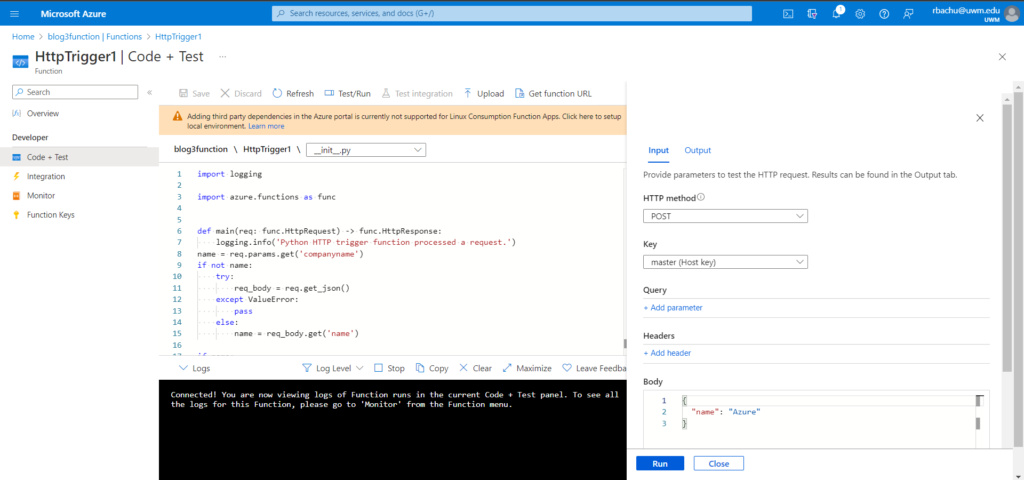
Step 10: Click on Query tab and add parameters and Click on run
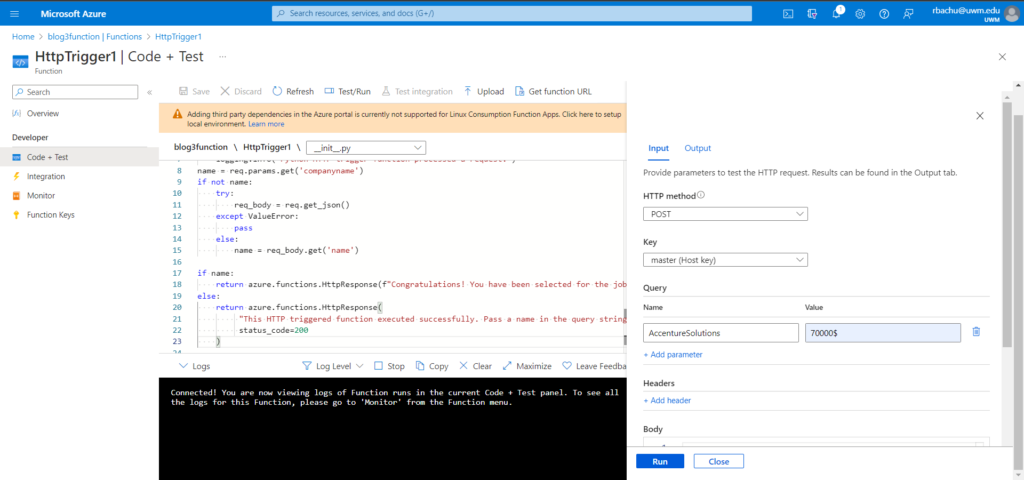
Step 11: After running the code we can see the url we can see the output like this.
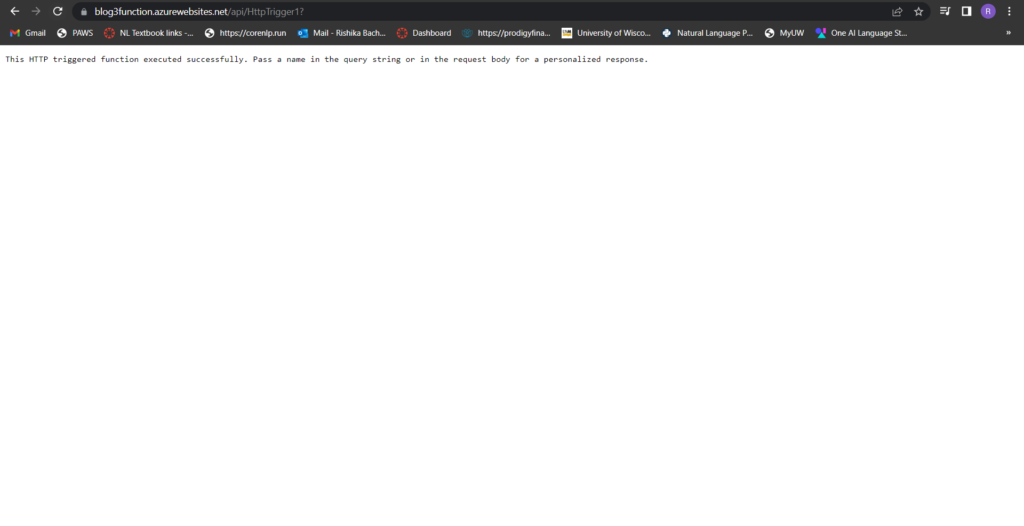
Conclusion: This function is triggered by an HTTP request and takes a ‘'name' parameter from the query string or the request body. If a 'name‘ is provided, the function returns a personalized response, otherwise it returns a default response.