Shared Access Signatures (SAS) are universal resource identifiers that are used to provide restricted storage resource access on your Azure account to clients. By using SAS, your clients can gain access to your resources for a specified amount of time. In general, Shared Access Signatures are provided to clients that are not fully to be trusted but to whom you want to delegate access to some of your resources. In this article, I discuss how to create Shared Access Signatures at different levels and access the storage account resources with them.
Before we begin, consider reading the slides in this six-minute video to have a little more context on Shared Access Signatures:
Before we generate an SAS, we need a storage account. If you do not have one already, follow the instructions in the below link to create one.
Creating Shared Access Signature for a Storage Account: (Storage Level)
Once you have created a storage account,
- Navigate to Home and then your Storage Account.
- Under the Security & Networking section, select Shared Access Signature.
- For allowed services, choose Blob, File, and Queue (Since we have not dealt with tables as of now).
- For the remaining permissions, choose based on the types of resources you want to share.
- Select the time frame in which you want your resources to be shared. For the timezone, go with the default.
- For the ‘Allowed Protocols’ section, selecting ‘HTTPS only’ is considered a good practice.
- Select the default option for the remaining sections and click on ‘Generate SAS and Connection String’.
note: the above customization can be done based on the user’s requirements. Here are the options I have chosen for this example:
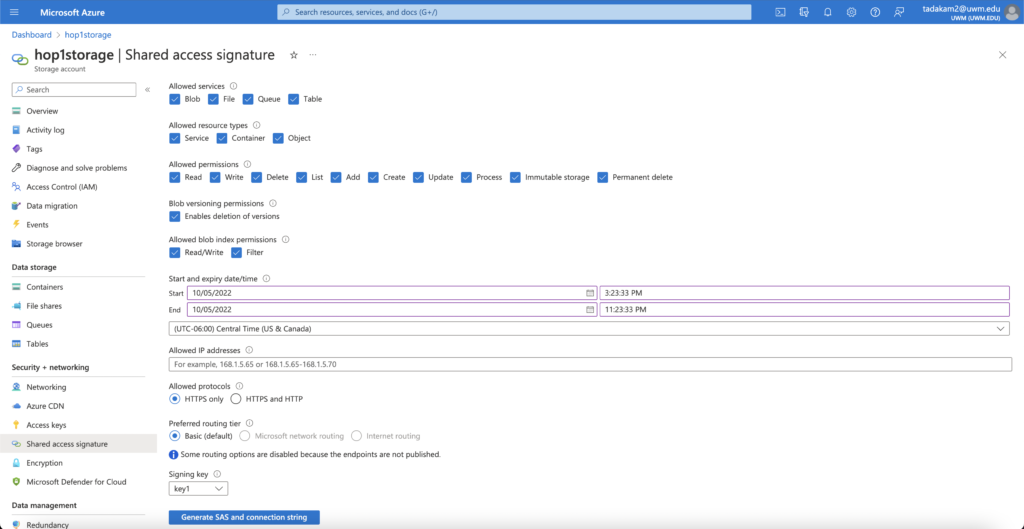
After you click on the ‘Generate SAS and Connection String’ option, you will generate a connection string, an SAS token, and a series of URL’s locating to the resources inside your storage account. Here’s how it looked on my device:
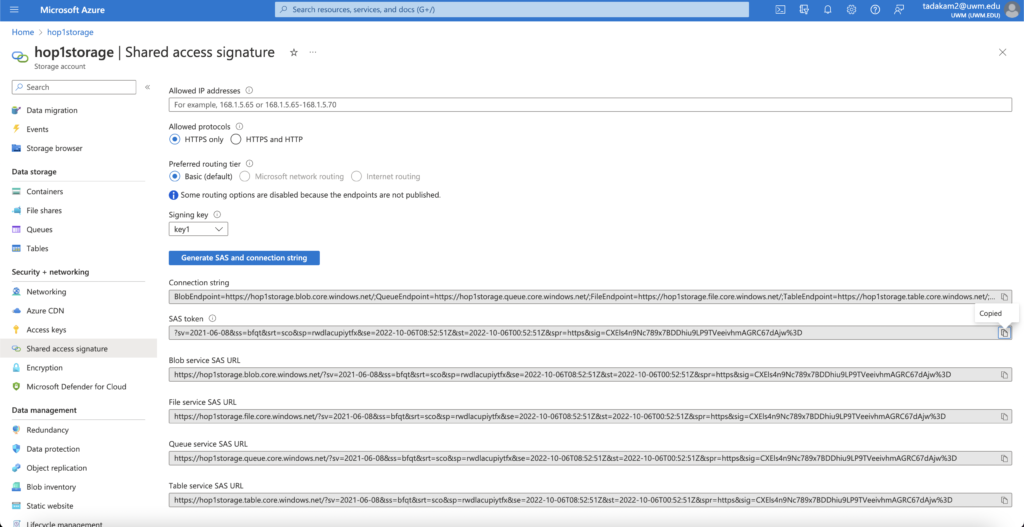
You can now share the SAS token with the people you want to access the resources in your storage account.
Creating Shared Access Signatures at Container Level: (Container Level)
- Navigate to Home and then your Storage Account.
- Select the Blob/File service inside your account for which you want to generate the SAS for (I have used a Blob Service for this example).
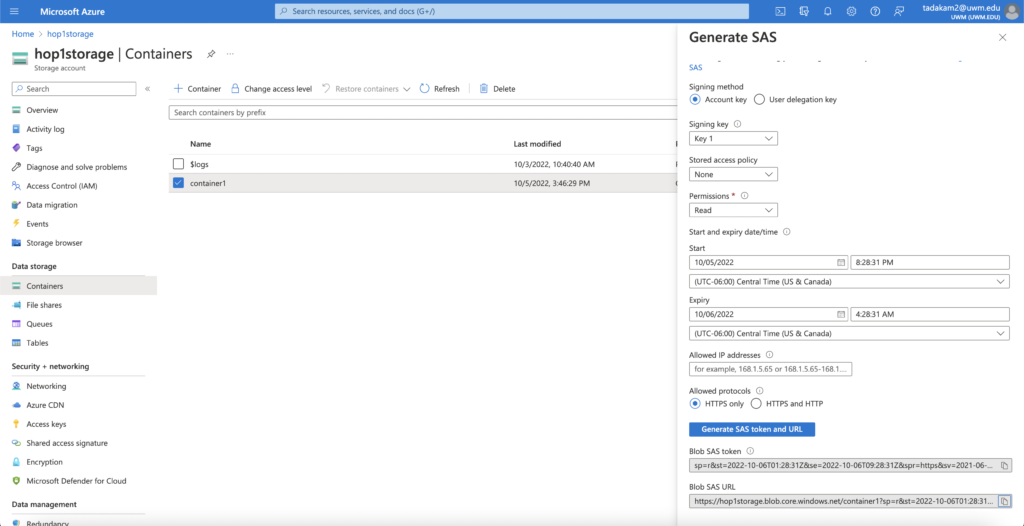
- Right-Click on the container in which the files you want to share exist and select ‘Generate SAS’, you will see a sidebar on the right.
- For the Signing Method, select ‘Account Key’.
- For Signing Key, go with the default option.
- Select ‘none’ for the Stored Access Policy.
- For Permissions, select the options based on what actions you want people to perform with your resources. In this example, I have only given the permission to read my files. Feel free to select different options and play around.
- Next, choose the start and expiry dates between which you want your Shared Access Signatures to be active.
- The ‘IP Addresses’ section provides an extra layer of security to your resources by only allowing specific IP addresses to access them. If you wish to add any IP address, feel free to do it. For this example I have chosen to leave it empty.
- For the ‘Allowed Protocols’ section, select ‘HTTPS only’.
- Now, clicking on the ‘Generate SAS token and URL’ option generates a Blob SAS token and a Blob SAS URL. You can now use these to access your container anonymously.
Here’s my result:
Creating Shared Access Signature for a File: (File Level)
- Navigate to Home and then your Storage Account.
- Select the Blob/File service which has your file container in it.
- Click on the container in which the file exists.
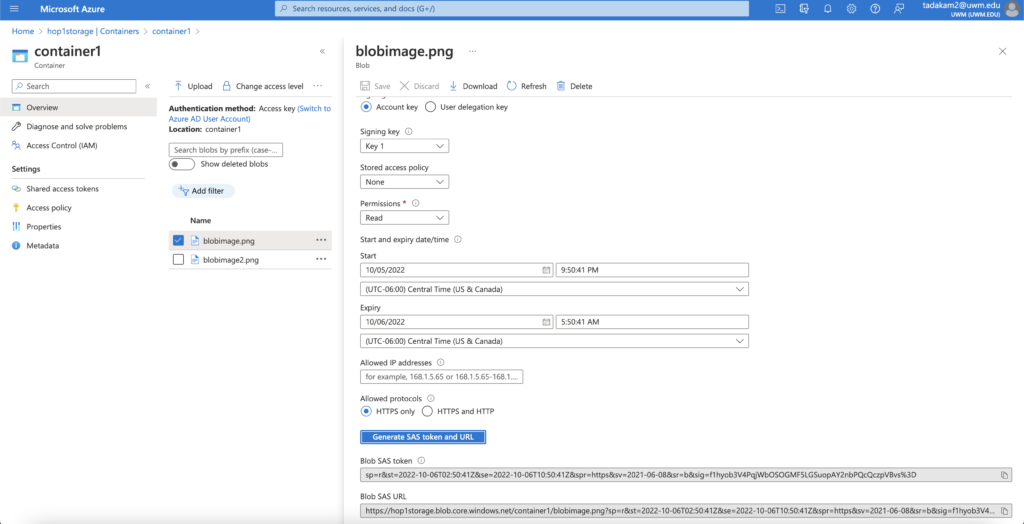
- Right-Click on your file and select ‘Generate SOS’.
- For the Signing Method, select ‘Account Key’.
- For Signing Key, go with the default option.
- Select ‘none’ for the Stored Access Policy.
- For Permissions, select the options based on what actions you want people to perform with your resources. In this example, I have only given the permission to read my files. Feel free to select different options and play around.
- Next, choose the start and expiry dates between which you want your Shared Access Signatures to be active.
- The ‘IP Addresses’ section provides an extra layer of security to your resources by only allowing specific IP addresses to access them. If you wish to add any IP address, feel free to do it. For this example I have chosen to leave it empty.
- For the ‘Allowed Protocols’ section, select ‘HTTPS only’.
- Now, clicking on the ‘Generate SAS token and URL’ option generates a Blob SAS token and a Blob SAS URL. You can now use these to access your file anonymously.
Now that we have created Shared Access Signatures at all three levels, let us access our files in two different ways:
Accessing the Resources using Microsoft Azure Storage Explorer: (Storage Level)
Firstly, let us use a software called Microsoft Azure Storage Explorer to access our Storage Account:
If you do not have the Microsoft Azure Storage Explorer on your device, follow the instructions in the below link to install it:
https://azure.microsoft.com/en-us/products/storage/storage-explorer/
After you finish the installation process, implement the following steps to connect to the storage account:
- Open Microsoft Azure Storage Explorer.
- On the left side, Right-Click on Storage Accounts.
- Select Storage Account or Service.
- Select shared access signature URL (SAS) and click next.
- Enter the service URL and the Display Name autofills.
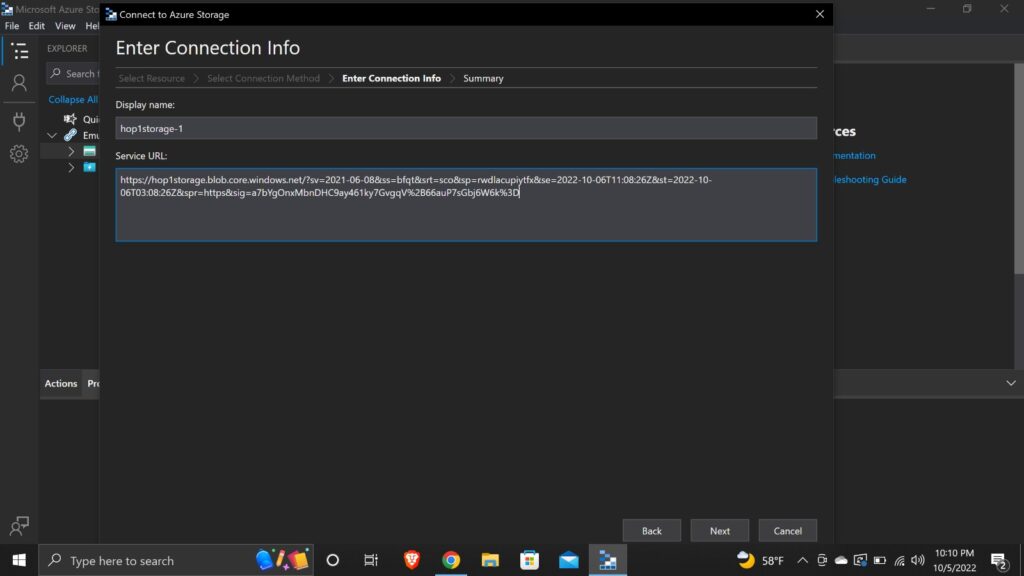
- Click on Next.
- If you have followed everything correctly so far, you will see the name of your Storage Account on the left.
- Now, you can navigate into the account and access your files there.
- Here is my final output after connecting to the Storage Account.
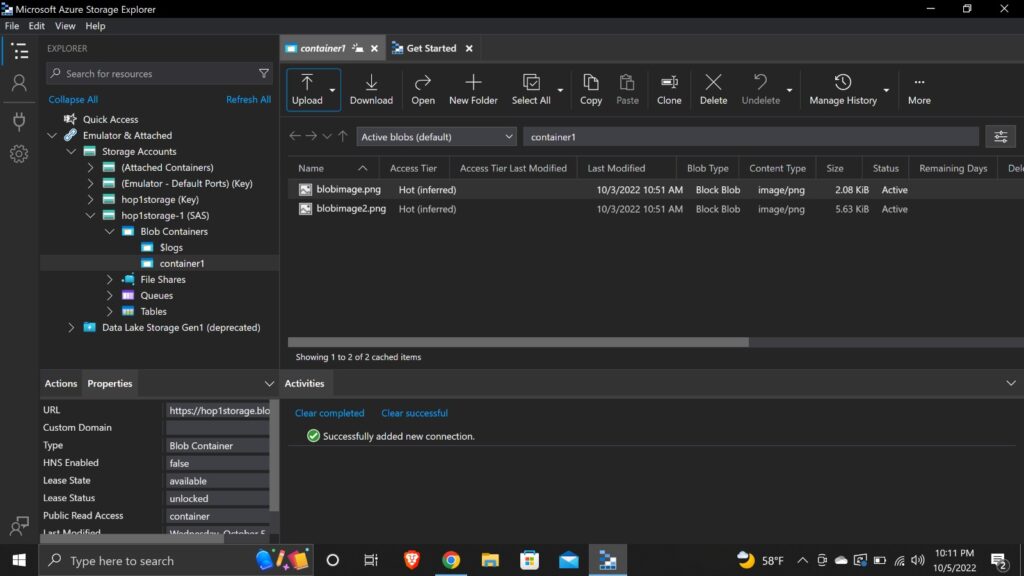
The same process should be followed to access a container level resource as well.
Accessing a Resource using Web Browser: (File Level)
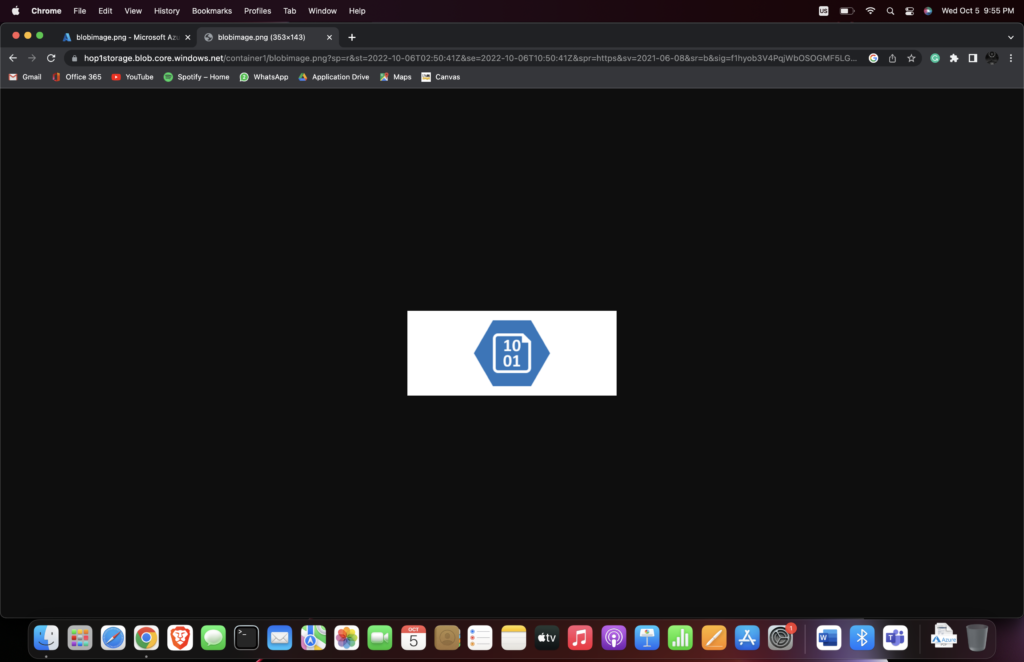
Now that we have accesses to the Storage Account using the Azure Storage Explorer, let us try accessing a different resource in a different way. Here, I have accesses to a ‘.png’ file using a web browser. All you have to do is copy paste the Blob SAS URL of the resource you want to access. Here’s how my output turned out to be:
Though the usage of Shared Access Signatures has its drawbacks, it is the go-to way to provide limited access to your storage account without requiring that people have a user id within your account to access it.
Refer to the link below to read more about Microsoft Azure Shared Access Signatures.
https://learn.microsoft.com/en-us/azure/storage/common/storage-sas-overview