Introduction
Azure table storage service is a sub-service of Azure storage account service, a highly scalable NoSQL data store that offers a key/attribute store with a schema-less design that stores very high volumes of semistructured NoSQL and nonrelational data in the cloud. Table storage service has been the preferred choice in Azure for many years, Delivering features with strong reliability and at an exceptionally low cost. Each table contains a single clustered index that may be used to swiftly query the data.
Working- Azure Table Storage Service
Because table storage service is part of a storage account, it takes all the best features of a storage account such as high scalability, low price, and so on. You can process up to 20,000 rows per second by assuming one-kilobyte row size, so the limit is much smaller, but this is a global limit across all tables. A table is made of records called as entities, that can store up to 500 terabytes of data in a single table and process up to 2000 rows per second by assuming the same thing as before, An entity has several properties. Properties can be thought of as columns and values, and a single entity can have up to one megabyte of data and a maximum of 255 columns. The property is a straightforward name-value pair that represents a cell in your table, and table storage includes free system properties. partition key, row key, and timestamp. This also is deducted from those 255 properties therefore an effective is 252.
The row key and partition key combination must be distinct, Combinedly they form the table’s primary key. The PartitionKey feature is used to split the rows among storage nodes, providing load balancing across storage nodes. The same storage node holds all entities with the same PartitionKey. RowKey is needed to ensure that each partition is unique. To achieve the optimum performance, you should carefully consider the PrimaryKey and RowKey, as well as how you will retrieve the data. Azure manages the Timestamp attribute, which represents the date and time the entity was last changed.

Using of Table Storage Service
Here are a few scenarios when you would use table storage service in azure.
- Table storage is used for storing terabytes of structured data because while this is schema-less it still contains structure because you can define columns and types.
- Data can be denormalized.
- No need for complex joins, or schema.
- With a clustered index, we can have quick queries.
- Support for OData queries.
- JSON serializable data.
- Serverless, Web applications, Simple logging, Metadata and configuration store are some of the few common scenarios where table storage is used. Because they are cheap, highly extensive, and very flexible these what makes them perfect.
Table storage SDKs and APIs
Table storage services can be integrated with
- .NET
- Java
- F#
- Node.js
- C++
- Python
- PowerShell
- Ruby
- PHP
Creating Table storage in Azure
Follows these instructions in order to create a table in azure. Below is one of the way to create a table and it the simplest way other
- Let’s get started with the creation of the table, by first creating a resource group.
- Under the created resource group, create a storage account. In order to create a storage account follows these: Go to portal Home-> search for the storage account service in the search bar at the top of web page-> look for create button at the top of the storage account page -> select the resource group that we create and put the remaining setting as required by you. For detailed information on how to create a storage account. click this link https://uwm-cloudblog.net/projects-all/project-1-cloud-computing-warmup/get-some-personal-storage-azure/
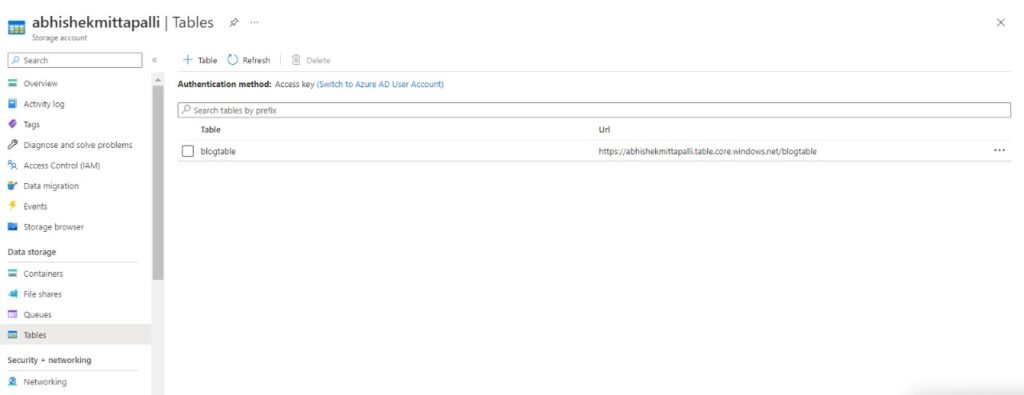
- Now Go to storage account page-> Click on the storage account we have created in the previous step -> On that page you can look for table which is located under the Data storage in the menu bar or you can search for it in the search bar which is located at top-left.
- After that, you will enter into the table storage service webpage, where there would be a +table button at the top click that ->put your desired table name (keep in mind that table naming has few restrictions). You have successfully created a table.

Managing the Tables Storage
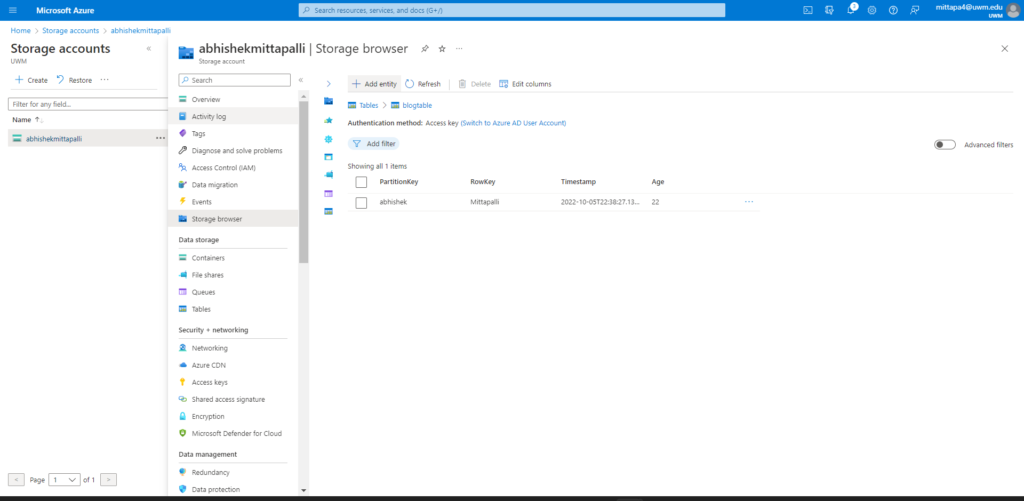
In order to open and manage tables in azure portal, we need to use storage exploer panel which can be accessed by selecting the storage account that we created in the storage account service web page, after clicking on it you will be directed to another webpage where you can search for storage browser (Previously it was called as storage explore), after selection of storage browser there will be tables options that will show you all the tables that you have created previously. Select anyone of the tables then it will open up a menu where you will be able to add entities and edit columns and many more things can be done to table.

Why Azure Table Storage Serivce
More than $ 1billion is being invested annually on cybersecurity research and development by microsoft, they have many employees who are specalist in maintaining the data security and privacy. Plus Azure has has certificates from
1) ISO/IEC
2) CSA/CCM
3) ITAR
4) CJIS and many more.
Table storage service has been and still being used by bigname like
- XBOX,
- Green Button,
- Carnegie Mellon University,
- Orange tribes.
Understanding the Costing of Table Storage Serivce in Azure
Microsoft allows us to find out, how much is it going to cost us for using any of their service. It could have a accurate estimate on how much will it cost the user and plus helps the user to have a better understanding on pricing. By clicking this link you will be directed to price calculator of azure.
https://azure.microsoft.com/en-us/pricing/calculator/
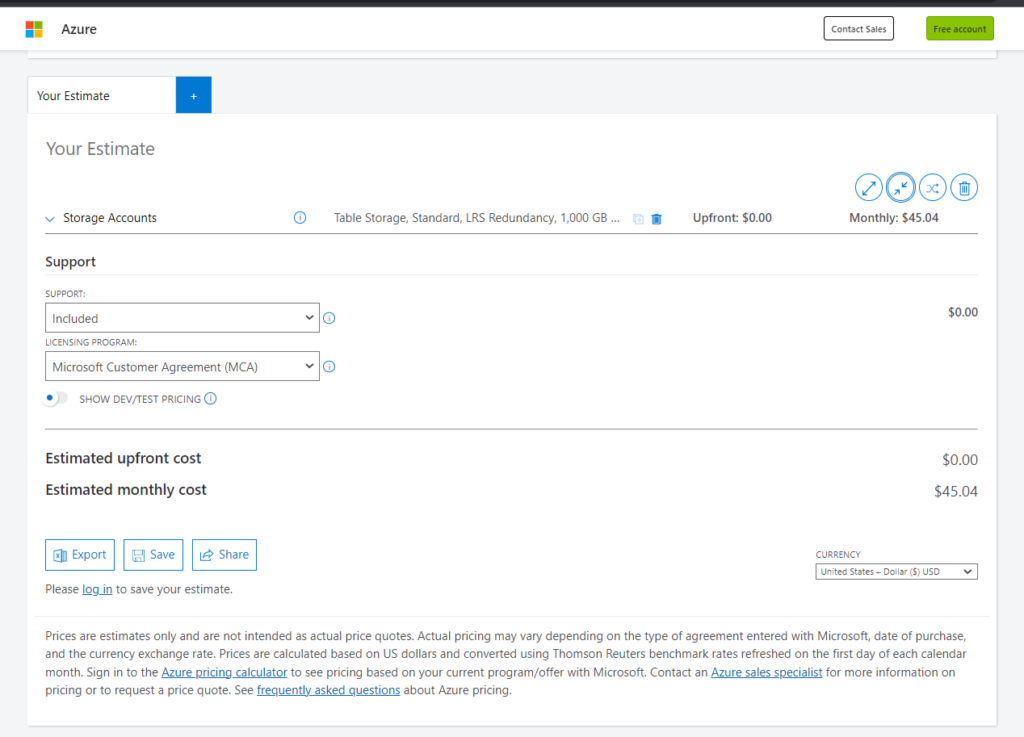
To findout the cost for azure table storage service. Go to the link above -> select storage account option -> a small window will pop-up click on view -> you are given with a bunch of options -> for region select the region on which you are working-> for type select table storage->keep the tier as default-> Redundancy keep LRS(Locally redundant storage means it will replicate your data three times in the data center) or you can choose your desired option-> for now I’m keeping all the other setting default. You will be able to see the exact cost for owning that service, we can save it, share or export a excel.
The below Screenshots show my Estimate if I want to use Table storage.


—All the Best—–