VULTR Virtual Server Review
VULTR offers global cloud hosting with brilliantly fast SSD VPS cloud storage. And they are 100% Kernel-based Virtual Machine.
The VULTR homepage is clear and easy to understand. The one thing I see in common with all the VPS providers is they all Boast about Fast SSD Performance and quick deployments.
Creating a VPS is really straightforward. I have chosen Vultr as my VPS provider, because they offer great performance backed by benchmarks and have great support.
Create your vultr Account
As I mentioned above vultr homepage is very clear and understandable.
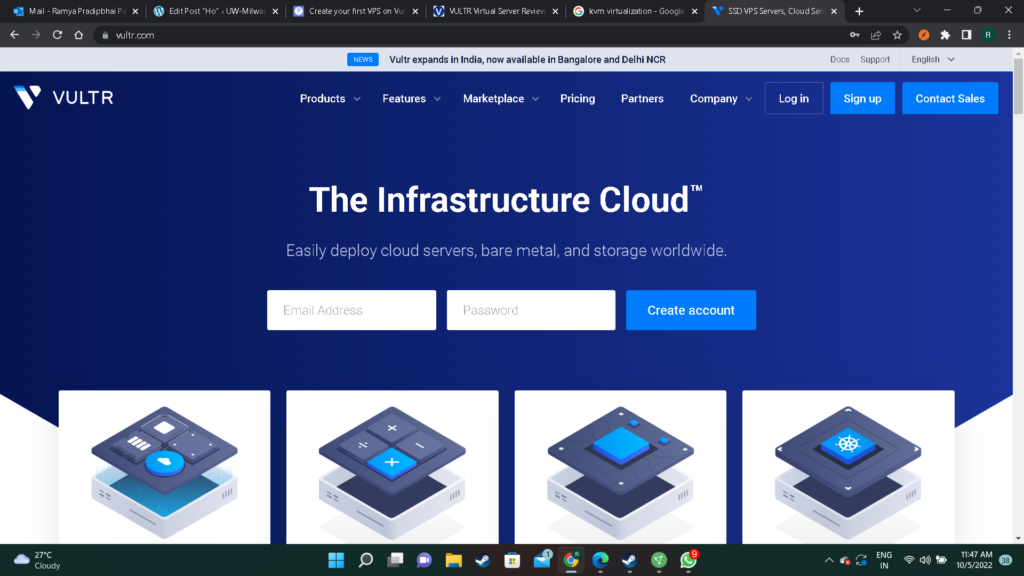
If you have vultr account Enter email address and password to get started or you have to sing up for new vultr account.
If you are sign up for new account you will get 100$ coupon for Vultr.
Once signed up, then they collected the rest of account information such as full name, billing address, the method of payment, etc.
Vultr has several payment options like:
- Credit Card
- PayPal
- Bitcoin
- Alipay
- Gift Code
you can choose any of them as payment option.
Deploying A New VULTR Virtual Server Instance
After you are logged in, you will see the following Dashboard.
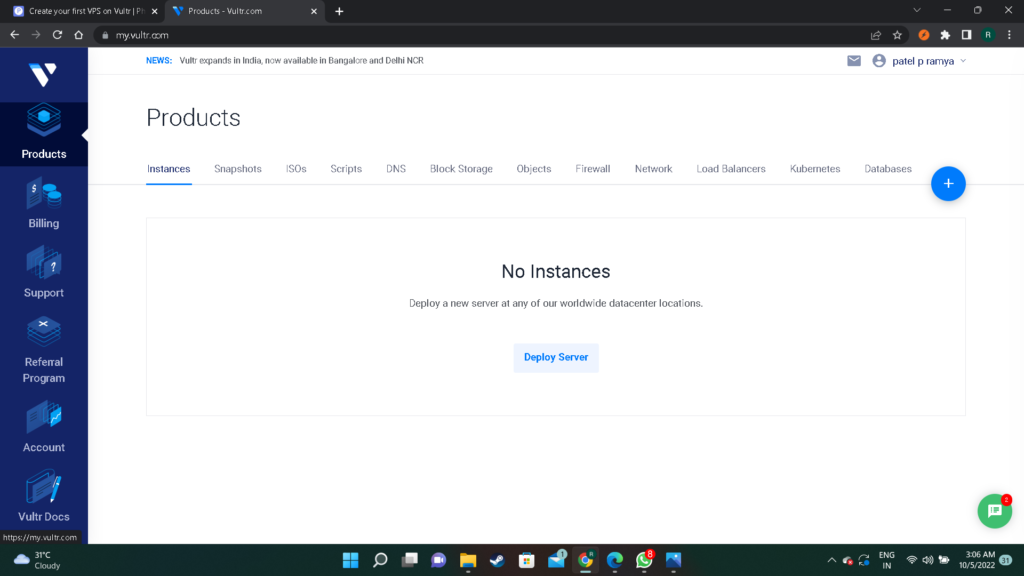
Click on products and you can seen lots of options on the top.
Just select Instances and click on the blue “+” button.
Select Your Server
After that you can seen four different options to choose your server:
- Optimized Cloud Compute
- Cloud Compute
- Cloud GPU(beta)
- Bare Matel Services
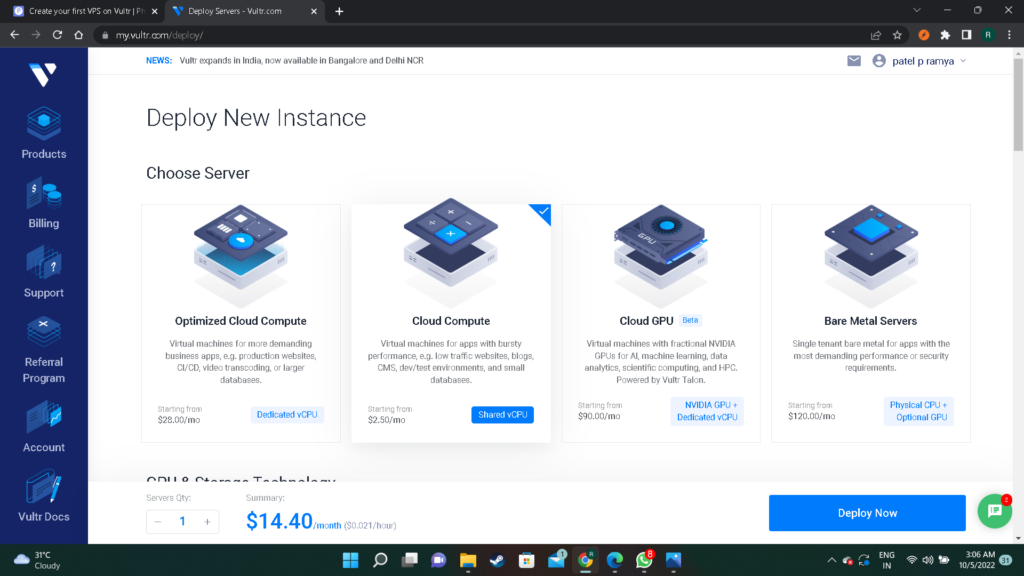
you can select any of them as your need i am selecting cloud compute.
Optimized Cloud Compute : If you need even better performance.
Cloud Compute : The most common VPS type it is perfect for web application or development environment.
Bare Matel Servers : Sometimes also called Root servers. It’s like if you would own a physical server, but located somewhere else.
Cloud GPU(beta) : Kind of like Bare Metal, but not with dedicated hardware just for you, but with dedicated resources.
all servers have different costs and uses all are mention on the dashboard below the server name.

After Selecting server there is a option to select CPU & Storage Technology, Select on of them and go ahead.
Select a server location
Depending where you live, you can select a region where your server should be located.
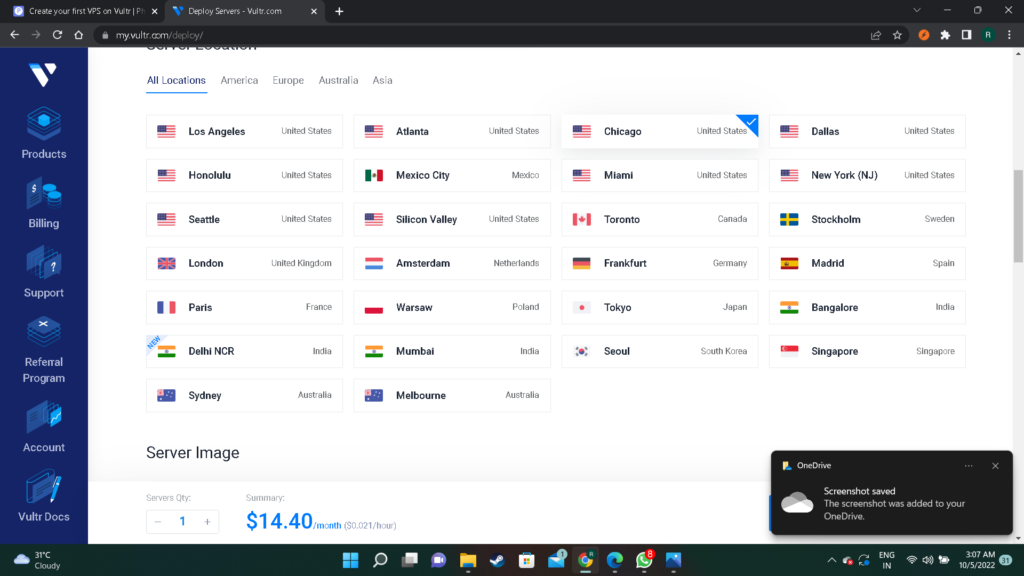
there are 15 locations globally where you can host your VPS or application.
Select a operating system
In this step you can select your operating system (OS) for the server. I am selecting Ubuntu. Make sure to select a Long-term support (LTS) version of Ubuntu, to get security updates for 5 years after the initial release.
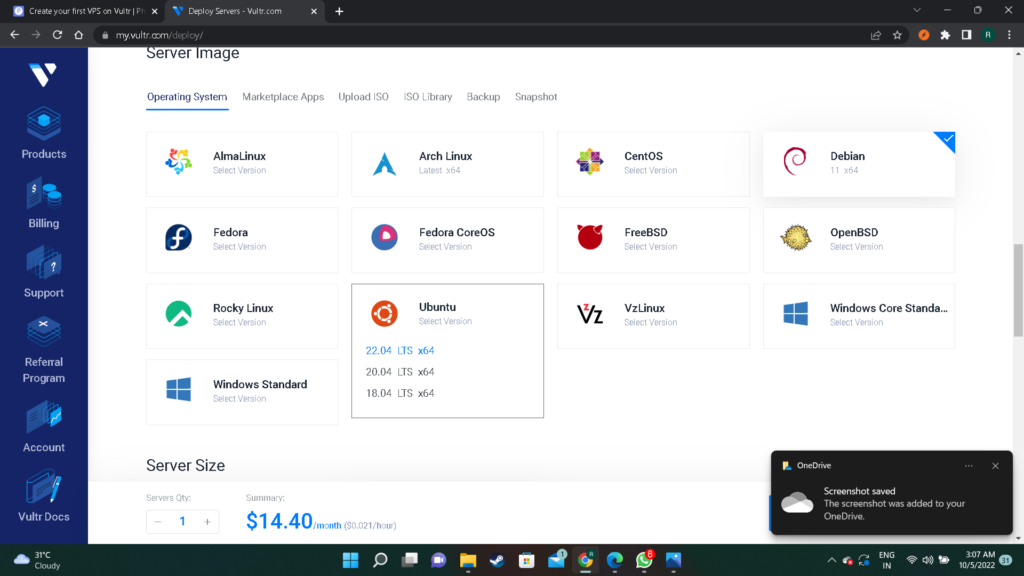
VULTR Application Options
Now, let’s look at the applications you can have deployed with your VPS instance.
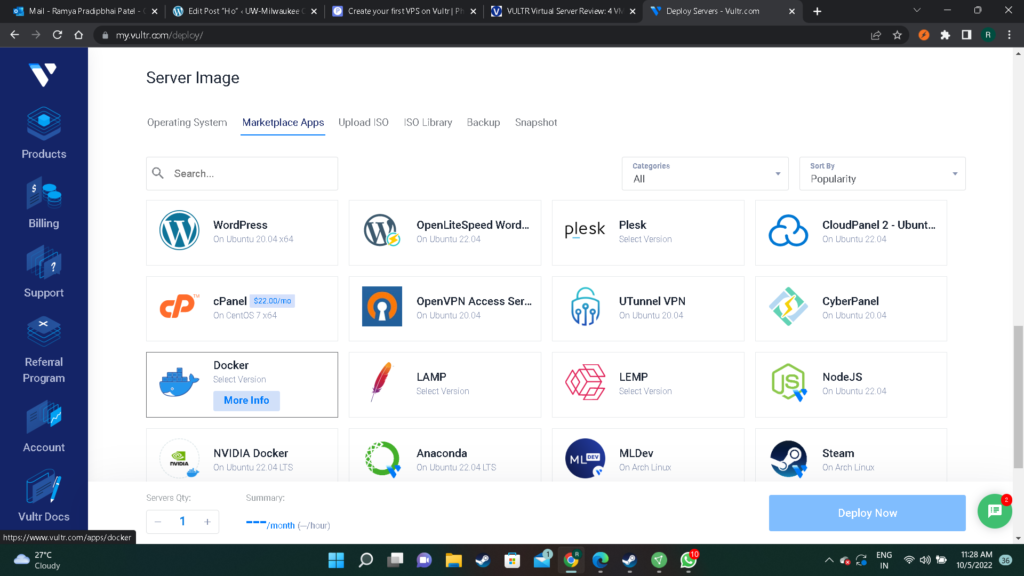
Vultr also has images with preinstalled application that could be used. If you don’t find your OS on Vultr, they also support to upload your own ISO file.
Select the specs of your server/Virtual Server Pricing
Now comes the most important part. In this step you have to decide how much resources do you need.
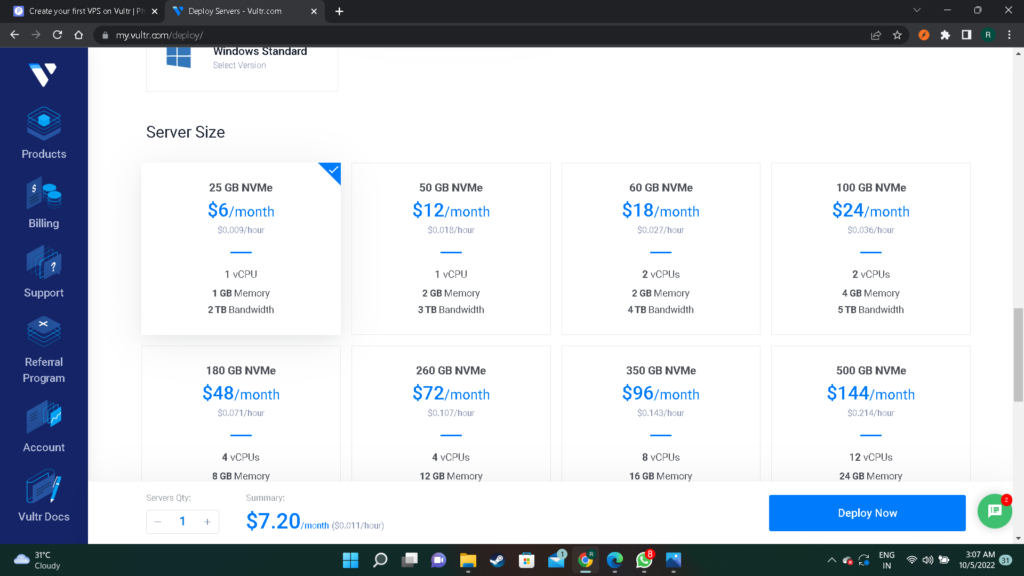
For small websites or web apps the 6$ instance should be enough to get started.
The 12$ instance is probably a good choice if you also need to host a database with PostgreSQL or MySQL.
If you ever think you current instance is sweating and can’t handle the load anymore, Vultr allows to upgrade your server to better plan with just 1 click.
Add SSH Key
you can also add SSH key
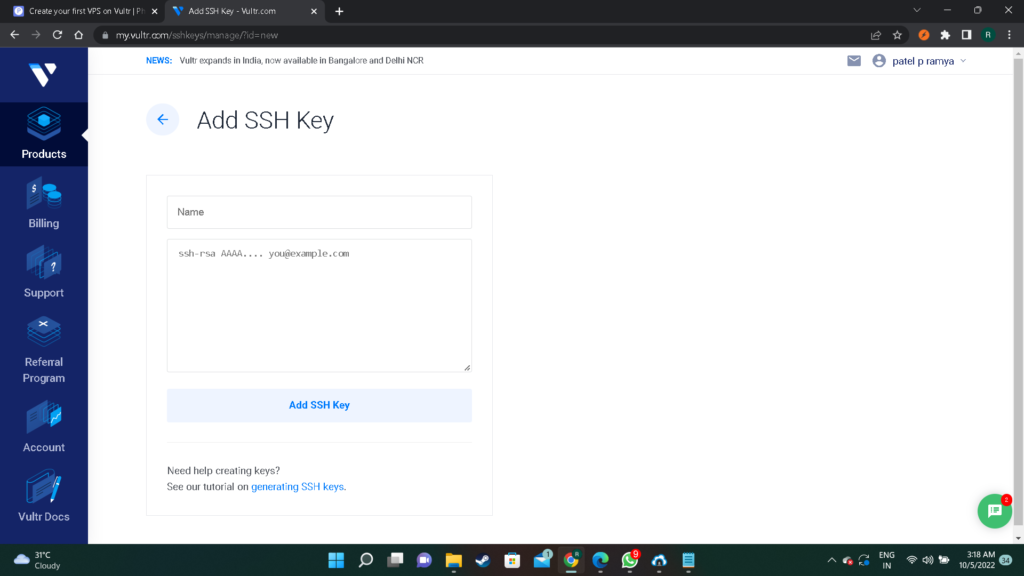
give your name and paste your public key.
Deploy your server
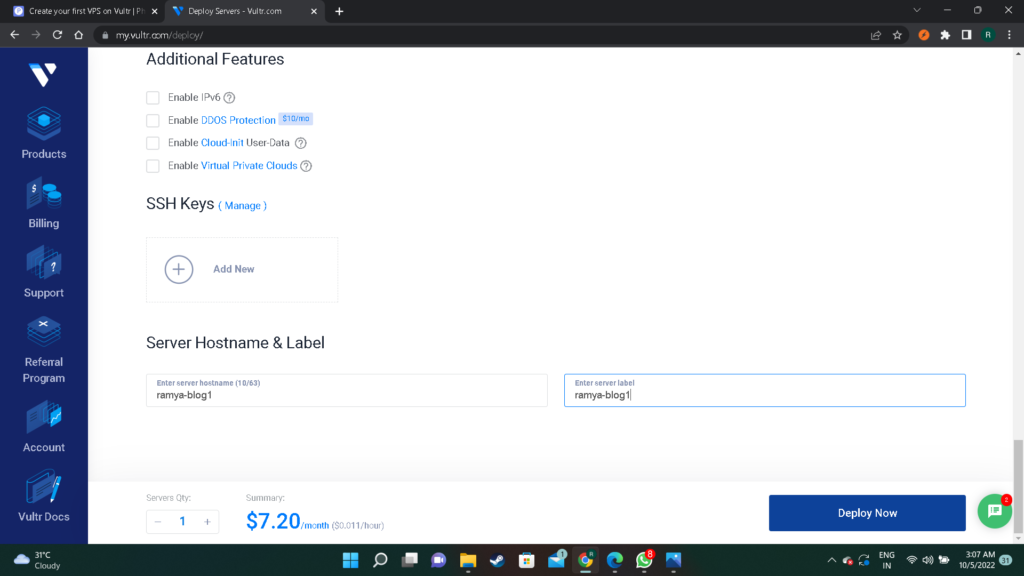
Last but not least you can give your server a hostname. After that you get a summery and you can press “Deploy Now” to create your server.
Server overview
It will get some time to create a server…….
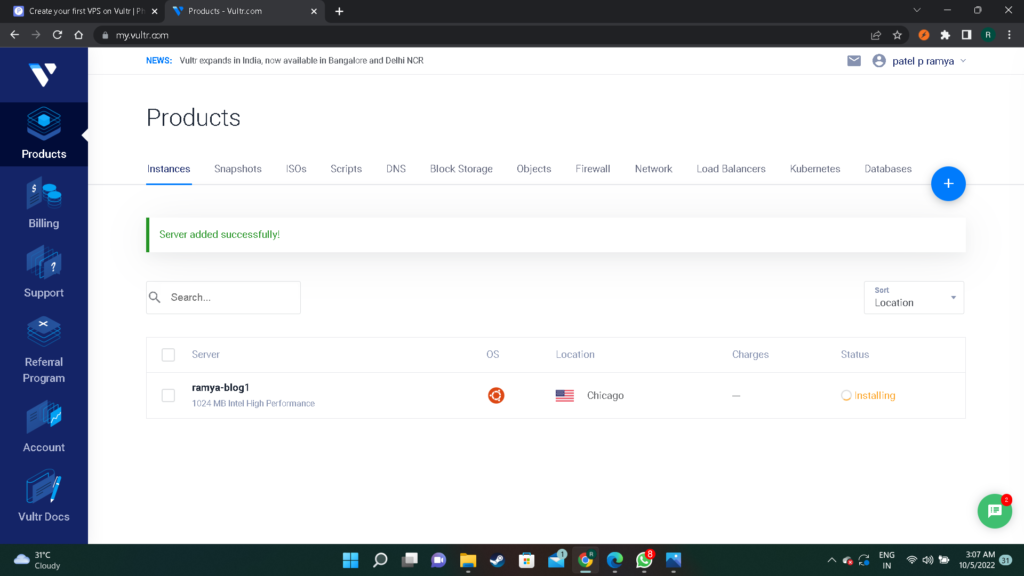
It shows server name , OS , Location and also a status of server.
by clicking of server name you can also see total overview of your server.
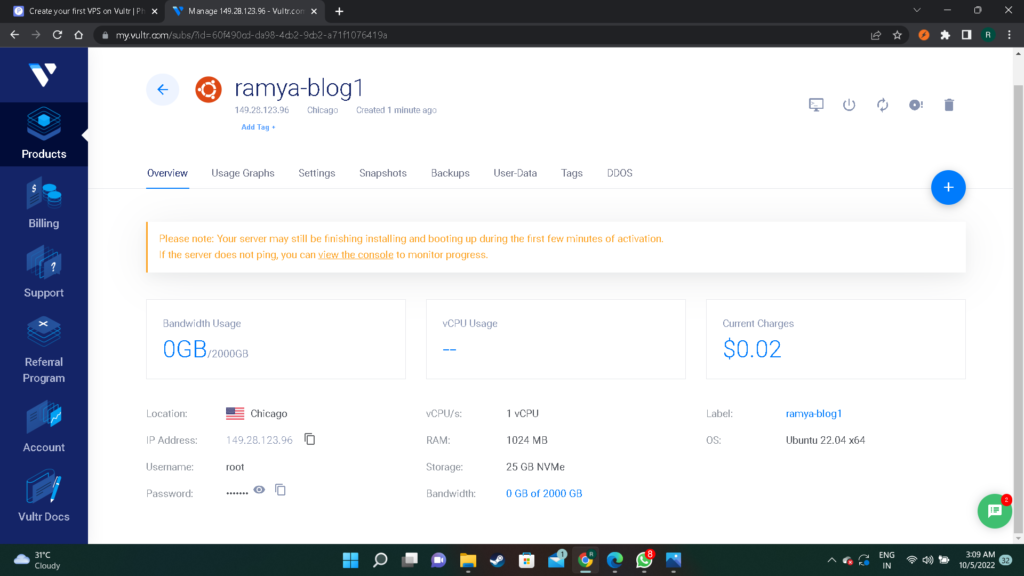
In overview you can see your IP address , Username, Password, RAM , storage used and Charges.
Connecting to the server
When you click on the server in the dashboard you will find an overview and more settings to interact with it.
You can copy the password for the root user using the copy symbol.
If you are using Windows you need to download SSH BITWISE CLIENT in order to connect to the server.
Just by click above link you can able to download SSH BITWISE CLIENT, set up the client and open it.
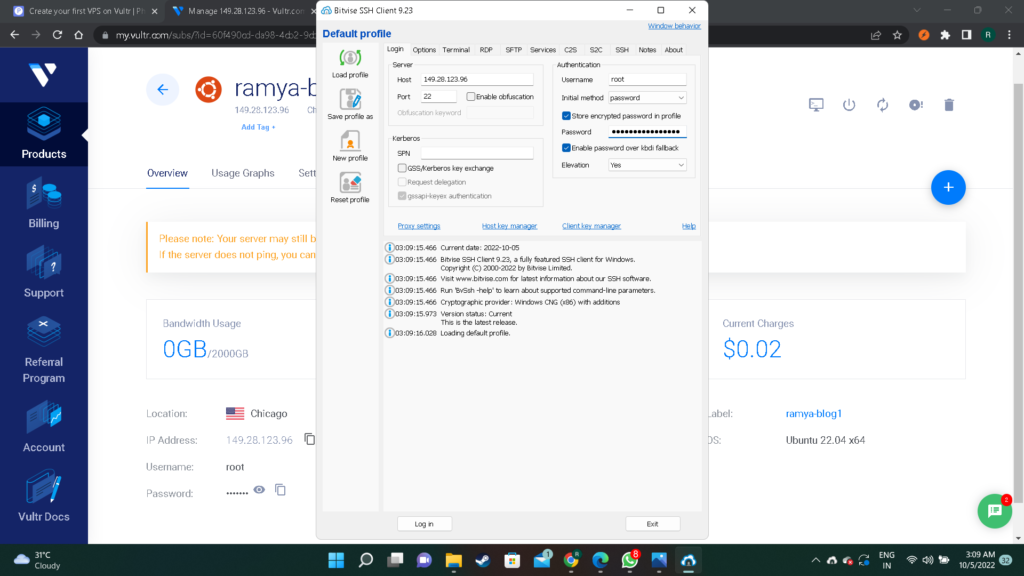
Enter your IP address in Host name and select port 22
Enter your user name and select initial method you can do it just by entering password or by selecting public key option.
Click login button after few seconds you see another windows just select “accept and save” your server is connected to the bitwise client.
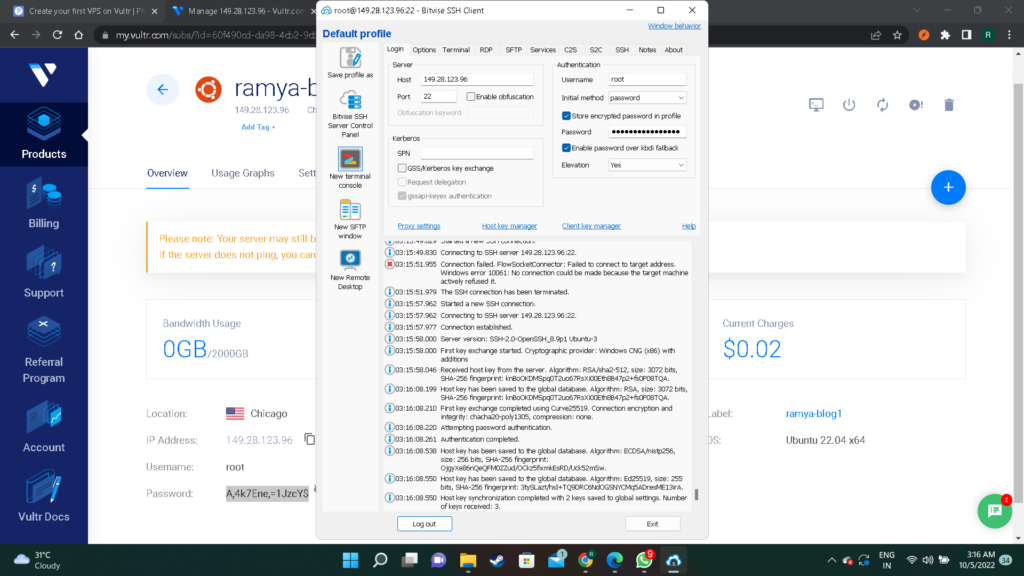
after connecting successfully you can see “new terminal console” option on left side open that
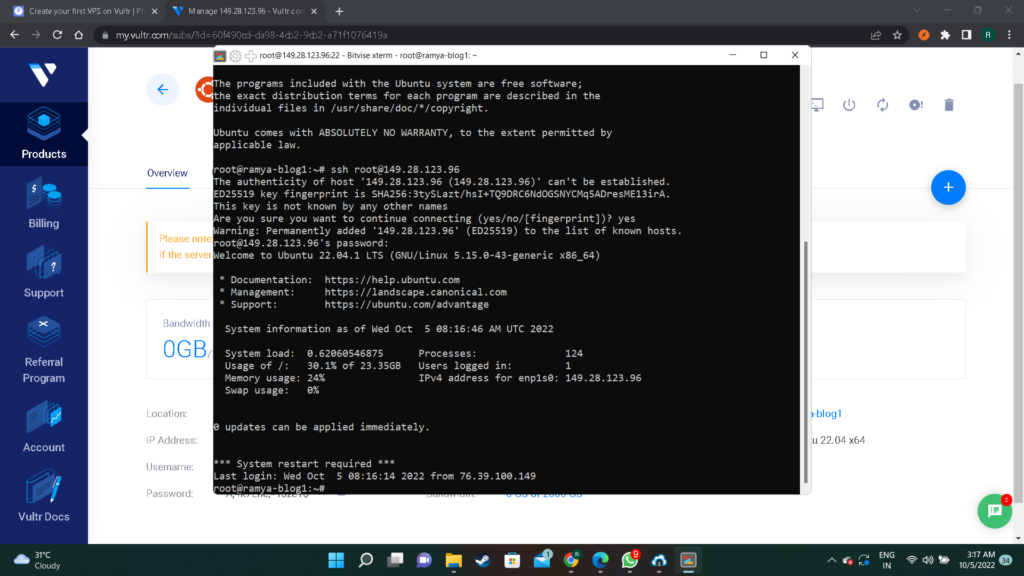
run “sss root@’your IP”
If your are done everything okay then you created server successfully and connected it.
Some Specialities that vultr has or You can choose vultr over other providers:-
- Vultr also permits its users to pick any of desired operating systems from the dashboard with a simple interface. The most common operating systems that developers can select here are the following ones:
- Windows
- OpenBSD
- FreeBSD
- CentOS
- Debian
- Fedora
- Fedora CoreOS
- Ubuntu
It only takes a few seconds to use any of these operating systems with your instance. Furthermore, Vultr also permits to go with a blend of various operating systems.
- The VULTR platform interface is easy to use and navigate with big bold labels and menus, as well as clearly marked buttons for their services.
- Advanced networking features make Vultr a very extensible and tailored cloud solution for users. It doesn’t only deliver customized IP space but also improves the efficiency of IP networks.
- Every developer desires to deploy or line up any game or application within a click. Luckily, Vultr fulfils this wish of developers. In this regard, Vultr backs a variety of application platforms. For example, Jitsi, CentOS Web Panel, cPanel, Docker and Drupal etc., are different application or game platforms that Vultr supports.
- Account creation on VULTR is by far the easiest I’ve had to deal with while creating my VPS series. But, I also want to note that they also offer a 2-factor login in case you want more security.
- Their datacenters are geo-located around the world which is good because Google doesn’t like slow websites and neither do users. Having your site hosted as close to the user base is the best option for low latency.
- They use KVM which is a very good hypervisor for hosting virtual machines. And because they don’t have to worry about paying for costly VMware ESXi or Citrix XenServer licenses, it allows them to offer lower prices.
- 5 ways to pay for their services is the most I’ve seen so far .
- If you are no Linux Admin, so cPanel is a huge PRO for you.
Vultr Pricing
The pricing model of Vultr is very flexible, and it is easy to calculate what they would charge for any project. This cloud platform offers a pay-as-you-go pricing structure.
However, if we look at the basic charges, then it takes $60 per month for 120 dedicated resources. Developers would have to consume $6 per month for a 32 GB SSD under High Frequency compute.
Furthermore, the cost of Bare Metal dedicated servers is around $140/month, and Object Storage charges begin from $6/month.