
Lambda runs your code on a high-availability compute infrastructure and performs all of the administration of the compute resources, including server and operating system maintenance, capacity provisioning and automatic scaling, and logging.
Three components of AWS Lambda:
- A function. This is the actual code that performs the task.
- A configuration. This specifies how your function is executed.
- An event source (optional). This is the event that triggers the function. You can trigger with several AWS services or a third-party service.
In this short blog, I will show you how to upload file to AWS S3 using AWS Lambda. We will use Python’s boto3 library to upload the file to the bucket. Once the file is uploaded to S3, we will generate a pre-signed GET URL and return it to the client.
Step 1: Create a project directory
First of all, you have to create a project directory for your lambda function and its dependencies.
mkdir my-lambda-functionStep 2: Install dependencies
Create a requirements.txt file in the root directory ie. the my-lambda-function directory. Add the boto3 dependency in it.
boto3
Next, install the dependencies in a package sub-directory inside the my-lambda-function .
pip install -r requirements.txt --target ./package
Step 3: Add lambda handler
Now that you have installed the dependencies, create a lambda_function.py file and add the following code snippet to it for your lambda handler.
def lambda_handler(event, context):
return None
Step 4: Upload file to S3 & generate pre-signed URL
Next, let us create a function that upload files to S3 and generate a GET pre-signed URL. The function accepts two params.
local_fileis the path to the local file that you need to uploads3_fileis the S3 object key that you want to use.
def upload_to_aws(local_file, s3_file):
    s3 = boto3.client('s3')

    try:
        s3.upload_file(local_file, os.environ['BUCKET_NAME'], s3_file)
        url = s3.generate_presigned_url(
            ClientMethod='get_object',
            Params={
                'Bucket': os.environ['BUCKET_NAME'],
                'Key': s3_file
            },
            ExpiresIn=24 * 3600
        )

        print("Upload Successful", url)
        return url
    except FileNotFoundError:
        print("The file was not found")
        return None
    except NoCredentialsError:
        print("Credentials not available")
        return None
Note:
- We are using the
upload_filemethod which directly uploads the file to S3. After that,generate_presigned_urlis being used just to receive aGETpre-signed URL for the uploaded object. TheGETpre-signed URL can be used to access the object. Another way to upload files is to first receive aPUTpre-signed URL and then use thePUTpre-signed URL to actually upload the object. - If the lambda function has
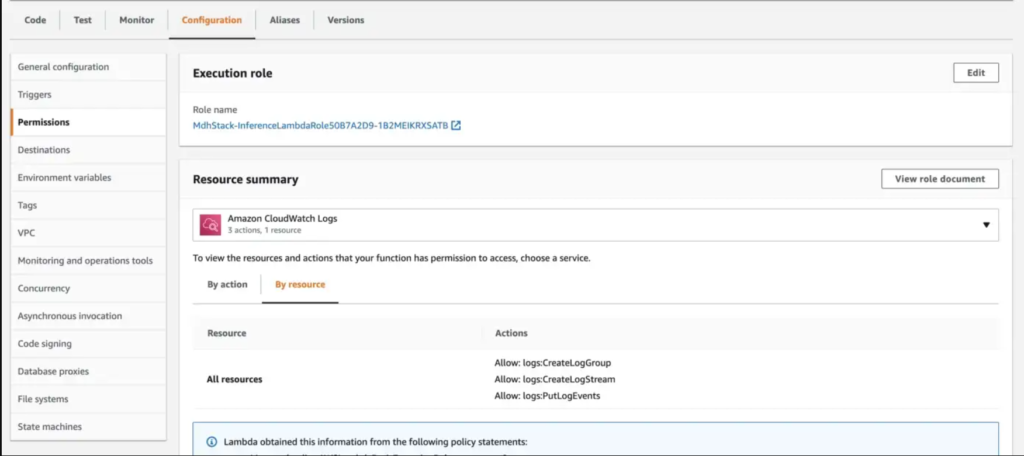
GetObjectandPutObjectpermissions on the bucket, then the operations would be successful. You don’t need to specify the access key and secret while creating theboto3S3 client. For granting the permissions, you can create a IAM role and set it as lambda’s execution role.
- You need to either pass
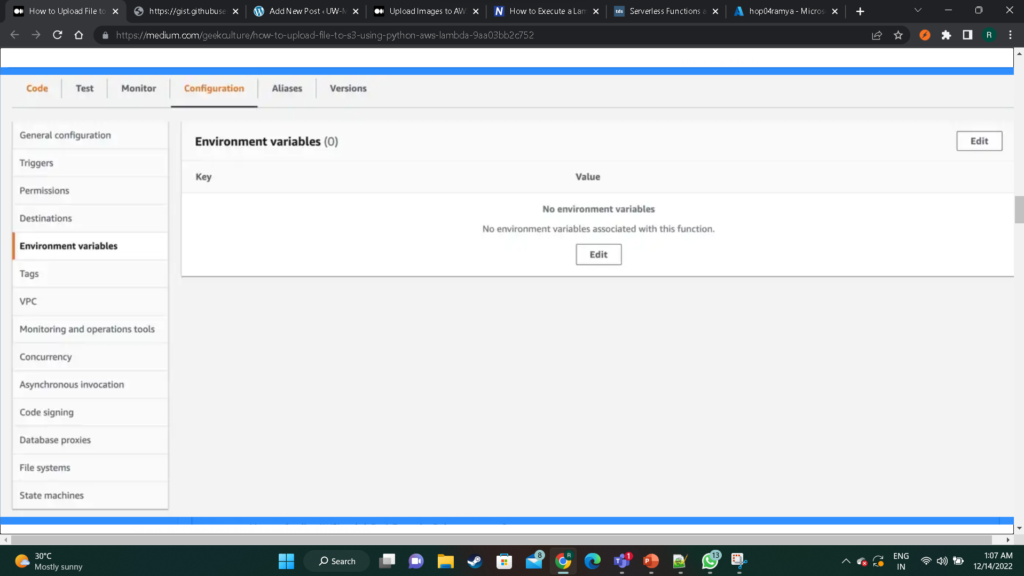
BUCKET_NAMEas an environment variable or hardcode it. You can set environment variables using the AWS Lambda’s console.
Step 5: Package the lambda function
We need to package the dependencies under package directory and the lambda_function.py . Run the following commands in the specified order to package the function along with the dependencies.
cd package
zip -r ../my-deployment-package.zip .
cd ..
zip -g my-deployment-package.zip lambda_function.py
First, zip command compresses the dependencies and the second zip command adds the lambda_function.py to the compressed archive.
Step 6: Deploy the lambda function
Now, that we have packaged our lambda function to a zip file, we can go ahead and upload the package using the AWS console.
Create Lambda function
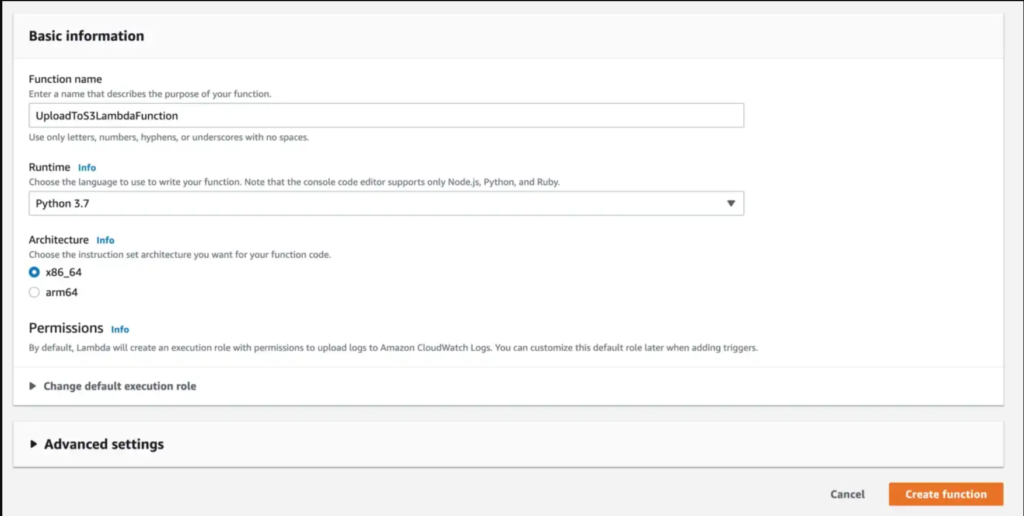
First, create a new Lambda function with Python 3.7 runtime by going to AWS Lambda service in the AWS console.
https://us-west-2.console.aws.amazon.com/lambda/home?region=us-west-2#/discover
Click on Create Function to create a new function.

Next, fill in the function name, choose Python 3.7 as runtime and click on Create function.
Upload deployment package
Next, click on the Upload from dropdown and select .zip file to upload the zipped deployment package.
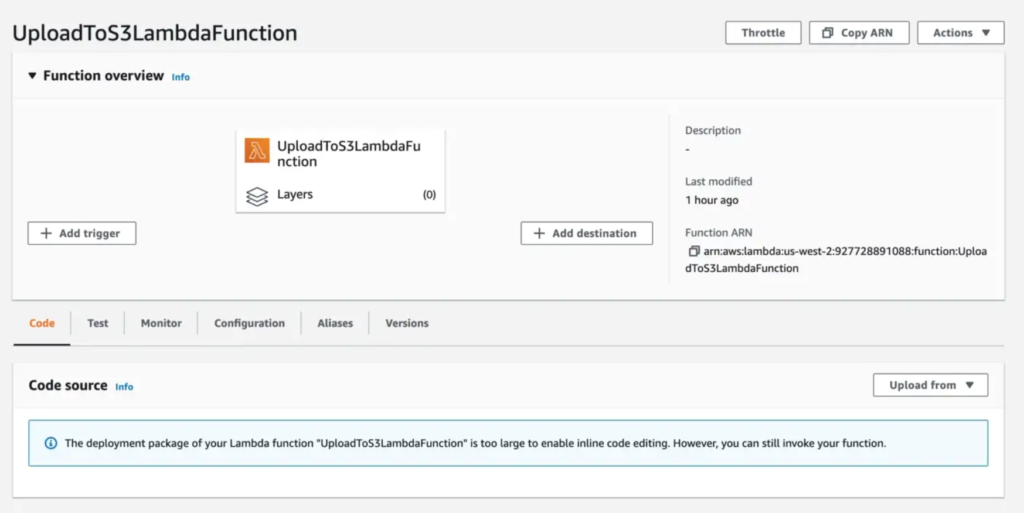
Note: If your deployment package is more than 10MB then you will have to first upload the zipped package to an AWS S3 bucket and then provide a link to the S3 object.
Add environment variables
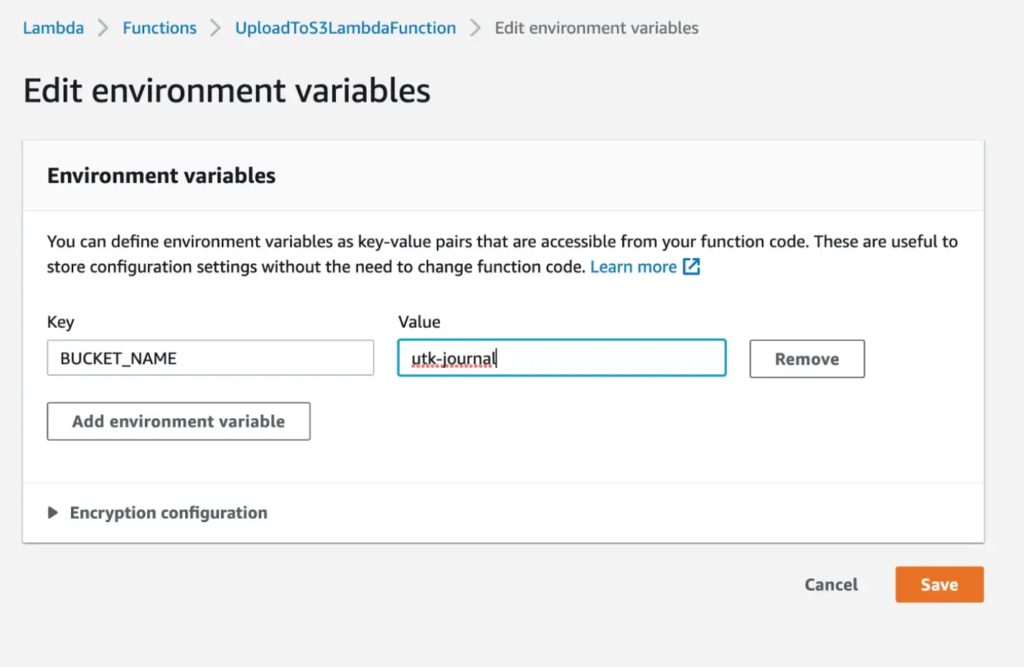
Next, navigate to the Configuration tab of your lambda function and choose Environment variables to edit the variables. Add the BUCKET_NAME environment variable by setting the value to an existing S3 bucket. Our function will upload the S3 files to this bucket.
Edit Execution Role
Next, edit the execution role of the lambda function by navigating to Configuration > Permissions tab. Click on the name of the attached role under the Execution role section.

It will open the IAM role page for this role.

Click on the Add permissions > Attach policies dropdown. Search for AmazonS3FullAccess and add it to the role.
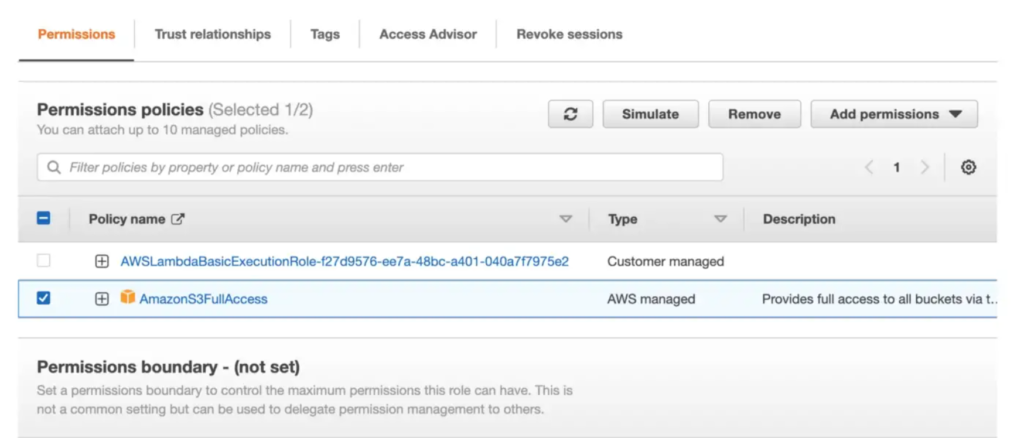
This policy will allow our lambda function to read/write to all theAWS S3 buckets in your account. Alternatively you can choose to provide more fine grained permissions.
Test the Lambda function
Finally, head over to the Test tab of the lambda function to execute it and see if it works.
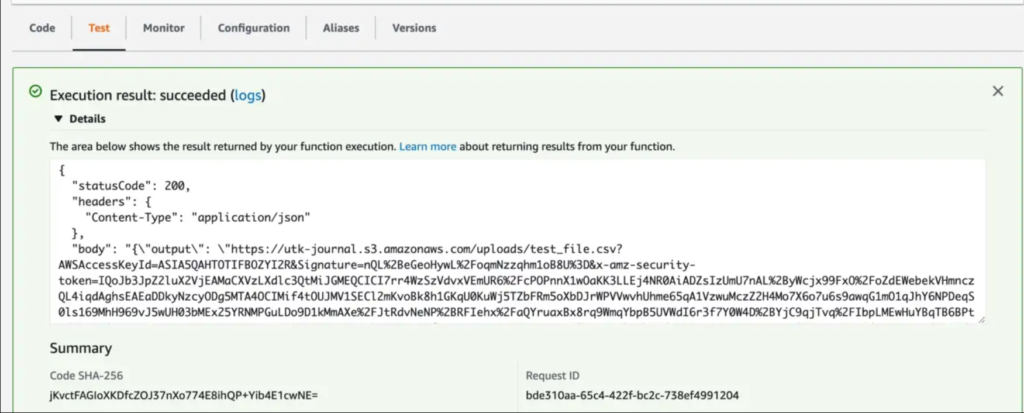
If everything was setup properly, the lambda execution should complete successfully.
Thank you for reading this blog.