Introduction
Azure Functions is an on-demand serverless cloud compute service that provides all of the constantly updated infrastructure and resources required to run your applications. This service allows users to run event-triggered code without the need for infrastructure provisioning or management. As a trigger-based service, it executes a script or code in response to a wide variety of events. An Azure Function can be triggered by an event (an HTTP request) or on a schedule (using a CRON expression).
Azure Function Triggers
Functions are started by triggers. A function must have exactly one trigger, which specifies how the function is called. Data that is associated with triggers are frequently provided as the function’s payload.

Timer Trigger:
On a predetermined schedule, a Timer trigger is activated. This schedule can be expressed using intervals or CRON syntax.
Blob trigger:
When a new or updated blob is detected and its contents are passed as input to a function, the blob storage trigger starts the function.
Data Factory Trigger:
You can start or stop Data Pipelines using Azure Data Factory Triggers based on a specified time period.
HTTP Trigger:
An HTTP trigger uses an HTTP endpoint to call the function via an HTTP request.You can create a serverless web application using HTTP triggers.
Connecting Azure Account to VS Code
In Order to Interact with Azure Account Using Visual Studio Code. For that, we should have downloaded VS Code and in VS code, Install an extension called Azure Account as below diagram.

Once this extension got installed, we can use it by going to Command Palette.
You can either directly access the menu bar and choose Command Palette from the View menu, or you can press Ctrl+Shift+P to open the Command Palette. Then you will get an option >Azure: Sign in which will direct you to a website.
Create an Azure function app in Visual Studio
Follow these steps in order to create an azure function project.
- Open VS code
- Create a new project by selecting File>New>Project.
- After that select path>C# language>.NET Core3>Http Trigger>select a name for your function.
- Access rights would be anonymous.
- Click yes for override prompt.

Here is what it looks like after creating a project.
Default C# sharp code
using System;
using System.IO;
using System.Threading.Tasks;
using Microsoft.AspNetCore.Mvc;
using Microsoft.Azure.WebJobs;
using Microsoft.Azure.WebJobs.Extensions.Http;
using Microsoft.AspNetCore.Http;
using Microsoft.Extensions.Logging;
using Newtonsoft.Json;

namespace My.Function
{
	public static class HttpTriggerCSharpExample
	{
		[FunctionName("HttpTriggerCSharpExample")]
		public static async Task<IActionResult> Run(
			[HttpTrigger(AuthorizationLevel.Anonymous,"get","post",Route=null)] HttpRequest req,
			ILogger log)
		{
			log.LogInformation("C# HTTP trigger function processed a request.");
			string name =req.Query["name"];
			string requestBody= await new StreamReader(req.Body).ReadToEndAsync();
			dynamic data = JsonConvert.DeserializeObject(requestBody);
			name=name ?? data?.name;

			string responseMessage=string.IsNullOrEmpty(name)
				?"This HTTP triggered function executed successfully.Pass a name in the query string or in the request body for a personalized response."
				:$"Hello, {name}. This HTTP triggered function executed successfully.";

			return new OkObjectResult(responseMessage);
		}
	}
}
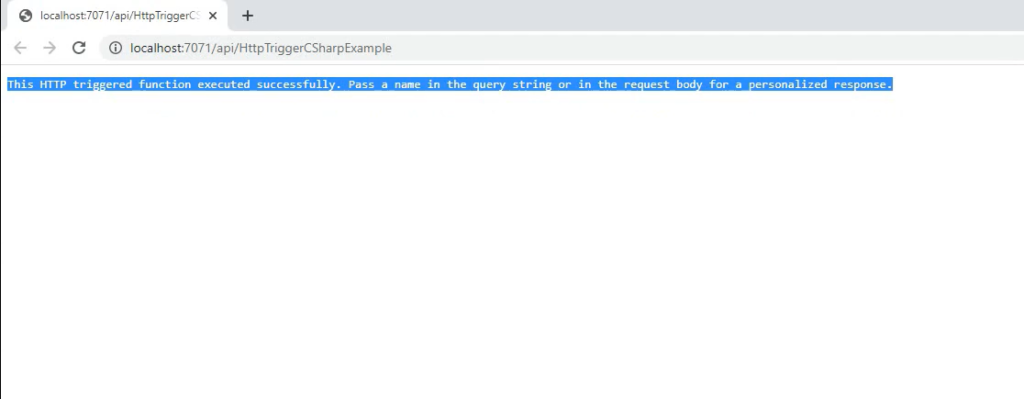
By Running this code, We would be able to see the actual response back on the web. This how it looks like.

Deploying a Web App
Firstly, We need to install the Azure app service which is an extension that is available in the azure store.
- Click on the Azure icon.
- You can create a web app by right-clicking on the App services and selecting Create new Web app.
- Select a name for the web app it should be unique.
- Now we need to select the language with which we would like to work with.
- An Empty web app will be created after a few minutes.
- By selecting Deploy in the confirmation dialogue, you can now deploy your application to this Web App.
Now in the Azure portal, you can browse your website or manage the App Services.
Connecting to Azure Storage
Here are the changes that I made to the default code in order the connect to azure storage.
using System;
using System.IO;
using System.Threading.Tasks;
using Microsoft.AspNetCore.Mvc;
using Microsoft.Azure.WebJobs;
using Microsoft.Azure.WebJobs.Extensions.Http:
using Microsoft.AspNettCore.Http;
using Microsoft.Extensions.Logging;
using Newtonsoft.Json;

namespace My.Function

{


	public static class AzureStorageQueueHTTPTrigger
	{

		[FunctionName("AzureStorageQueueHTTPTrigger")]
		 O references

		public static async Task<IActionResult> Run(
			 [HttpTrigger(Authorizationlevel.Anonymous, "get", "post", Route= null)] HttpRequest req,
			 //setup queue using local AzurellebJobsStorage endpoint
			[Queue("outqueue"), StorageAccount("AzureWebJobsStorage")] ICollector<string> msg,
			ILogger log)
		{

			log.LogInformation("C# HTTP trigger function processed a request.");
			string name=req.Query["name"];
			string requestBody=await new StreamReader(req.Body).ReadToEndAsync();
			dynamic data=JsonConvert.DeserializeObject(requestBody);
			name=name ?? data?.name;

			if (!string.IsNullOrEmpty(name))

			{
				// add a message to the output collection
				msg.Add(string.Format("Name passed to the function: {0}", name));
			}
			return name!=null;
			? (ActionResult)new OkobjectResult("Hello, {name}");
			: new BadRequestObjectResult("Please pass a name on the query string or in the request body");
		}
	}
}
Once we run a build task we would get a function.json file as the output.

By right-clicking on the function which was built, we can the option to execute the function now, then we can send a message to the queue.

Now, open azure storage explorer to look at the message we just passed.
