Summary:
In this blog we will discuss about Provisioning Virtual Machine and few other components in Azure using Python SDK, instead of creating them from Azure portal.
Installing Azure CLI and building a Virtual Environment in VS Code
- To build out a resource group to house the virtual machine and its components, we must first download Azure cli (available on the MS website), and build a virtual environment with python3 in VScode. In the event Azure cli does not work, try adding the Azure cli executable to the path variables in the Edit environment variable settings.
- Next, download the Azure tools and Python extension to enable the sign in. You can sign in to the Azure portal through the GUI in VScode, or you can use Azure login to login to your account on Azure.
- Once you’ve logged in and activated your virtual environment, create a requirements.txt in python and execute it to install all the required dependencies.
- To execute and install the requirements: pip install requirements.txt

- After the requirements have been installed, import all the libraries needed to set up your infrastructure in VScode.
- Authenticate to Azure via CLI and extrapolate the subscription ID so the provisioning is relocated to that specific subscription.
from azure.identity import AzureCliCredential
from azure.mgmt.resource import ResourceManagementClient
from azure.mgmt.network import NetworkManagementClient
from azure.mgmt.compute import ComputeManagementClient
from azure.mgmt.storage import StorageManagementClient
import os

print(f"Provisioning a virtual machine...some operations might take a minute or two.")


credential = AzureCliCredential()


subscription_id = os.environ["3c926743-b55e-44d3-8095-8d4f01eae35a"]- Once we’ve set up a subscription and authenticated to Azure, we create a resource group to house our virtual machine, virtual networks and any other resources that may possess the same lifecycle.
resource_client = ResourceManagementClient(credential, subscription_id)

RESOURCE_GROUP_NAME = "Saathvika-RG"
LOCATION = "westus2"

rg_result = resource_client.resource_groups.create_or_update(RESOURCE_GROUP_NAME,
    {
        "location": LOCATION
    }
)
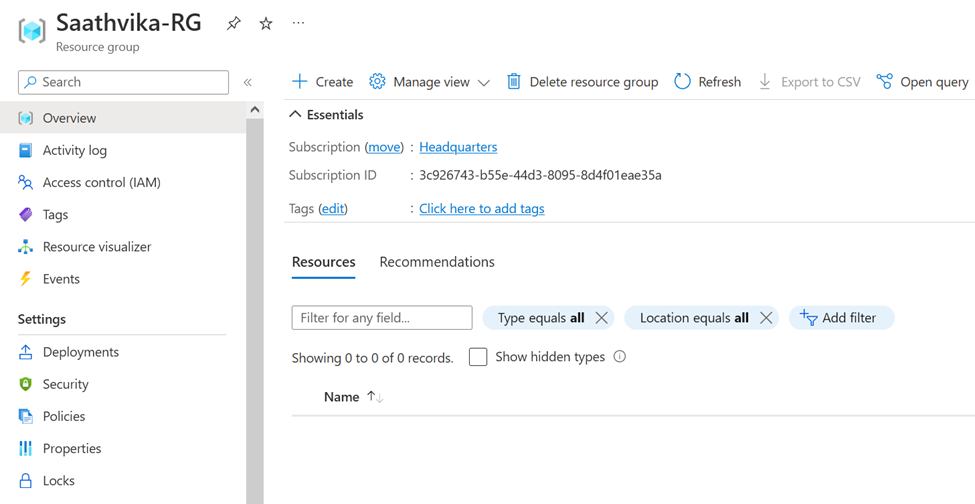
print(f"Provisioned resource group {rg_result.name} in the {rg_result.location} region")- This snippet of code will obtain the management object using credentials from the previous login and then provision a resource group called Saathvika-RG. I’ve selected the westus2 location for this particular example.
- To provision a virtual network with a working NIC, we’ll need to provision a virtual network first.
# Step 2: provision a virtual network
# A virtual machine requires a network interface client (NIC). A NIC requires
# a virtual network and subnet along with an IP address. Therefore we must provision
# these downstream components first, then provision the NIC, after which we
# can provision the VM.
# Network and IP address names
VNET_NAME = "saathvika-vnet"
SUBNET_NAME = "saathvika-subnet"
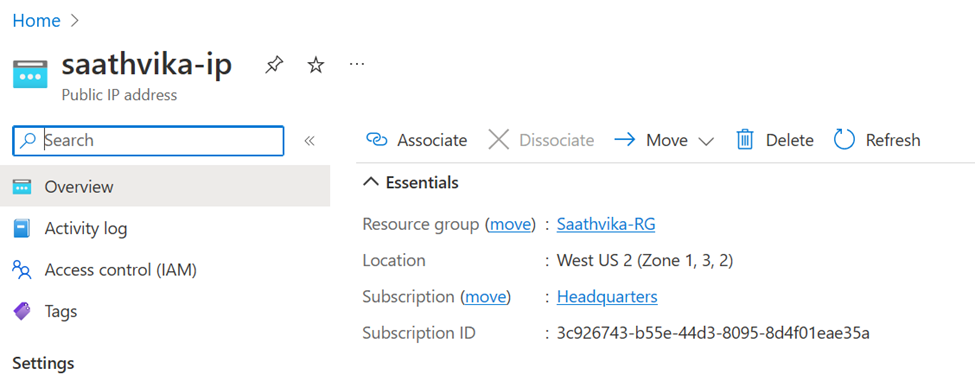
IP_NAME = "saathvika-ip"
IP_CONFIG_NAME = "saathvika-config"
NIC_NAME = "saathvika-nic"
network_client = NetworkManagementClient(credential, subscription_id)
poller = network_client.virtual_networks.begin_create_or_update(RESOURCE_GROUP_NAME,
VNET_NAME,
{
"location": LOCATION,
"address_space": {
"address_prefixes": ["10.0.0.0/16"]
}
}
)
vnet_result = poller.result()
print(f"Provisioned virtual network {vnet_result.name} with address prefixes {vnet_result.address_space.address_prefixes}")
- Once we deploy this piece of code, the virtual network, subnet and public IP resource (to be attached to the NIC) are created in the portal.
- The network_client is used to gain the management object from the credentials we’ve provided during authentication.
# Step 3: Provision the subnet and wait for completion
poller = network_client.subnets.begin_create_or_update(RESOURCE_GROUP_NAME,
    VNET_NAME, SUBNET_NAME,
    { "address_prefix": "10.0.0.0/24" }
)
subnet_result = poller.result()

print(f"Provisioned virtual subnet {subnet_result.name} with address prefix {subnet_result.address_prefix}")

# Step 4: Provision an IP address and wait for completion
poller = network_client.public_ip_addresses.begin_create_or_update(RESOURCE_GROUP_NAME,
    IP_NAME,
    {
        "location": LOCATION,
        "sku": { "name": "Standard" },
        "public_ip_allocation_method": "Static",
        "public_ip_address_version" : "IPV4"
    }
)

ip_address_result = poller.result()

print(f"Provisioned public IP address {ip_address_result.name} with address {ip_address_result.ip_address}")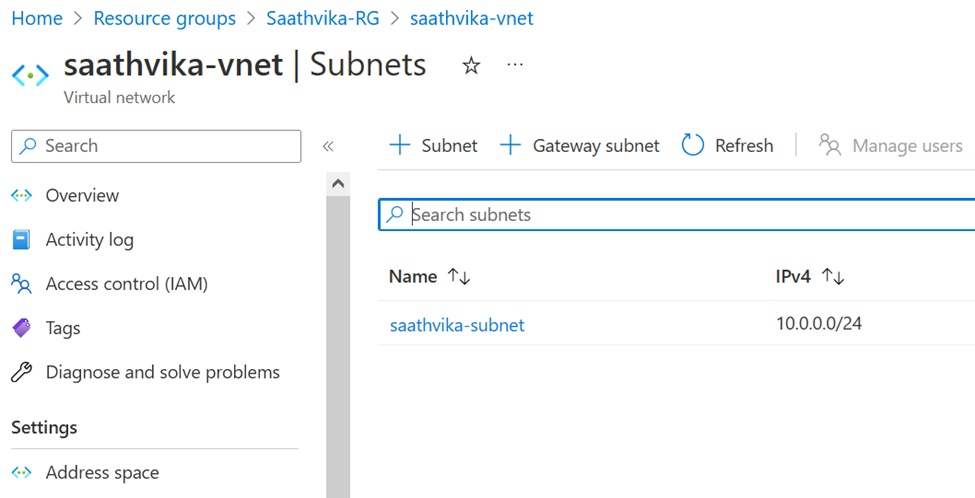
- Now that the VNet, Subnet and the Public IP resource have been created, we can create the NIC (Network Interface Card) for the virtual machine to connect.
- This NIC will allow internal and external communication, and employ NSGs to track communication.
# Step 5: Provision the network interface client
poller = network_client.network_interfaces.begin_create_or_update(RESOURCE_GROUP_NAME,
    NIC_NAME,
    {
        "location": LOCATION,
        "ip_configurations": [ {
            "name": IP_CONFIG_NAME,
            "subnet": { "id": subnet_result.id },
            "public_ip_address": {"id": ip_address_result.id }
        }]
    }
)

nic_result = poller.result()
print(f"Provisioned network interface client {nic_result.name}")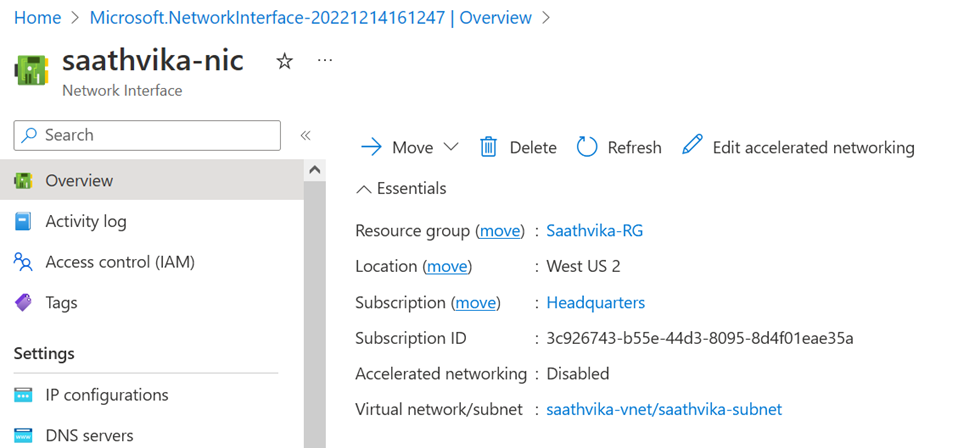
- Once the NIC has been created and deployed, the virtual machine can be provisioned and attached to the NIC
# Step 6: Provision the virtual machine
# Obtain the management object for virtual machines
compute_client = ComputeManagementClient(credential, subscription_id)
VM_NAME = "Enter your VM name here"
USERNAME = "enter your username here"
PASSWORD = "Enter your password here"
print(f"Provisioning virtual machine {VM_NAME}; this operation might take a few minutes.")
poller = compute_client.virtual_machines.begin_create_or_update(RESOURCE_GROUP_NAME, VM_NAME,
{
"location": LOCATION,
"storage_profile": {
"image_reference": {
"publisher": 'Canonical',
"offer": "UbuntuServer",
"sku": "16.04.0-LTS",
"version": "latest"
}
},
"hardware_profile": {
"vm_size": "Standard_DS1_v2"
},
"os_profile": {
"computer_name": VM_NAME,
"admin_username": USERNAME,
"admin_password": PASSWORD
},
"network_profile": {
"network_interfaces": [{
"id": nic_result.id,
}]
}
}
)
vm_result = poller.result()
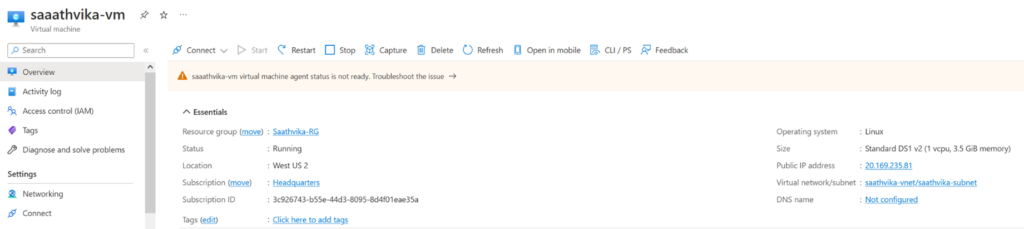
print(f"Provisioned virtual machine {vm_result.name}")
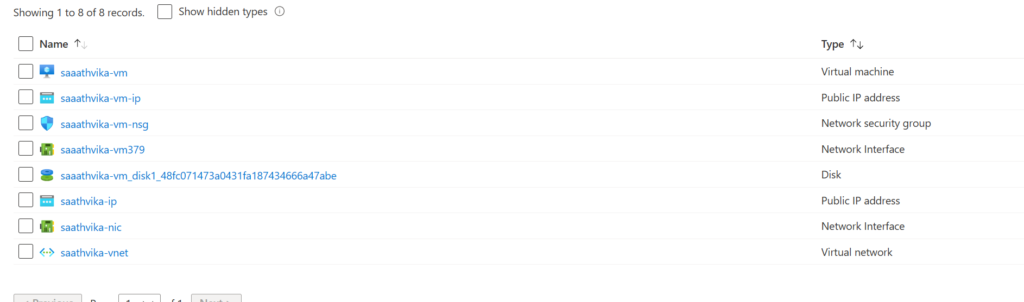
- The virtual machine is a Standard DS 1 v2 sku, with 1 vCPU and 3.5 GB memory.
- It runs an Ubuntu OS and is hooked to the Vnet/Subnet we created in the previous deployment. The public IP is hooked to the NIC of the virtual machine.
- After the creation of the VM, let’s build a storage account container to connect to this VM to export and import any data.
- The storage client management library handles the authentication of the storage account into Azure.
#Provisioning a storage account in the resource group
storage_client = StorageManagementClient(credential, subscription_id)
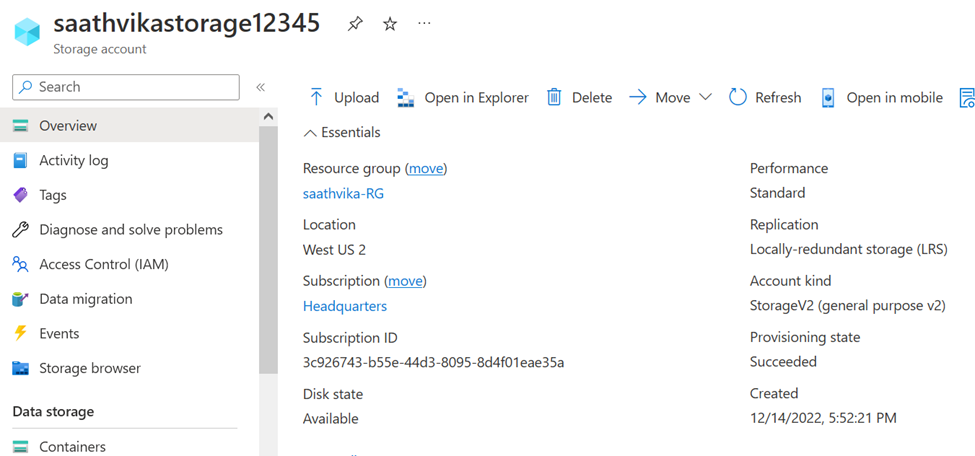
STORAGE_ACCOUNT_NAME = f"saathvikastorage12345"
poller = storage_client.storage_accounts.begin_create(RESOURCE_GROUP_NAME, STORAGE_ACCOUNT_NAME,
{
"location" : LOCATION,
"kind": "StorageV2",
"sku": {"name": "Standard_LRS"}
}
)
account_result = poller.result()
print(f"Provisioned storage account {account_result.name}")- This piece of code allows us to deploy a storage account into the same resource group that houses the virtual machine.
- Please keep in mind that the storage account name should be unique across the entirety of azure, since we will be deploying connection strings that build out URLs, and these URLs should be unique.
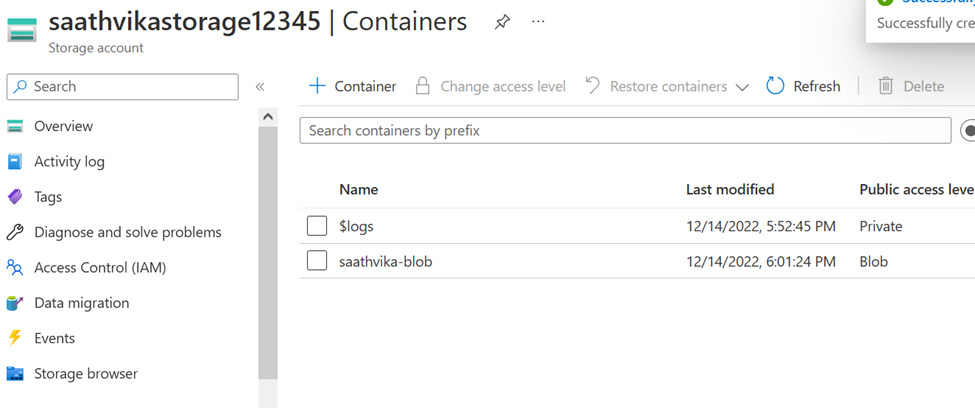
- Now that we have a storage account in the cloud, let’s create a blob container to store unstructured data like videos, files and other forms of media.
#Deploy a blob into a container

CONTAINER_NAME = "saathvika-blob"
container = storage_client.blob_containers.create(RESOURCE_GROUP_NAME, STORAGE_ACCOUNT_NAME, CONTAINER_NAME, {})


print(f"Provisioned blob container {container.name}")
This snippet of code will now create a blob inside the specified storage account.
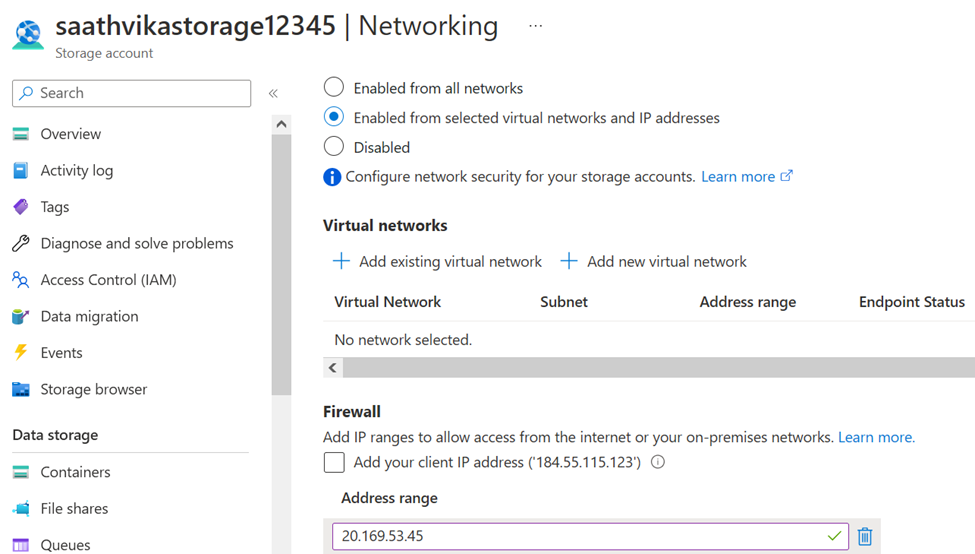
- If we want to connect our VM to the storage account, we need to allow the public IP connected to the NIC of the virtual machine to enter the firewall of the storage account. Head into networking under the security + networking blade on the left side.
- Next, select the Enabled from selected virtual networks and IP addresses option and enter the public IP of the virtual machine.
Note that this firewall does not allow internal IP addresses, and accepts public addresses only. In the event you want to disable public addresses, you have to add the Vnet/Subnet (that the virtual machine resides in) to the storage account firewall.
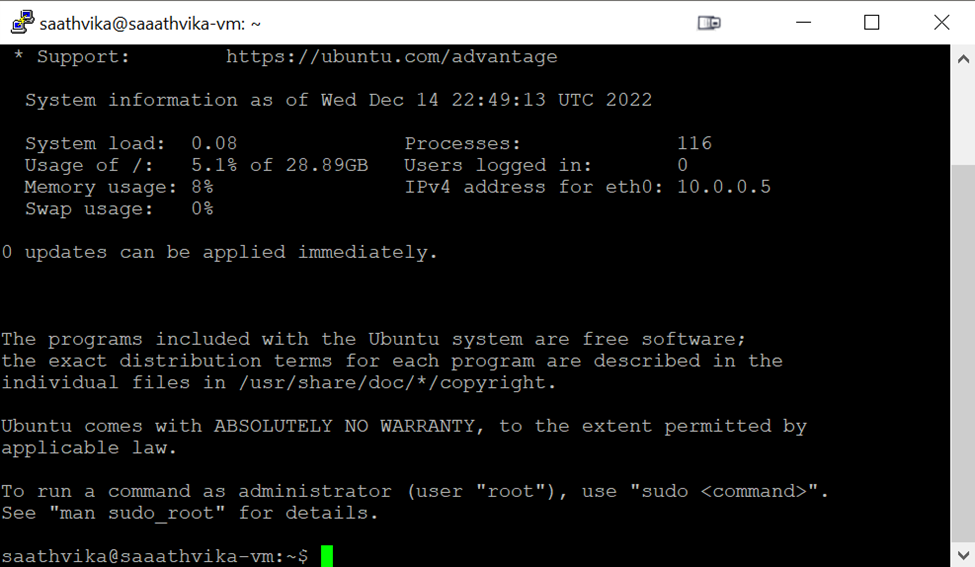
- This concludes the building of resources tutorial via the Python SDK in Azure. Use Putty or Cyberduck to connect via SSH (Port 22) to the virtual machine.