Let us start with What is speech-to-text?
Speech-to-text, also known as speech recognition, enables real-time or offline transcription of audio streams into text. Speech-to-text is one feature within the Speech service. This is a part of Azure Cognitive Services.
Speech-to-text REST API is used for Batch transcription and Custom Speech.
Use Speech-to-text REST API to:
To know about Speech-to-text REST API we need few Insights on Batch transcription and Custom Speech.
Insights on Batch transcription:
Batch transcription is a set of Speech-to-text REST API operations that enables us to transcribe a large amount of audio in storage. We can point to audio files with a shared access signature (SAS) URI and asynchronously receive transcription results. We should provide multiple files per request or point to an Azure Blob Storage container with the audio files to transcribe.
The batch transcription service can handle a large number of submitted transcriptions. The service transcribes the files concurrently, which reduces the turnaround time. Both the Speech-to-text REST API and Speech CLI support batch transcription.
Now let us discuss What Batch Transcription is.
With Batch Transcriptions, we submit the audio data, and then retrieve transcription results asynchronously. The service transcribes the audio data and stores the results in a storage container. We can then retrieve the results from the storage container.
To get started with batch transcription we have to follow these steps below:
- Locate audio files for batch transcription (We can upload our own data or use existing audio files via public URI or shared access signature (SAS) URI).
- Create a batch transcription (Submit the transcription job with parameters such as the audio files, the transcription language, and the transcription model.)
- Get batch transcription results (Check transcription status and retrieve transcription results asynchronously.)
Jobs for batch transcribing are scheduled on a best-effort basis. It’s impossible to predict when a job will enter the operating state, although it should happen within minutes under normal system demand. When the work is ongoing, the transcription speed exceeds the audio runtime playback speed.
Insights on Custom Speech:
The Azure speech-to-text service analyzes audio in real-time or batch to transcribe the spoken word into text. As a base model, speech-to-text uses a Universal Language Model that is trained with Microsoft-owned data and reflects commonly used spoken language. This base model has been pre-trained with dialects and phonetics that represent a wide range of common domains. In most cases, the base model is adequate.
The standard model may not be sufficient if the audio comprises ambient noise or includes a lot of industry and domain-specific jargon. Building a specialized speech model with additional data linked with that specific domain makes sense in these circumstances. We may build and train our own acoustic, language, and speech models.
A custom model can be used to augment the base model to improve recognition of domain-specific vocabulary specific to the application by providing text data to train the model. It can also be used to improve recognition based for the specific audio conditions of the application by providing audio data with reference transcriptions.
Here is how Custom Speech works:
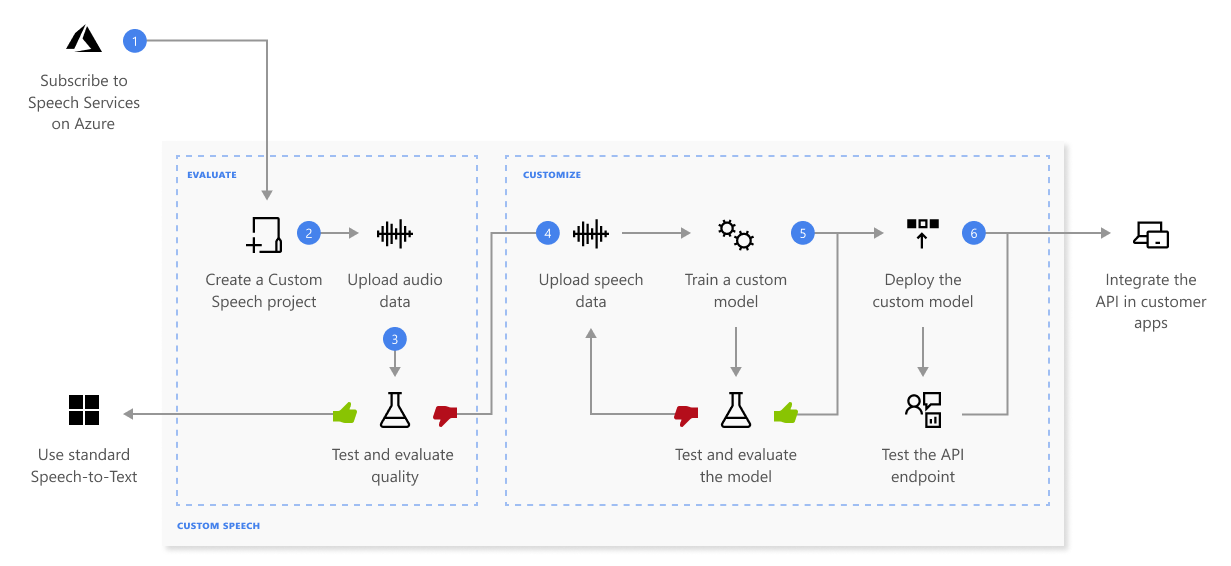
This is the information about the sequence of steps shown in the previous diagram:
- Create a project and choose a model. Use a Speech resource that we create in the Azure portal. If we train a custom model with audio data, choose a Speech resource region with dedicated hardware for training audio data. See footnotes in the regions table for more information.
- Upload test data. Upload test data to evaluate the Microsoft speech-to-text offering for our applications, tools, and products.
- Test recognition quality. Use the Speech Studio to play back uploaded audio and inspect the speech recognition quality of our test data.
- Test model quantitatively. Evaluate and improve the accuracy of the speech-to-text model. The Speech service provides a quantitative word error rate (WER), which we can use to determine if additional training is required.
- Train a model. Provide written transcripts and related text, along with the corresponding audio data. Testing a model before and after training is optional but recommended.
- Deploy a model. Once we are satisfied with the test results, deploy the model to a custom endpoint. With the exception of batch transcription, we must deploy a custom endpoint to use a Custom Speech model.
Speech-to-text REST API includes few features and they are mentioned below:
- Get logs for each endpoint if logs have been requested for that endpoint.
- Request the manifest of the models that er create, to set up on-premises containers.
- Upload data from Azure storage accounts by using a shared access signature (SAS) URI.
- Bring our own storage. Use our own storage accounts for logs, transcription files, and other data.
- Some operations support webhook notifications. We can register our webhooks where notifications are sent.
Difference between Base Model and Custom Speech-to-text Model:
A basic speech-to-text model has been trained using Microsoft data and is already in the cloud.
A custom model can be created and used to better fit an environment with specific ambient noise or language.
An adapted acoustic model would be required for factory floors, cars, or noisy streets. Biology, physics, radiology, product names, and custom acronyms would all necessitate an adapted language model. To improve the recognition of special terms and phrases, start with related text when training a custom model.
Now let us see few applications on Speech-to-text.
Recognize and convert Speech-to-text:
We have to run an application to recognize and transcribe human speech (often called speech-to-text).
Prerequisites
- Azure subscription
- Create a Speech resource in the Azure portal.
- Get the resource key and region. After your Speech resource is deployed, select Go to resource to view and manage keys. For more information about Cognitive Services resources, see Get the keys for your resource.
First, we have to Set up the environment:
The steps to set up the environment which require few installations are:
- Install the Speech SDK for Python which is available as a Python Package Index (PyPI) module (The Speech SDK for Python is compatible with Windows, Linux, and macOS).
- We must install the Microsoft Visual C++ Redistributable for Visual Studio 2015, 2017, 2019, and 2022 for our platform. Installing this package for the first time might require a restart. On Linux, we must use the x64 target architecture.
- Install a version of Python from 3.7 to 3.10.
Secondly, we have to Set environment variables:
To access Cognitive Services resources, our application must be authenticated. Use a secure method of storing and obtaining our credentials for production.
For example, after we have a key for our Speech resource, we can save it to a new environment variable on the local machine where the application is running.
Tip: Don’t include the key directly in our code, and never post it publicly.
To set the environment variable for your Speech resource key, open a console window, and follow the instructions for our operating system and development environment.
To set the SPEECH_KEY environment variable, replace your-key with one of the keys for our resource.
Windows:
setx SPEECH_KEY your-key- If we only need to access the environment variable in the current running console, we can set the environment variable with
setinstead ofsetx.
Linux:
export SPEECH_KEY=your-key- After we add the environment variable, run
source ~/.bashrcfrom our console window to make the changes effective.
To set the environment variable for our Speech resource region, follow the same steps. Set SPEECH_REGION to the region of our resource. For example, westus.
Recognize speech from a microphone:
These are the steps to create a new console application:
- Open a command prompt where we want the new project, and create a new file named
speech_recognition.py. - Run this command to install the Speech SDK:
pip install azure-cognitiveservices-speech- Copy the following code into
speech_recognition.py.
import os
import azure.cognitiveservices.speech as speechsdk

def recognize_from_microphone():
    # This example requires environment variables named "SPEECH_KEY" and "SPEECH_REGION"
    speech_config = speechsdk.SpeechConfig(subscription=os.environ.get('SPEECH_KEY'), region=os.environ.get('SPEECH_REGION'))
    speech_config.speech_recognition_language="en-US"

    audio_config = speechsdk.audio.AudioConfig(use_default_microphone=True)
    speech_recognizer = speechsdk.SpeechRecognizer(speech_config=speech_config, audio_config=audio_config)

    print("Speak into your microphone.")
    speech_recognition_result = speech_recognizer.recognize_once_async().get()

    if speech_recognition_result.reason == speechsdk.ResultReason.RecognizedSpeech:
        print("Recognized: {}".format(speech_recognition_result.text))
    elif speech_recognition_result.reason == speechsdk.ResultReason.NoMatch:
        print("No speech could be recognized: {}".format(speech_recognition_result.no_match_details))
    elif speech_recognition_result.reason == speechsdk.ResultReason.Canceled:
        cancellation_details = speech_recognition_result.cancellation_details
        print("Speech Recognition canceled: {}".format(cancellation_details.reason))
        if cancellation_details.reason == speechsdk.CancellationReason.Error:
            print("Error details: {}".format(cancellation_details.error_details))
            print("Did you set the speech resource key and region values?")

recognize_from_microphone()- To change the speech recognition language, replace
en-USwith another supported language.
To Run our new console application to start speech recognition from a microphone:
python speech_recognition.pyTo Speak into our microphone when prompted. What we speak should be output as text:
Speak into your microphone.
RECOGNIZED: Text=I'm excited to try speech to text.
How to use Azure Speech-To-Text service from Python
This service is part of a suite of pre-built AI services we can use to add intelligence to your apps in only a few lines of code. These services are known as Azure Cognitive Services.
To use these samples, we need an Azure subscription, and an Azure Speech to Text resource.
Create an Azure subscription
- To use Azure services you will need an Azure subscription. If you don’t have a subscription you can sign up for free.
Create the Speech to Text resource
- To use the Azure Speech to Text service, you will need to create a resource in your Azure subscription.
Create the resource using the Azure Portal
- Launch the Azure Portal
- Log in with the account we used to create our Azure subscription
- Select + Create a resource from the home screen or the side menu

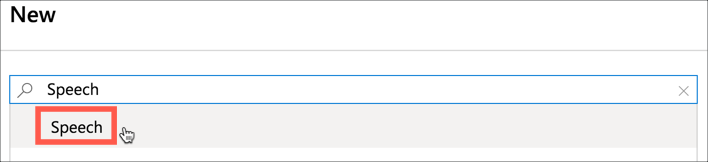
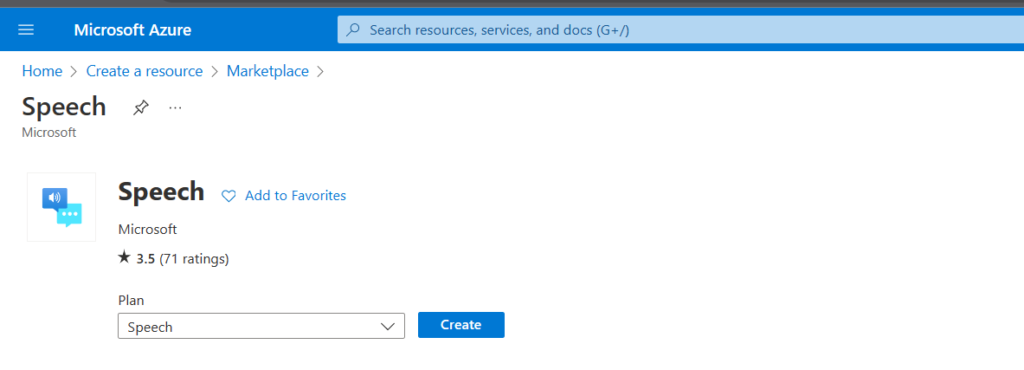
4. Search for Speech and select Speech from the drop down
5. Select Create
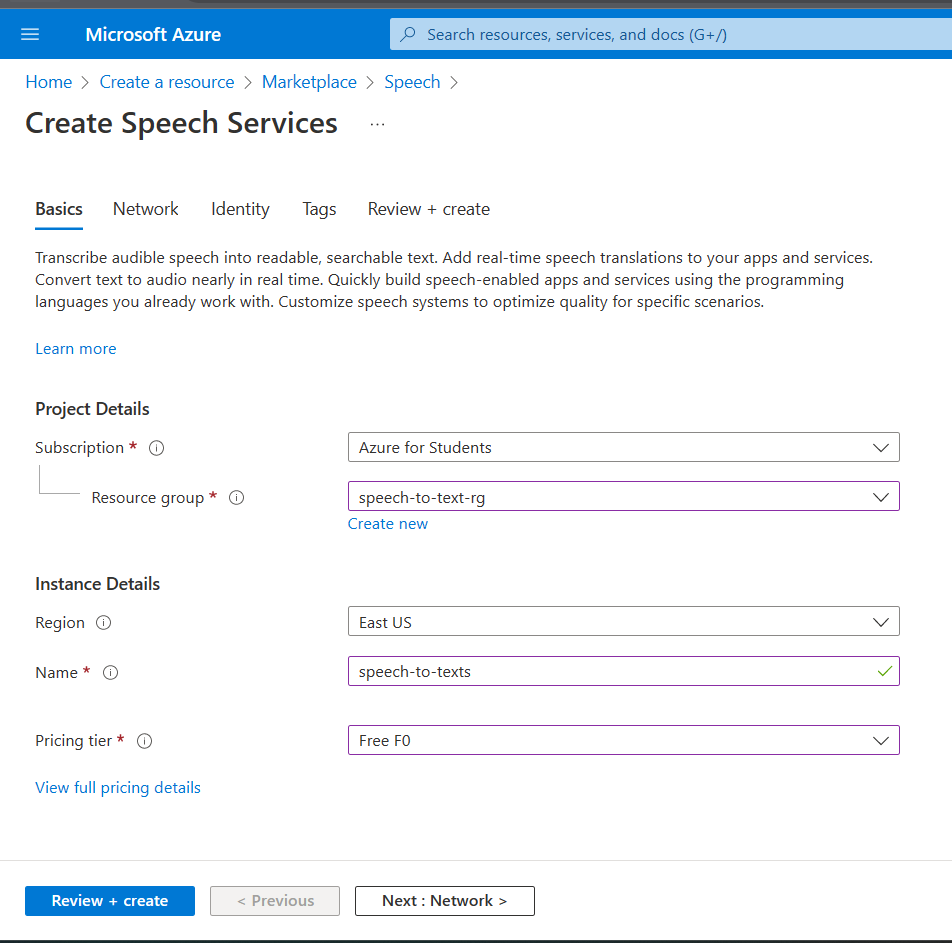
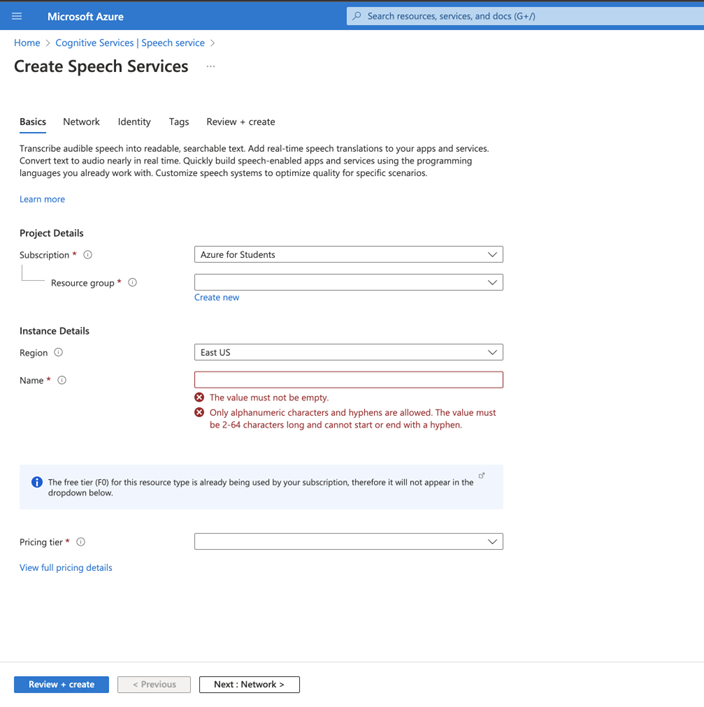
6. Fill in the details for the resource:
- For the name, enter
speech-to-textfollowed by the name. Speech resources created through the portal need to have a globally unique name, so we will need something unique. - Select the subscription we can use.
- Select the location closest to where we are. We will be able to see the regions on a map on the Azure Regions page.
- Select the F0 pricing tier. This is the free tier
- For the resource group, select the Create new option, and name the resource group
speech-to-text-rg. Select OK to set the new resource group name.
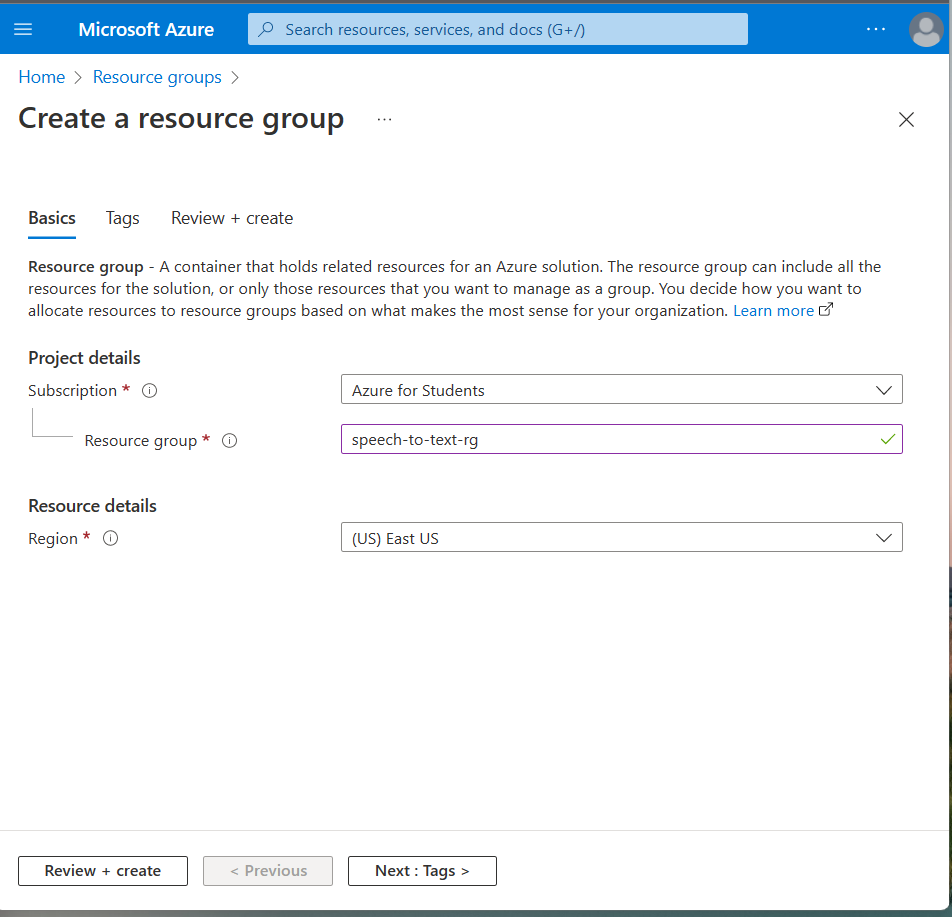
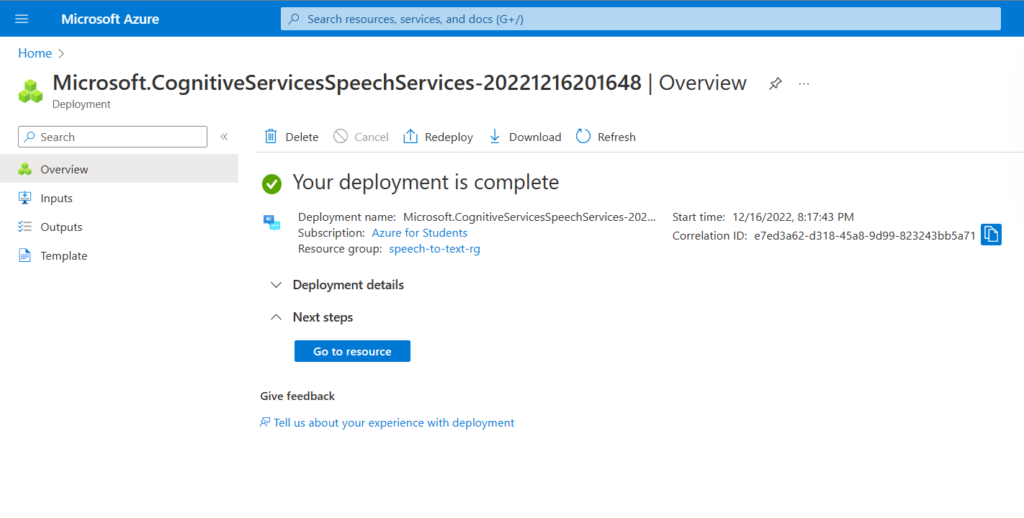
7. Select Create.
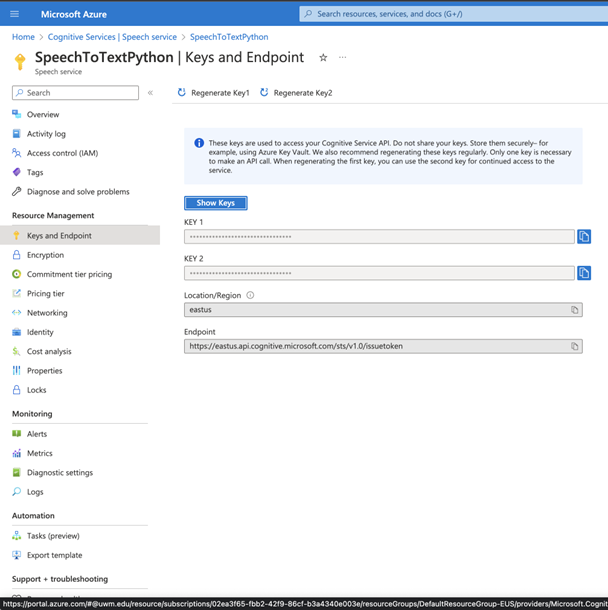
8. The resource will deploy, and we will get a notification when done. Select Go to resource from the notification.
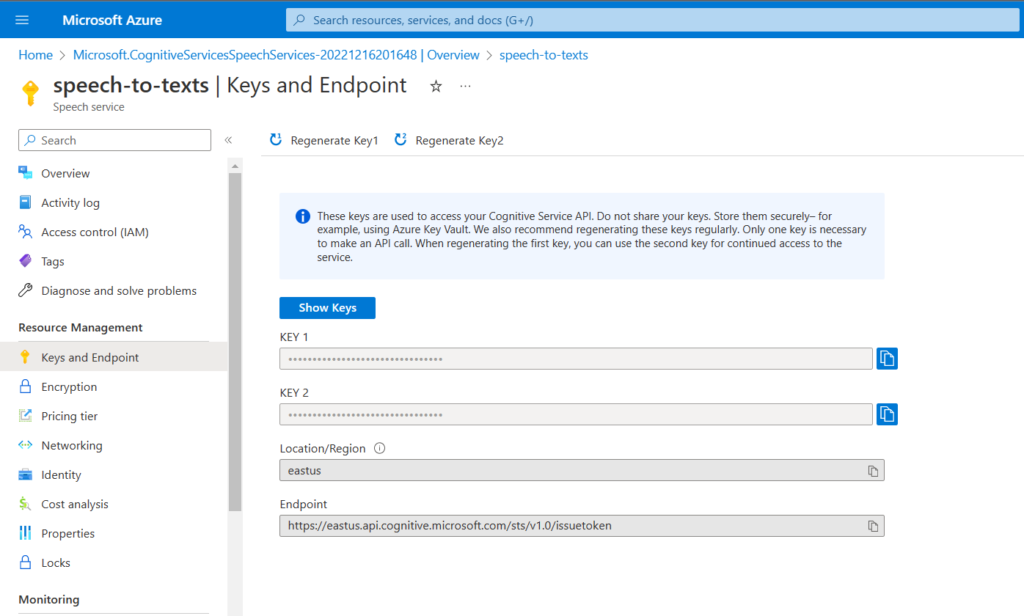
9. From the resource blade, select Resource Management -> Keys and Endpoint*
10. Make a note of the value of Key 1 and Location.
Create the resource using the Azure CLI
- If you don’t have the Azure CLI installed, install it by following these instructions on Microsoft Docs
- Sign into the Azure CLI using the following command:
az login- This will launch a browser window where we can log in with the account, we used to create your Azure subscription. Once logged in we can close the browser window.
3. If we have more than one Azure subscription (such as a student subscription and a university subscription), ensure to have the correct subscription set.
- Use the following command to list all our available subscriptions:
az account list \
--output table- Set the active subscription using the following command:
az account set
--subscription <subscription_id>- Set
<subscription_id>to the appropriate value from theSubscriptionIdcolumn in the table output by the previous command.
4. Azure has multiple regions worldwide. When we create a resource, we select the region. We should select the one closest. To see all available regions for our subscription, use the following command:
az account list-locations --output table- Note the value from the
namecolumn for the location closest. We can see the regions on a map on the Azure Regions page. Make a note of this location as we will need it to run the samples.
5. Create a resource group to contain our resource. Resource groups are logical groupings of resources that allow us to manage the resources together, for example deleting a resource group to delete all the resources that it contains. Use the following command to do this:
az group create \
  --name speech-to-text-rg \
--location <region>- Replace
<region>with the location closest.
- This will create a resource group called
speech-to-text-rg.
6. Once the resource group has been created, create the Speech to Text resource. Do this using the following command:
az cognitiveservices account create \
  --name speech-to-text \
  --resource-group speech-to-text-rg \
  --kind SpeechServices \
  --sku F0 \
  --yes \
--location <region>- Replace
<region>with the location we used to create the resource group.
- This will create a Speech to Text resource called
speech-to-textin thespeech-to-text-rgresource group. This will use the free tier.
7. To access this resource from code, we will need a key. We can list the keys using the following command:
az cognitiveservices account keys list \
  --name speech-to-text \
  --resource-group speech-to-text-rg \
--output table- Take a note of the value from the
Key1column as we will need it to run the samples.
Steps
1) Get azure api keys from Azure console :
- Go to the azure console and search for “Speech Services”
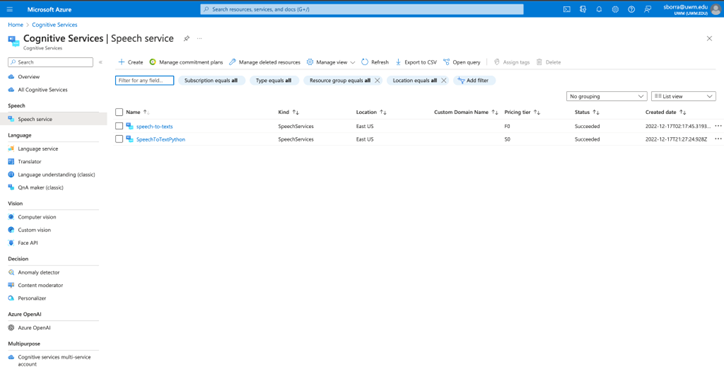
- Click on create and create a new speech service
- Open the newly created speech service resource and click on “Keys and Endpoint” in left , copy the Key 1
2) Setup Prerequisites
- Make sure your laptop has microphone access, and has python installed in it
- Open any folder, and open the terminal in this location
- install this package by running the following command
pip install azure-cognitiveservices-speech
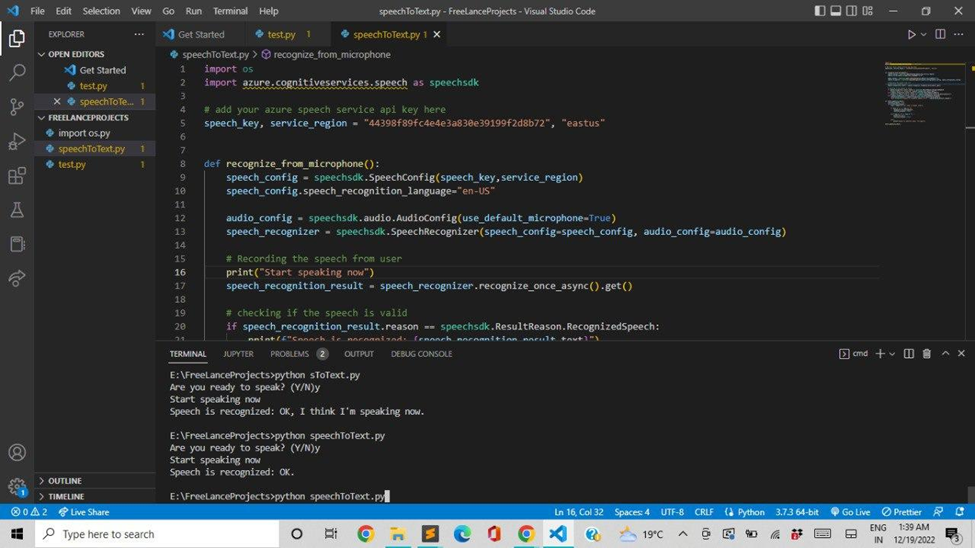
3) Code and execution
- In the previously created location, create a file names SpeechToText.py
- Open the file and paste the following code
- <Optional> Replace the speech_key with your own Key copied in the Step 1)
- In the terminal, run this command python SpeechToText.py
Code:
import os
import azure.cognitiveservices.speech as speechsdk

# add your azure speech service api key here
speech_key, service_region = "44398f89fc4e4e3a830e39199f2d8b72", "eastus"


def recognize_from_microphone():
    speech_config = speechsdk.SpeechConfig(speech_key,service_region)
    speech_config.speech_recognition_language="en-US"

    audio_config = speechsdk.audio.AudioConfig(use_default_microphone=True)
    speech_recognizer = speechsdk.SpeechRecognizer(speech_config=speech_config, audio_config=audio_config)

    # Recording the speech from user
    print("Start speaking now")
    speech_recognition_result = speech_recognizer.recognize_once_async().get()

    # checking if the speech is valid
    if speech_recognition_result.reason == speechsdk.ResultReason.RecognizedSpeech:
        print(f"Speech is recognized: {speech_recognition_result.text}")
    elif speech_recognition_result.reason == speechsdk.ResultReason.NoMatch:
        print(f"No speech could be recognized: {speech_recognition_result.no_match_details}")
    elif speech_recognition_result.reason == speechsdk.ResultReason.Canceled:
        cancellation_details = speech_recognition_result.cancellation_details
        raise Exception(f"Unable to recognize speech, Error : {cancellation_details.reason}")

def start_speech_to_text():
    continue_program = True
    while(continue_program) :
        resp = input("Are you ready to speak? (Y/N)")

        if resp == "y" or resp == "Y":
            recognize_from_microphone()
            continue_program = False

        elif resp == "N" or resp == "n" :
            print("Bye Bye")
            continue_program = False

        else :
            print("Unable to identify input, try again")

start_speech_to_text()