In this blog, I’ll show you how to incorporate several AWS services into a simple, serverless workflow. The idea is to create an SQS queue, then using an HTTP API to trigger a Lambda function that sends messages to the queue.
What is serverless computing?
Serverless computing is a means of offering on-demand backend services. Users may use a serverless provider to build and publish code without having to worry about the underlying infrastructure. A firm that uses a serverless vendor for backend services is charged depending on their calculations and does not have to reserve and pay for a predetermined amount of bandwidth or number of servers.
Serverless computing allows developers to purchase backend services on a flexible ‘pay-as-you-go’ basis, meaning that developers only have to pay for the services they use. Serverless means that the developers can do their work without having to worry about servers at all.
Advantages of serverless computing:
- Developers using serverless architecture don’t have to worry about policies to scale up their code. The serverless vendor handles all of the scaling on demand.
- Serverless computing is generally very cost-effective
- With Function as a Service(FaaS), developers can create simple functions that independently perform a single purpose, like making an API call.
- Serverless architecture can significantly cut time to market. Instead of needing a complicated deploy process to roll out bug fixes and new features, developers can add and modify code on a piecemeal basis.
A little bit of introduction about the AWS services that we used for creating this work flow:
Lambda is a serverless computing service provided by Amazon Web Services (AWS). It allows you to run code without having to manage any servers. Lambda handles all compute resources, including provisioning, monitoring, and scaling, enabling you to focus on code.Lambda is a great tool to make other AWS Services work optimally together. Lambda is a serverless compute service that allows users to run event-driven functions. We will be using Lambda to send a message to our SQS Queue.
Amazon Simple Queue service is a distributed message querying service which supports standard Queue and FIFO queue. Amazon SQS supports programmatic sending of messages via web service applications as a way to communicate over the internet. Amazon SQS offers a secure, durable, and available hosted queue that lets you integrate and decouple distributed software systems and components.
SQS is intended to provide a highly scalable hosted message queue that resolves issues arising from the common producer-consumer problem or connectivity between producer and consumer. SQS eliminates the complexity and overhead associated with messaging and operating message-oriented middleware. It empowers the developers on differentiating the work. Using SQS we can store and receive the messages between software components at any volume without losing a message.
An API (Application Programming Interface) Gateway is an individual proxy server and management tool that sits between a client and backend services. An API is a messenger that delivers a request to the provider you are requesting from and then delivers a response to you. You can make API calls and set API as a trigger in Lambda.
We’ll use all three of these services to send a message to our queue that will show us the current date and time.
Workflow:
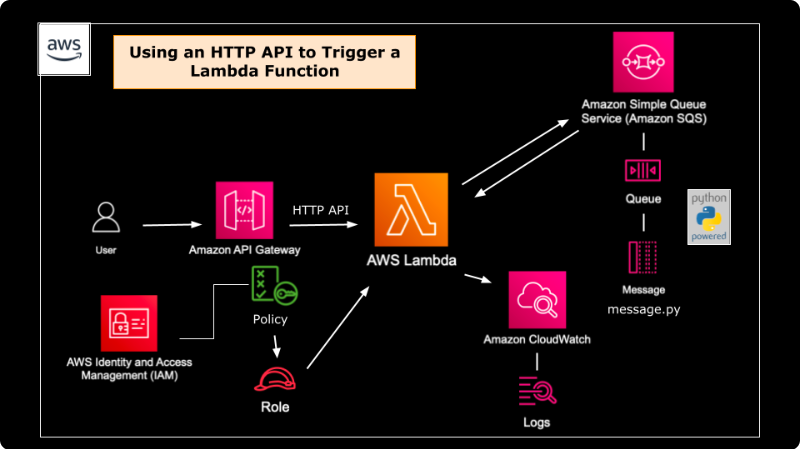
The following are the steps are used in this blog to create this workflow:
1.Create a standard SQS queue in the AWS management console
2.Create a Lambda function in the console with a Python
3.Modify the Lambda to send a message to the SQS queue. The message should contain the current time. Use the built-in test function for testing.
4.Create an API Gateway HTTP API type trigger.
5.Test the trigger to verify the message was sent.
Prerequisites to do this exercise:
- AWS IAM user with administrative access
- Basic understanding of creating and running python scripts
Step involved in this workflow process is :
Step 1 : Create a standard SQS queue in the AWS management console
In AWS management console, navigate to Amazon Simple Queue Service and then create a new queue. Enter the name of the queue and select the type of queue as Standard. Leave the remaining setting as default. Click on create queue.
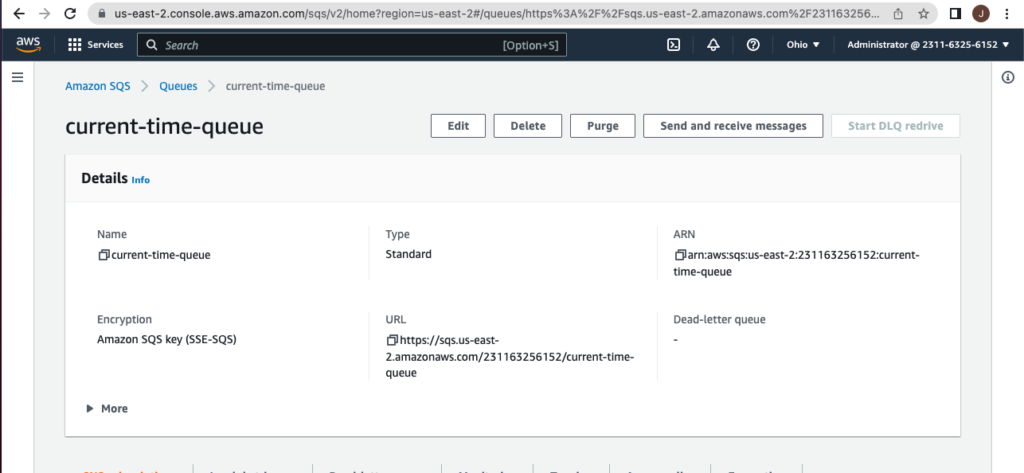
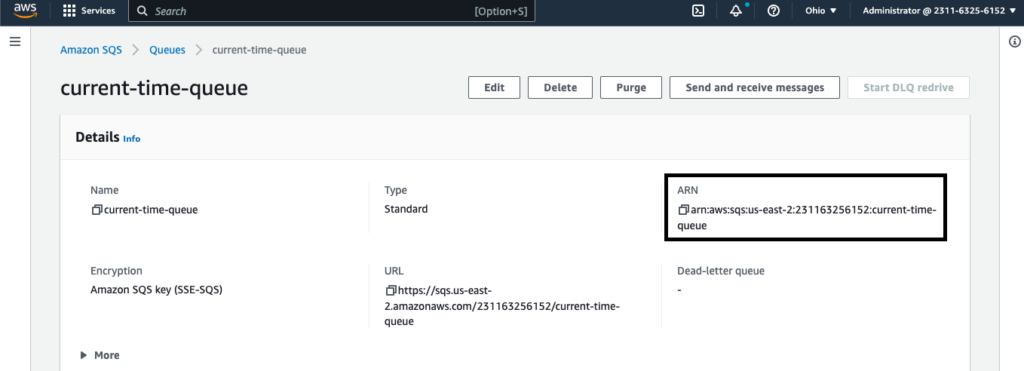
In AWS management console, navigate to AWS Queue services and select the newly-created queue and copy the ARN for later — it will be needed when editing the permissions policy of the lambda execution role.
Step 2 : Create a Lambda function in the console with a Python
In AWS management console, navigate to Lambda and then click on create function.
Provide the function name and select appropriate runtime – python 3.9 and then in the execution role section select the option to make new execution role. Click “create function”
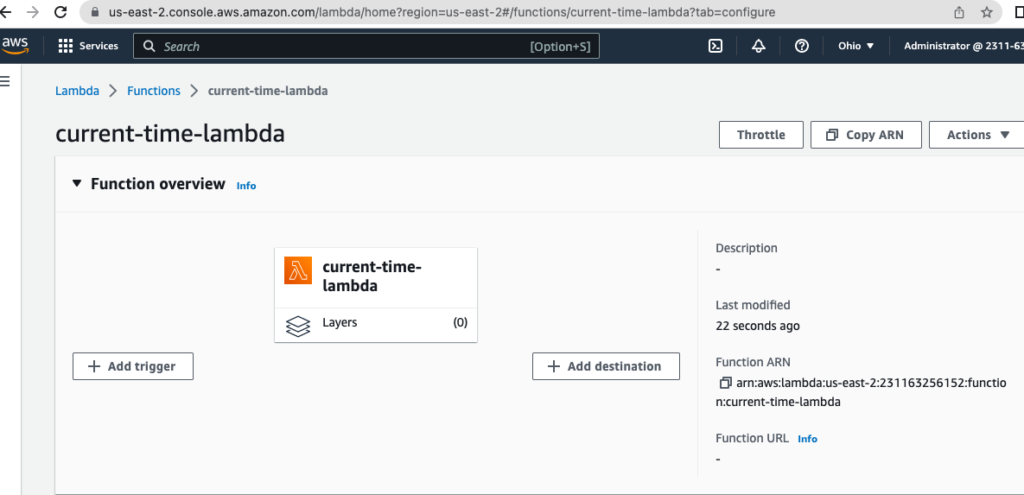
The new execution role must be changed after the function is created to permit access to SQS when triggered. Search for the freshly formed execution role by entering in the function name in the IAM section of the AWS Management Console’s “Roles” section; it should populate on its own.
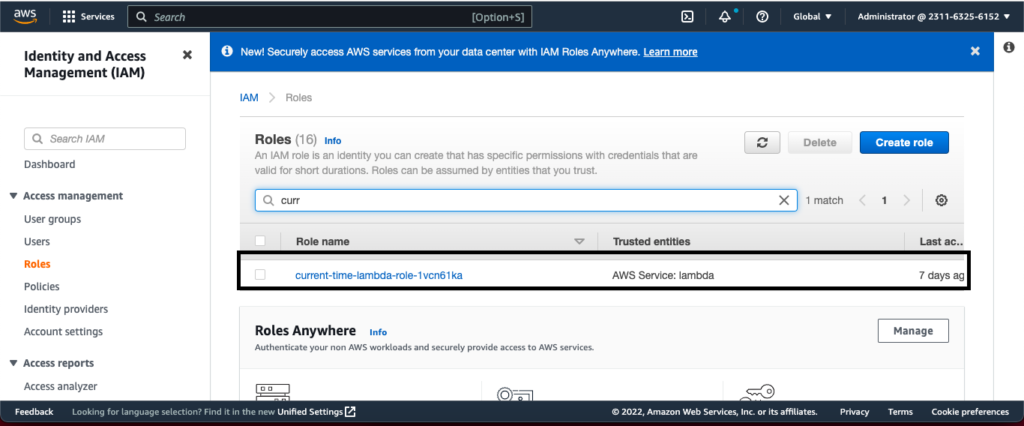
Search the execution role that was created with the function and select it.
Click on the policy name to edit the policy directly. The execution policy that was made with the function does not contain any permissions that would grant Lambda access to SQS, thus we must add that section with the SQS queue ARN to the current policy.
Click on the “Edit policy” and click on the JSON tab to view and edit the policy. Add the SQS permissions — to send messages to SQS — and paste the ARN of the SQS queue that we have copied earlier from the SQS queue in the Resource element.
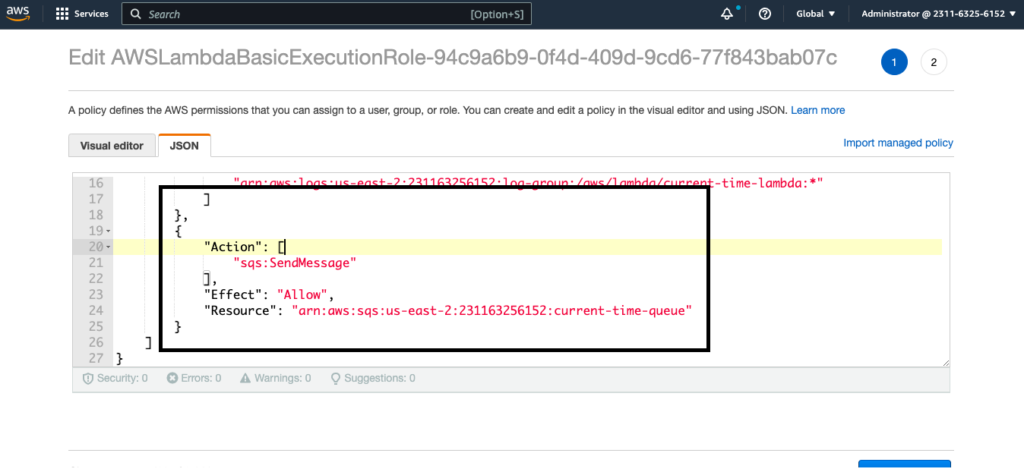
Click “Review policy” and “Save changes” .
Step 3 : Modify the Lambda to send a message to the SQS queue. The message should contain the current time
Now that we have set up the serverless function, we can write the code. While in Lambda, open the function you recently created to view the Code source. Using the gist below, modify the existing Lambda function to send a message to SQS that contains the current time.
The code to generate the current time produces a result in UTC, or Coordinated Universal Time and send the message to the queue service. Here we use the boto3 client to invoke the AWS SQS service . The python SDK (i.e., boto3) used a method named send_message to sent a message to the sqs by providing the QueueURL and MessageBody. If the code successfully sent the message then code will return status code of 200 and prints the body of the message.
import json
import boto3
from datetime import datetime


def lambda_handler(event, context):

    print("Http API Gateway trigger invoked")
    now = datetime.now()                                        #current date and time
    date = "%m/%d/%Y"                                           #date format
    time = "%H:%M"                                              #time format
    current_time = now.strftime(date+" "+time)
    message = "This message was sent at: " + current_time

    sqs = boto3.client('sqs')

    sqs.send_message(
        QueueUrl="https://sqs.us-east-2.amazonaws.com/231163256152/current-time-queue",
        MessageBody=current_time
    )

    return {
        'statusCode': 200,
        'body': json.dumps(message)
    }
Be sure to click “Deploy” to save any changes made in order to apply them to the test.

Before moving on, let’s use the built-in test function to test the code above. To do this, select Test. The Configure test event page will pop up and then enter the name of the test event and template and then select “Save”.
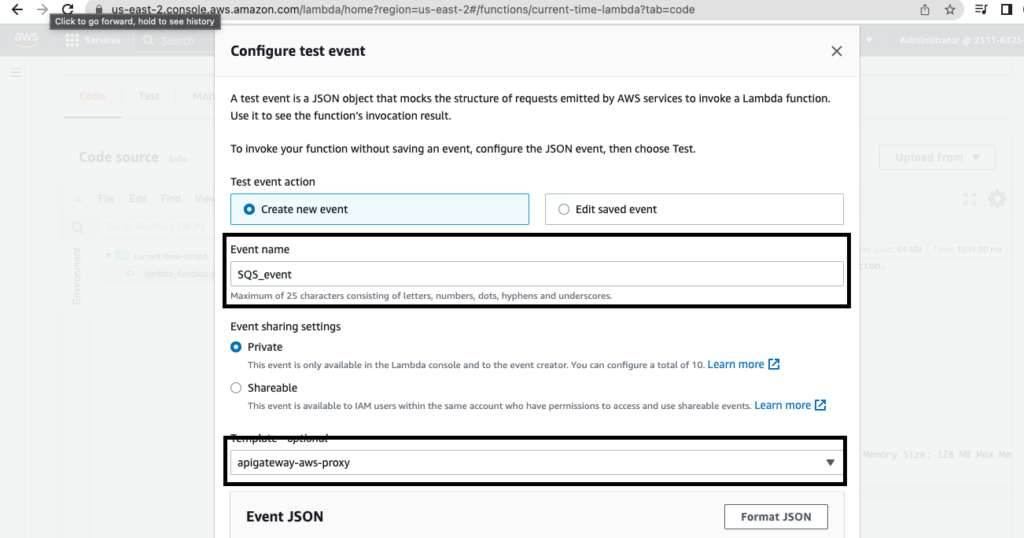
I named test event as SQS_event and configured it using the template called API Gateway — AWS Proxy as I will be using an HTTP API trigger for this function.
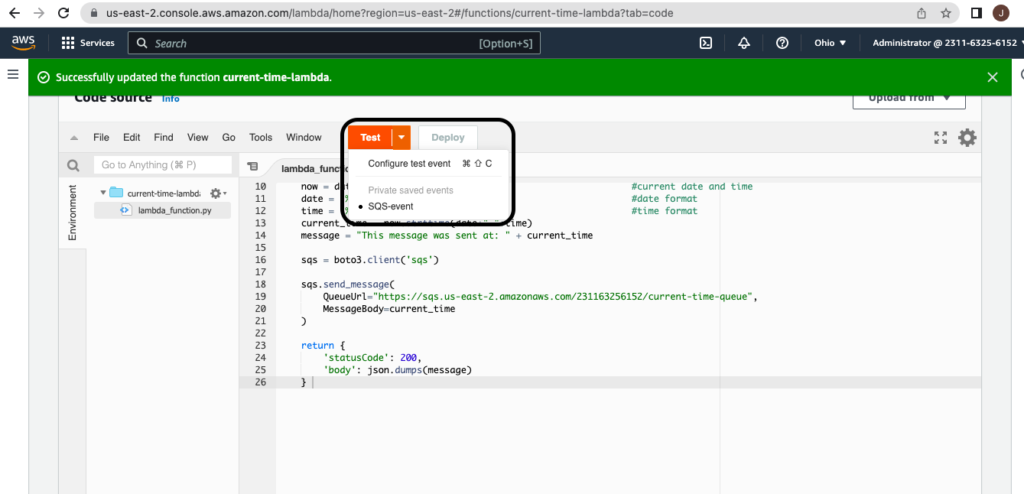
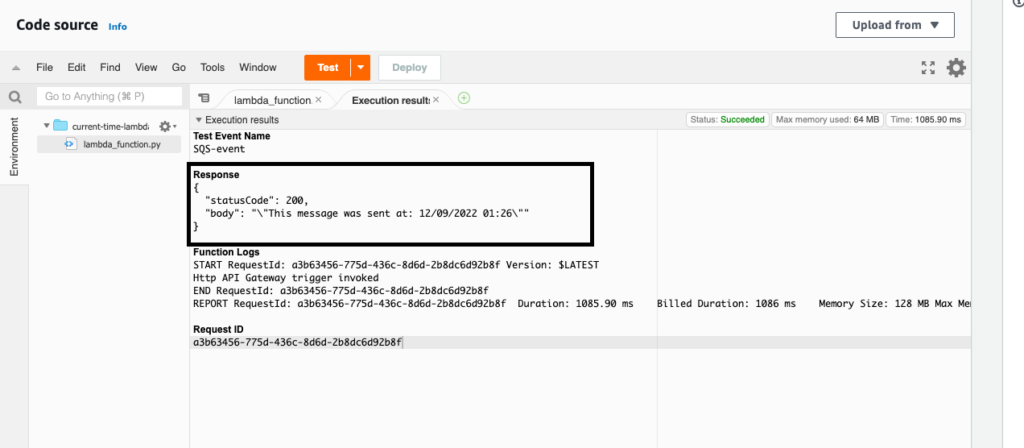
You can now select Test again and see that the Test Event was successful. After configuring the test event, click “Save” and proceed to test the function.We know this by looking under Response. The “Status” and “Response” portions of the execution results should show that the test was successful and that the current time was returned from the function.
Step 4: Create an API gateway HTTP API type trigger
In the Function overview or in configuration section, go to Triggers select + Add trigger and
Select a API Gateway trigger and for API type select HTTP API.Pick Open for Security.
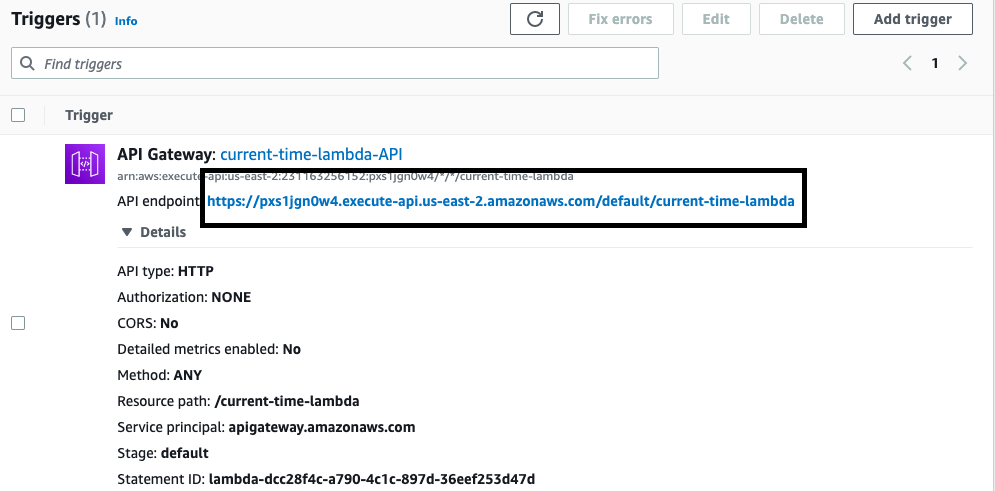
Then select Add and you should automatically be brought back to the page below, which states that the trigger was successfully added to the Lambda function.
Step 5: Test the trigger to verify the message was sent :
Select the API endpoint URL; this will open up a new tab in the web browser and display our message with the date and time.

Moving back over to the Lambda web browser tab, select Services => Application Integration =>Simple Queue Service.The queue gains a message with each function invocation.

From here, choose the queue that we created earlier and select Send and receive messages.
Now click on Poll for messages. Once finished, you will see we have messages available to view.
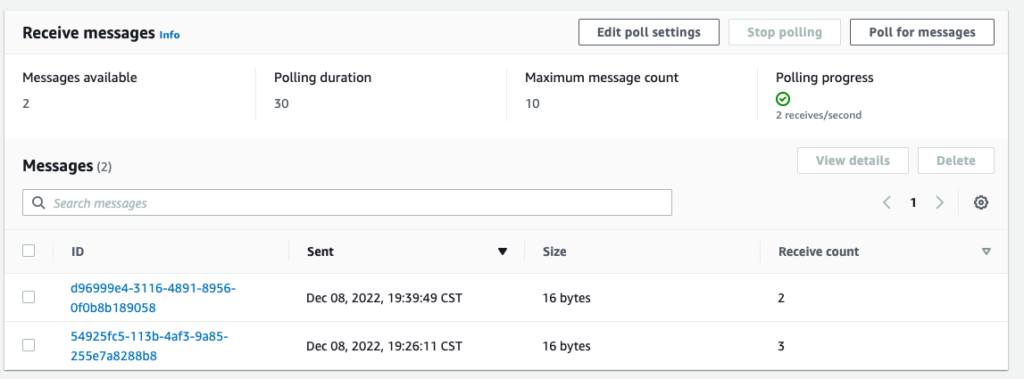
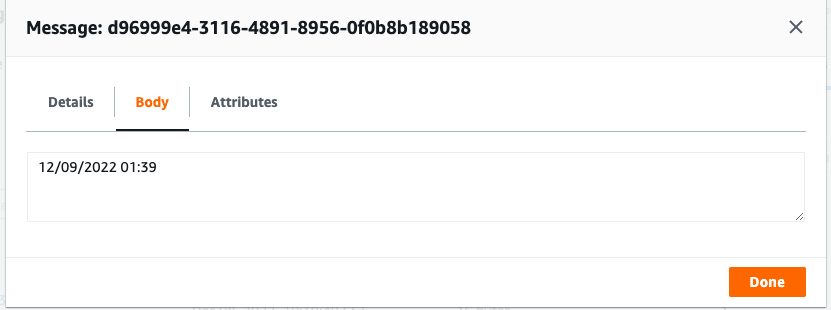
When you select that message, the image below shows us our message with the date and time.
We have completed all the objectives and were able to send a message to the SQS queue by triggering our Lambda function with an API Gateway.
This blog article covered how to develop a serverless function in Python to deliver messages to a queue. We began by discussing the various serverless computing and AWS services that are used in this exercise. Developers may quickly and simply establish a serverless function to send messages to SQS by following the steps indicated in this blog post. The purpose of this exercise was to illustrate how a basic serverless workflow can be setup using AWS services and Python.