This is step 4 of 6 of Hands-On Project 2 for Azure and Amazon Web Services. In this step, you create a new Python project and virtual environment under Visual Studio code and get a Hello World program running in the VS Code Debugger. Note that this process can be used to set up any development computer for Python under VS code, whether the development machine is in the cloud or not, provided that you have installed all the software identified in project steps 1 – 3.
Create a New Project and Virtual Environment Using pipenv
Since we are using pipenv as our chosen tool for Python package and virtual let’s use it to create a new project and virtual environment under VS Code. Connect to your virtual machine using Remote Desktop Protocol and get into Ubuntu Desktop. Open a terminal window and run the following sequence of commands:
Make sure you are in your home directory:
cd ~Create a new directory to hold all the files in the new project, then go to it and start up VS Code. Use whatever directory name you would like:
mkdir pycloud
cd pycloud
code .
Using pipenv, you create a virtual environment simply by installing the first Python package you need. We will install a very popular numerical package for Python called numpy. We won’t really be using numpy for this example – it’s just some package we can install. Usually when you create a new virtual environment and project, you know which package you need to install first.
Within VS Code, open a New Terminal window, then enter the following command:
pipenv install numpyThis creates the virtual environment, then installs the numpy package. You will receive messages confirming that a new virtual environment was created:
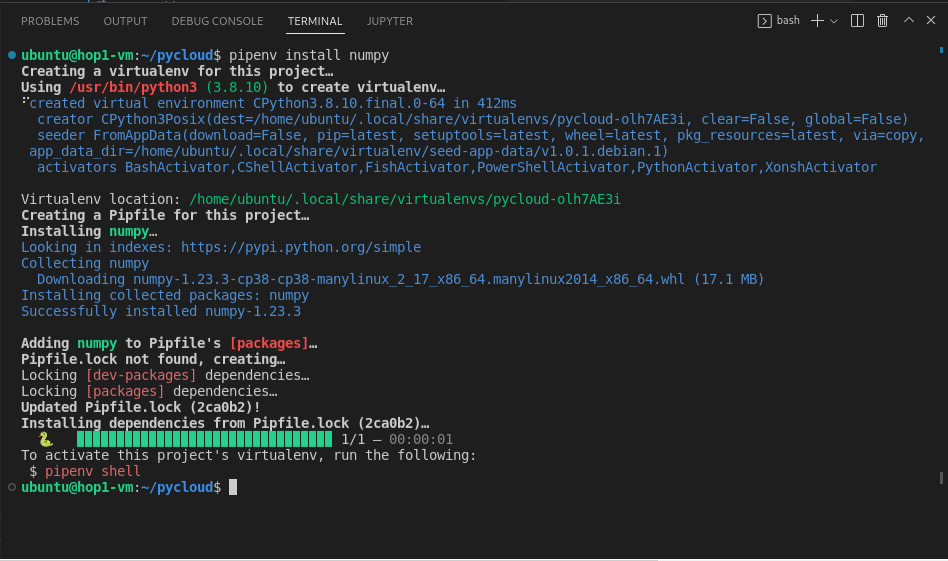
This output shows that the virtual environment was created in the /home/ubuntu/.local/share/virtualenvs/pycloud-olh7AE3i/ folder. As usual for Python virtual environments, this folder contains a full install of Python and all the packages installed into the virtual environment. You can go there to see what is all included so far.
In addition to creating the virtualenv, pipenv also created two files in your project folder: Pipfile and Pipfile.lock:
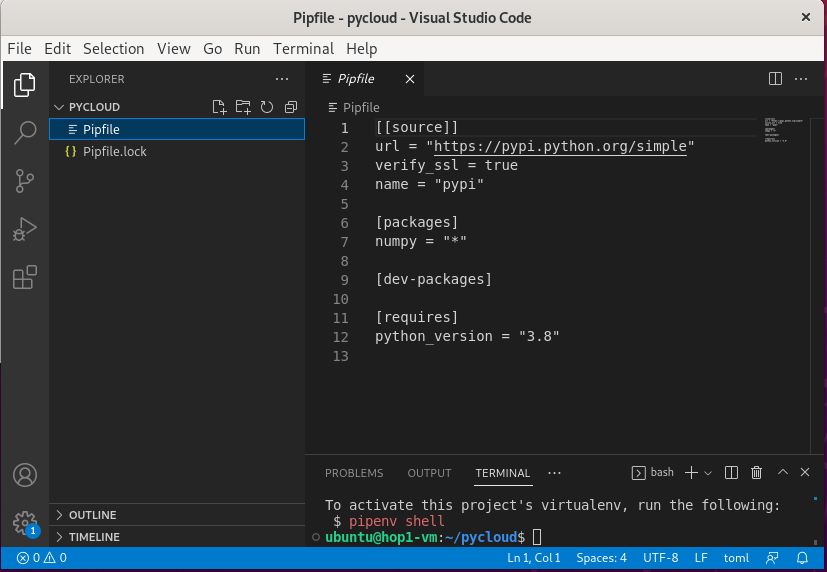
Pipfile defines what packages are included in the project (under the [packages] and [dev-packages] sections), and also which version of Python is being used in the virtual environment. Later on, you can use Pipfile to install all the dependencies for your project on another computer. The Pipfile.lock file is created by pipenv to resolve and store all of the package dependencies for this project in detail. Generally, each time you install another package using pipenv, pipenv rebuilds the entire Pipfile.lock file.
One useful command to use at this point is the pipenv graph command, which shows the dependency graph of the packages installed in the virtual environment. The pip list command seems to work just as well:
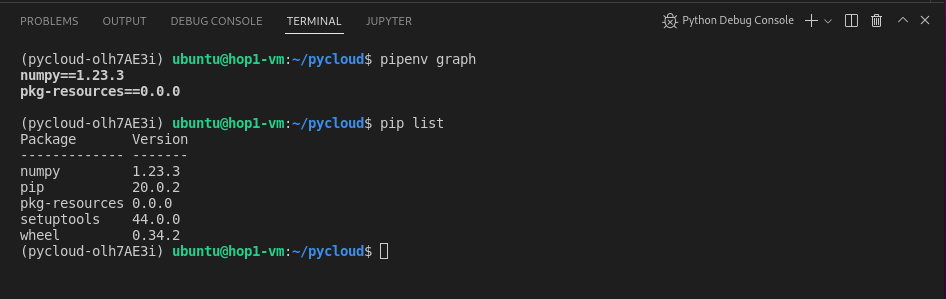
The graph command will become more and more important the more packages you have installed in the virtual environment.
Select the Python Interpreter
Now that we have our virtual environment, we need to tell VS Code to use the Python interpreter that is stored there for this project. Within VS Code, select View | Command Palette or press Ctrl-Shift-P. Then begin typing Python: Select and click to select the Python Interpreter:
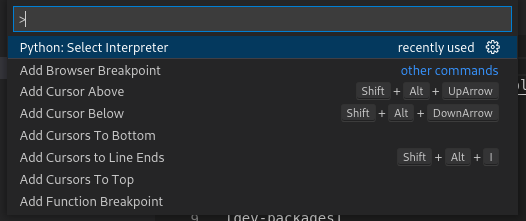
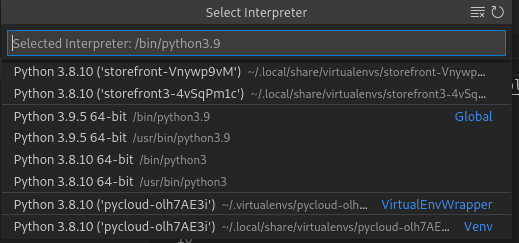
This will display a list of interpreter choices. Scroll down if necessary to find the virtual environment we just created – pycloud-olh7AE3i in this case – and choose either of them as our interpreter. They are at the bottom of this list:
We’re now ready to verify that our setup is working.
Verify that Python is Working Within VS Code
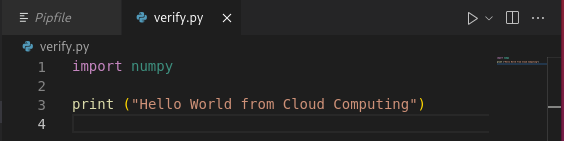
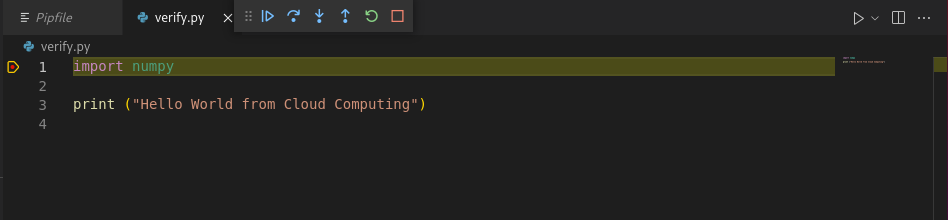
Create a new file in VS Code with a .py extension. Create a small program like the one below. Import the numpy package to be sure that it exists in our virtual environment, then print a message. When we run it, if the message gets printed, we know that numpy is installed.
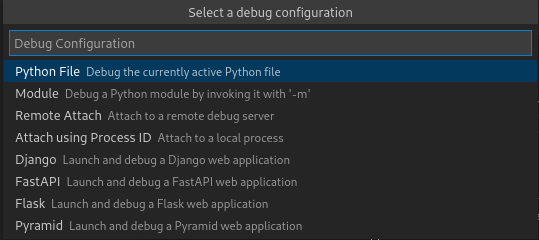
To run the program, press F5, or select Run | Start Debugging. The first time you do this within a session, you will need to select a debug configuration. Choose Debug the currently active Python file:
After selecting the debug configuration, VS Code activates the virtual environment and runs the program. If all is well, the results look like this:
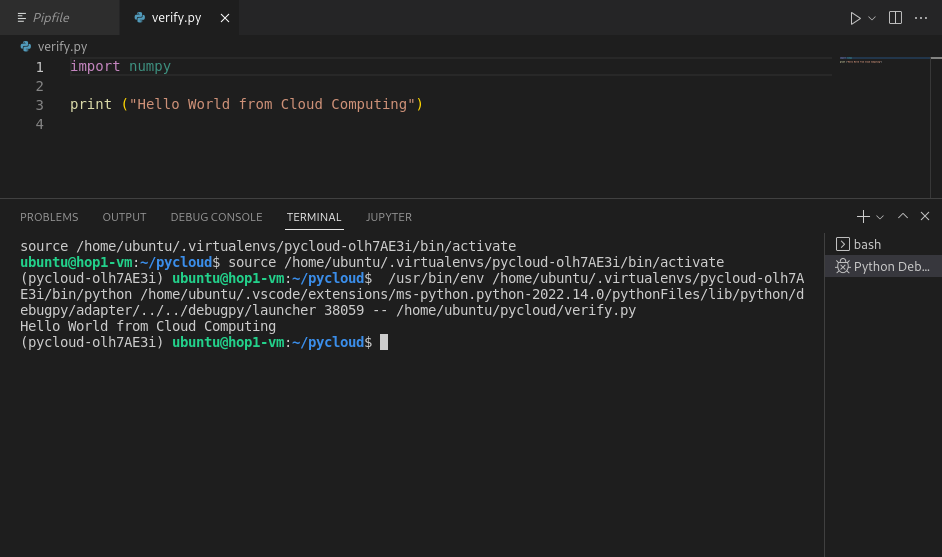
Please notice the following in the run results:
- VS Code “knows” that the virtual environment is needed and is not yet active. It therefore activates the virtual environment. After doing so, you can see that the venv is active by the (pycloud-olh7AE3i) in the prompt on the next line.
- VS Code runs a “launcher” program within the virtual environment, which in turn runs your Python program.
- The import of numpy was successful and the output of the print statement is visible.
Check Out the VS Code Debugger
When running in debug mode as we did above, we can use the Code debugger to set breakpoints and step through code. Set a breakpoint by clicking on the first line of Python code, in the left margin of the code window, then press F5 to start the debugger. The program will stop at the breakpoint:
At this point, you can inspect variables at the left, step through code using F10 and F11, and many other things that the debugger supports.