This is step 3 of 5 of Hands-On Project 4 for Amazon Web Services. In this step, you make final changes to the Django application configuration to allow it to be deployed successfully to Elastic Beanstalk.
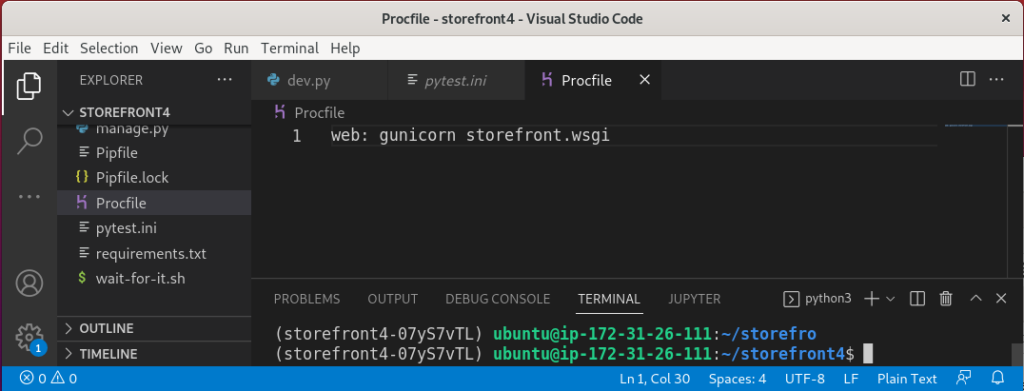
Add a Procfile
Within Elastic Beanstalk, a Procfile directs the Elastic Beanstalk Python runtime to run specific commands at certain times. In our situation, we need to make sure that Elastic Beanstalk runs the gunicorn web server with the correct command after the application has been deployed. Only one line is needed. Note that this is the same command that we used to run gunicorn on our cloud development PC, with “web: ” added to the beginning:
web: gunicorn storefront.wsgiAdd a Procfile to your storefront4 folder and add the required line. This screenshot shows it when complete:
Update Django ALLOWED_HOSTS
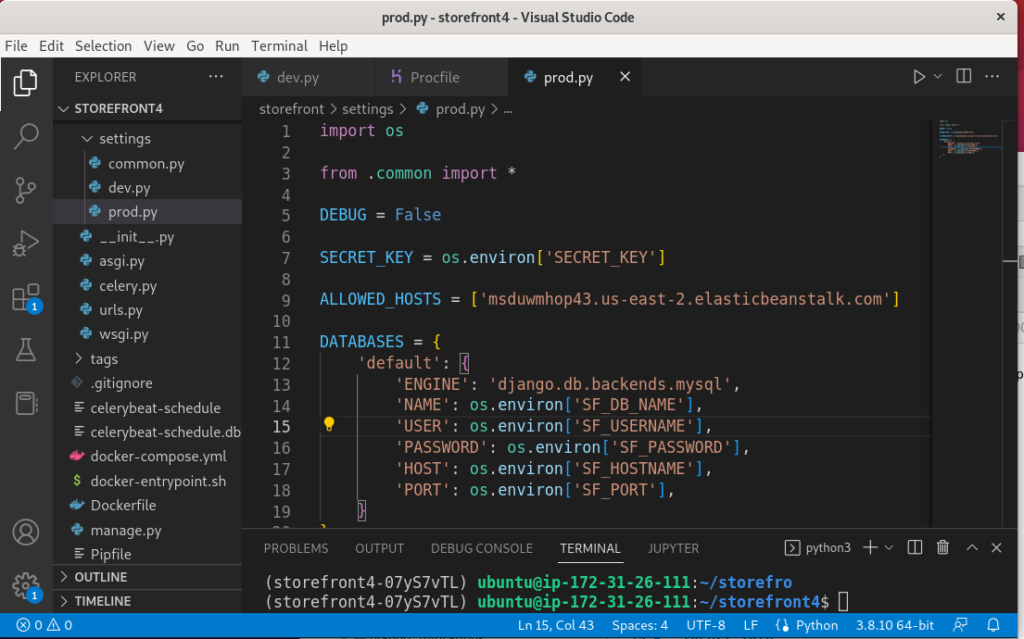
The Django web framework requires that we identify the host names from which the application will accept web requests. This is done in the settings file with the ALLOWED_HOSTS variable. In development, we allowed access from localhost because we were running the development web server only on localhost. In production, we need to provide a host name to allow the application to accept requests from the public URL of the application.
Note that we could not do this settings change until we knew the public hostname for our web server. Now that our Elastic Beanstalk environment has been created, we can just look it up:
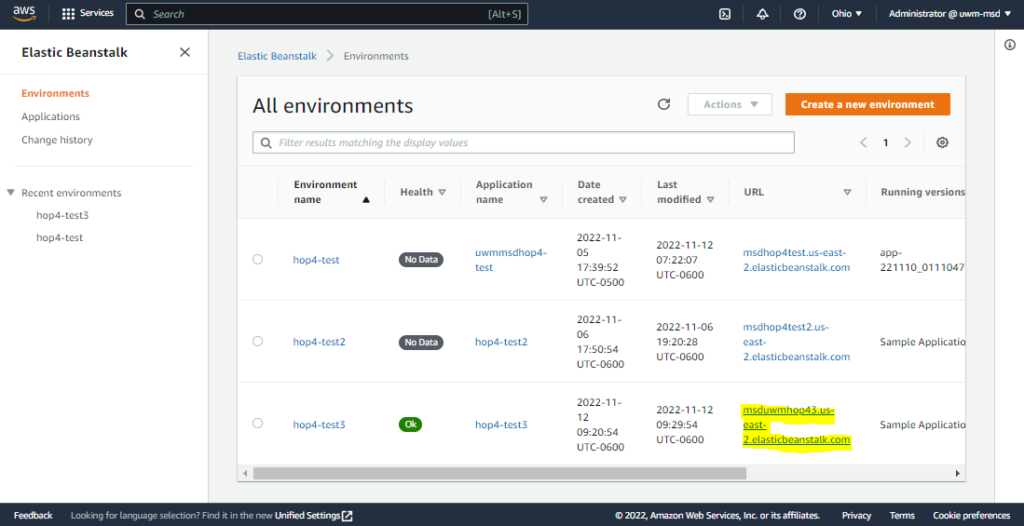
Open the /storefront4/settings/prod.py file and enter the hostname for the production application:
Install Elastic Beanstalk CLI
For deployment, our process will be to deploy directly from our cloud development PC to Elastic Beanstalk. This is a bit of a shortcut. In a real production deployment, the code would most likely be pushed to a repository (such as Github) and deployed from there. We are bypassing this detail to make this project a little simpler.
To deploy directly from the file system of our development computer, we will use the Elastic Beanstalk Command Line Interface (CLI). Please copy the link below and use Firefox on your cloud PC to access the instructions and install the EB CLI. (You need to install this on your cloud PC, not your local PC).
https://github.com/aws/aws-elastic-beanstalk-cli-setup
After the above is completed, two more steps are needed to make sure the eb command will work on your cloud PC:
1. From a terminal window, install the python-is-python3 package:
sudo apt updatesudo apt install python-is-python32. Add the EB CLI executable to your PATH statement. Use nano to edit your .bashrc file:
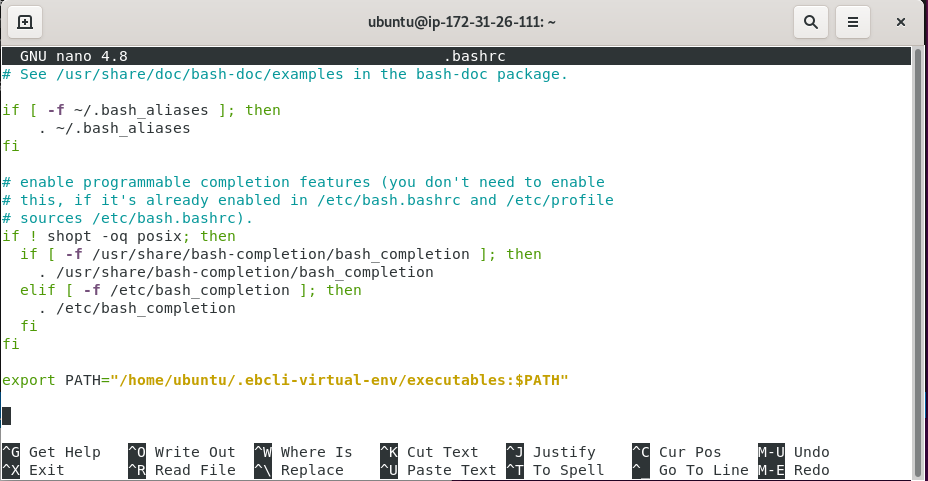
cd ~nano .bashrcAt the bottom of the file, add the following line:
export PATH="/home/ubuntu/.ebcli-virtual-env/executables:$PATH"The result looks like this:
Save the .bashrc file, then update your path with:
source .bashrcLink Application to Your Elastic Beanstalk Environment
The Elastic Beanstalk CLI provides the init command, which allows you to provide a target environment to be used each time the application is deployed.
eb initAfter installing the CLI, run eb init from your VS Code virtual environment. Select the appropriate region and Elastic Beanstalk environment. The results look like this:
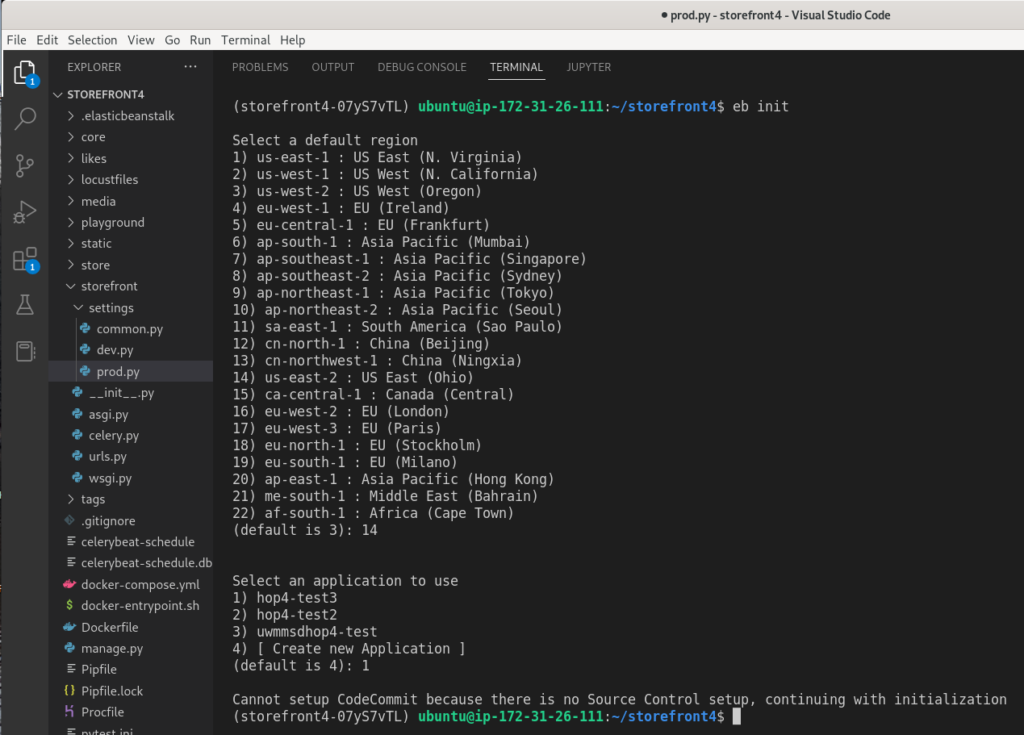
Note that the eb init command accessed resources that exist within your AWS account. To do so, it accessed the account credentials you saved previously using the aws configure command.
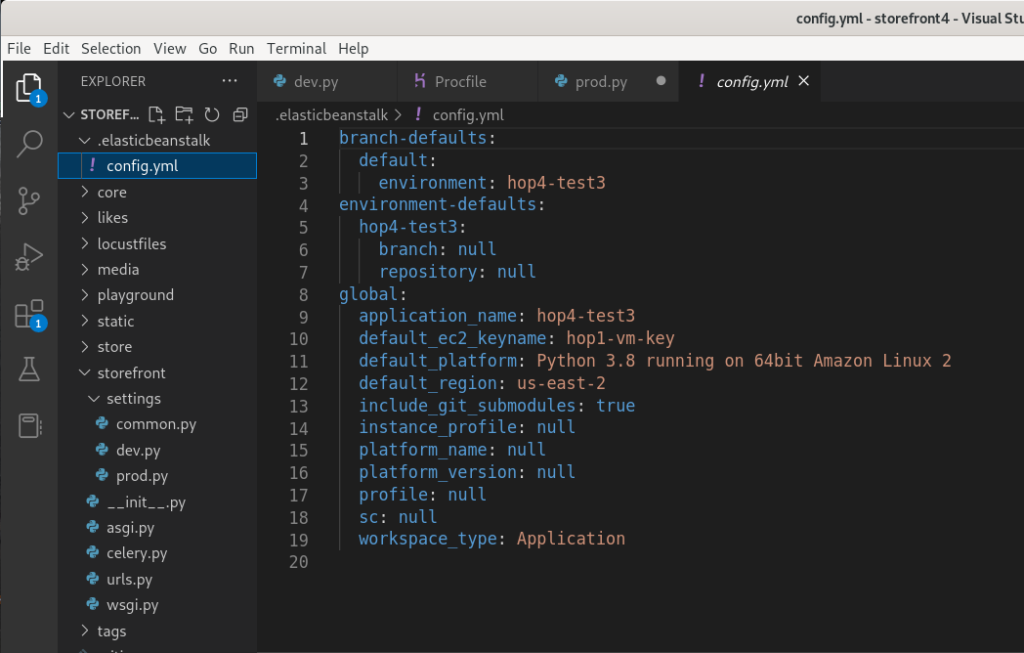
The eb init command saves the details of the link between your application folder and the Elastic Beanstalk environment in the .elasticbeanstalk/config.yml file. This file will be used to identify where the application code is going each time you deploy the application:
Pre-Load MySQL Native Client Library
One nuance of setting up our cloud PC development environment that we did not emphasize is that in order to successfully install the mysqlclient Python package, the native MySQL client library needed to be installed first. (Otherwise, the mysqlclient package install would have failed.) The instructions for Project 2 made sure that this was the case. However, we now need to make sure that the native MySQL client is installed before our application is deployed on Elastic Beanstalk.
Each time we deploy to Elastic Beanstalk, the virtual machine that runs the web server is rebuilt from scratch. So, we must include instructions within our deployment to install the native client for MySQL. Fortunately, Elastic Beanstalk provides a means to resolve dependencies like these by including a file in the deployment.
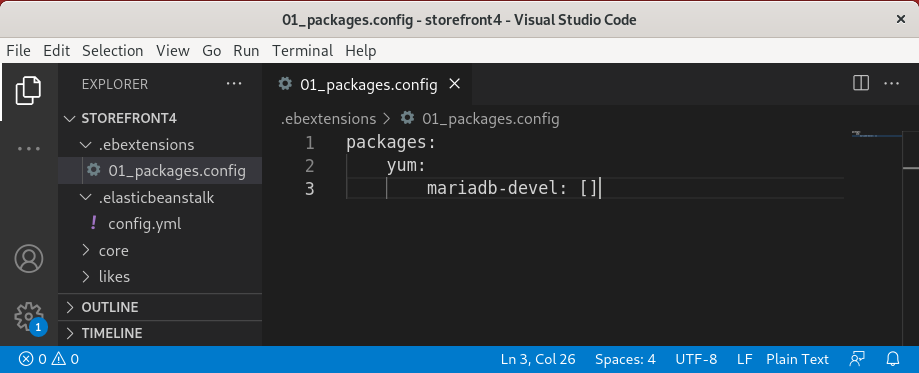
Create a .ebextensions folder, and then a new file within it named 01_packages.config, and enter the following lines:
packages:
    yum:
        mariadb-devel: []
Here’s what it looks like when the file is complete:
Yum is another package manager, like apt on Ubuntu Linux. This is a directive to have yum install the mariadb-devel package. This installation happens before any of the Python modules are installed in the Elastic Beanstalk server, so the dependency will be resolved just in time to allow our application to deploy successfully.
Interestingly, it is the mariadb-devel package that contains the MySQL native client library on this operating system. Go figure.
Application Tailoring is Complete
We are now ready to proceed with the next step in the project.