This is step 7 of 7 of Hands-On Project 1 for Azure. In this step, you gain some experience with the Cost Management features of the Azure Portal, and an introduction to the Azure Pricing Calculator
Azure Cost Management
Using the Azure Cost Management feature within the portal, it is easy to get information to help you understand the charges that Microsoft is applying to your subscription. To get started, select the Cost Management feature from the portal Home page. The first time you do this, you might need to search for Cost Management using the Search on the home page. You will get a Summary page containing this in the main page area:
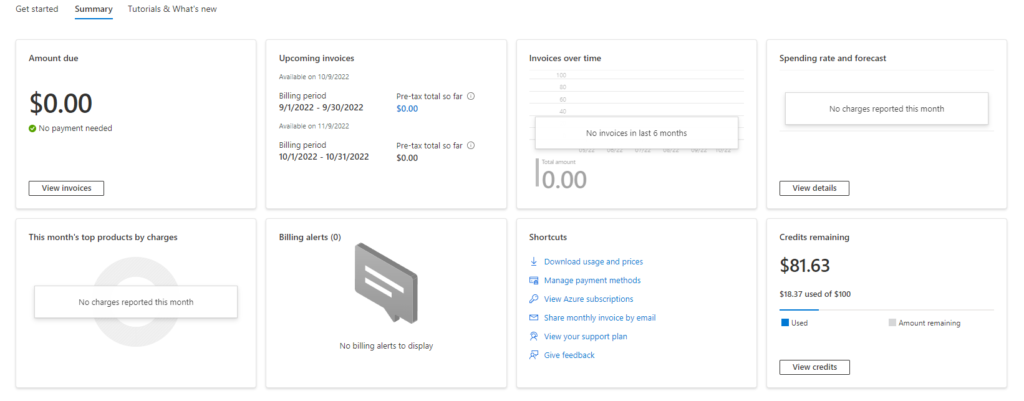
For this display, I am using my Azure for Students account. This is a free account that gives me $100 per year in credits. I have not been invoiced for this account yet, and I believe that I won’t have to pay any real money until the credits run out. You can see that I have used $18.37 of my credits and have $81.63 left.
From here, click on Cost analysis at the left, and you will get the default cost analysis display:
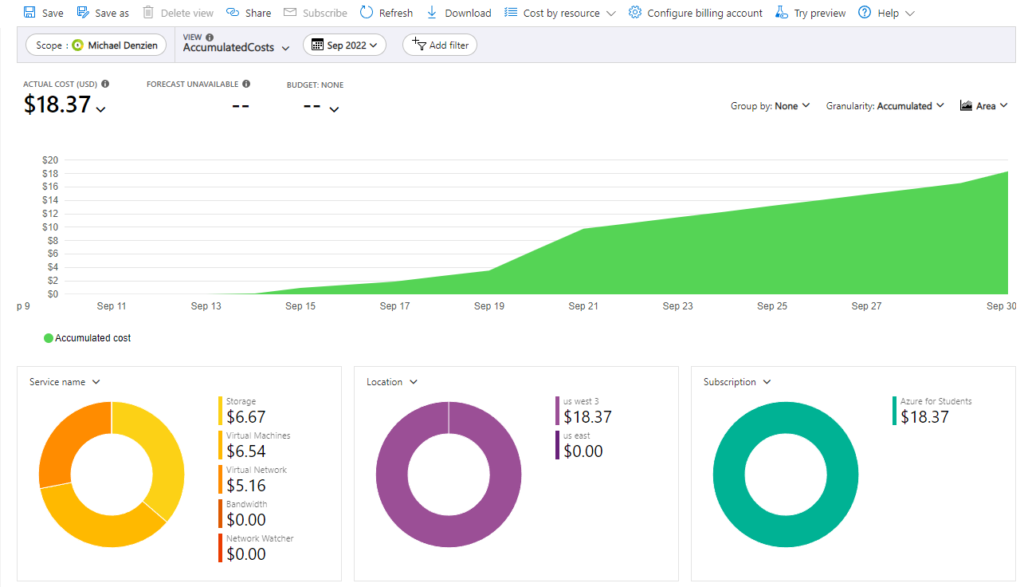
The initial display shows total accumulated charges for a time period (in this case the Month of September), by date, as an area chart. At the bottom, there are breakouts by Service Name, Location (Region) and Subscription. The Service Name breakout is useful as-is: It shows me which services I am spending my credits on. The Location and Subscription breakouts can be useful if I have resources in multiple regions or if I have multiple subscriptions under this Microsoft login.
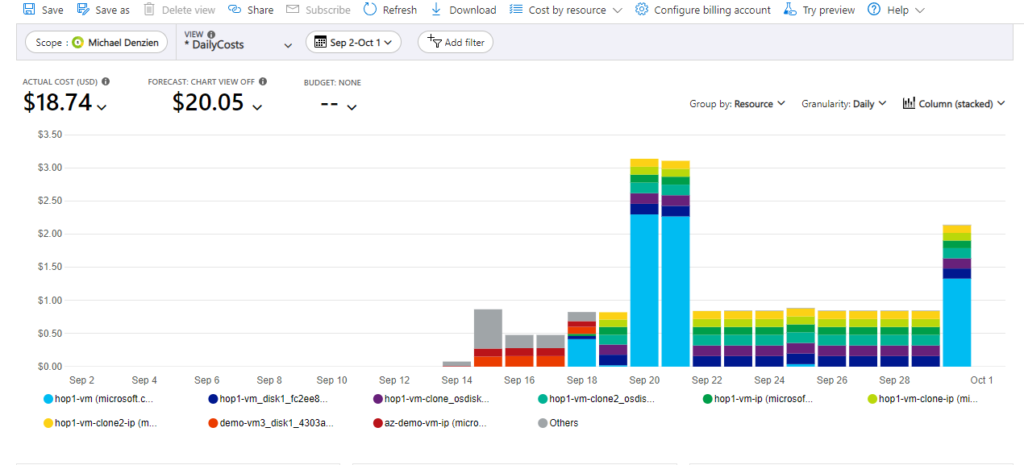
There are several useful controls on the Cost Analysis display that you can use to show your usage in different ways.
Here is a screenshot of the cost analysis with daily data grouped by individual resource and displayed in stacked bar format:
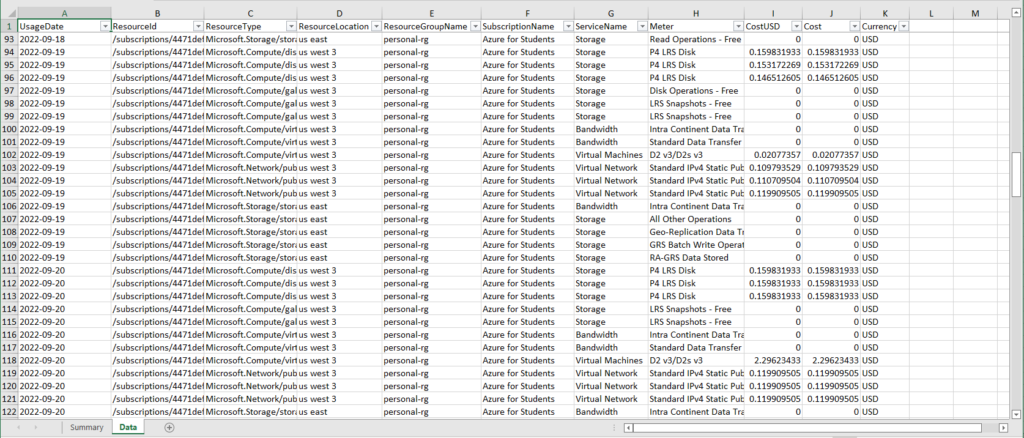
For the number crunchers among you, here is that same display, downloaded to Excel. With this level of detail, you can not only do detailed analysis of your usage, but over time you can gain insight into exactly which features you are using that are driving your costs, and use that knowledge to decide which features to use in the future:
There are many more features to Azure Cost Management, including Budget and Cost Alerts. We have covered only the basics here. (Hint: Other Cost Management features might make good blog articles.)
Azure Pricing Calculator
The purpose for the Azure Pricing Calculator is to be able to get an accurate cost estimate for a configuration that you envision. Within the tool, you can create a quote with multiple resources and it will add up total costs for you. You can find the Azure Pricing Calculator here:
https://azure.microsoft.com/en-us/pricing/calculator/
Once you go there, you get the pricing calculator main page. Scroll down a little to see the product selector:
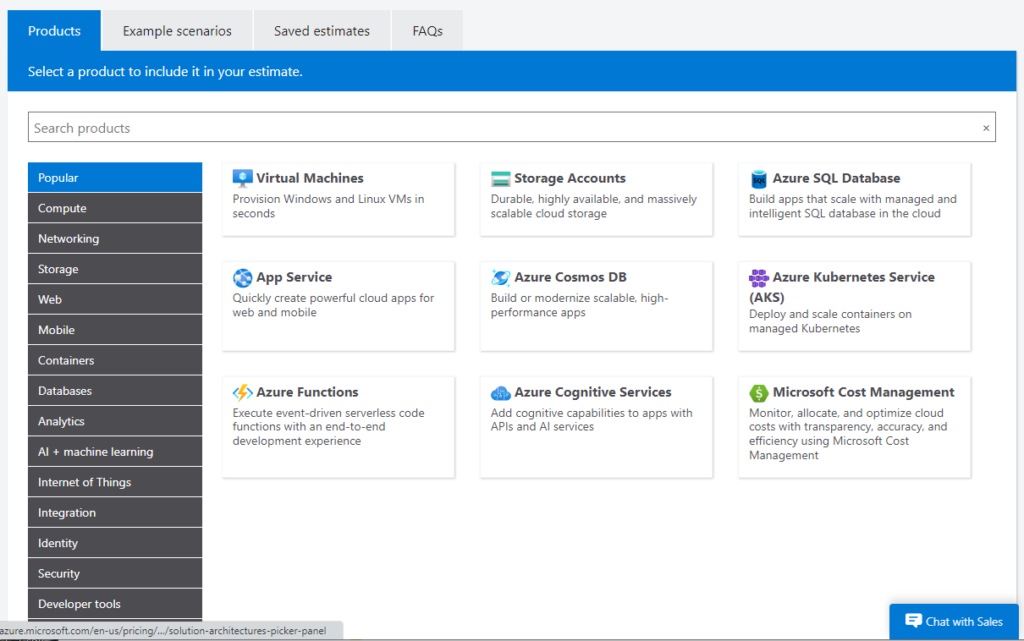
Each time you click on a product, the calculator adds another item to your Estimate. Then, for each item you can select the options you want and it will estimate your costs. If the product does not appear on the list, use the search bar to locate the product and then click on it to add it to your estimate.
In this screenshot, I clicked on Virtual Machines, and it added it to my estimate:
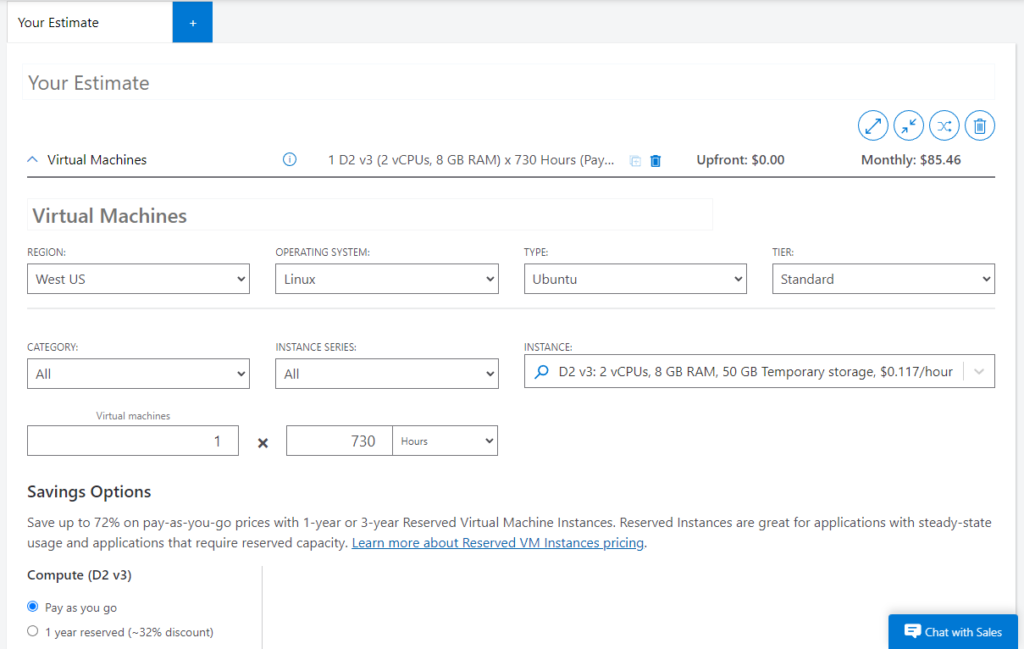
From this view, you can select region, OS, Instance Type, and indicate number of hours usage (for pay-as-you-go). This is only part of the VM pricing process though: You can scroll down and add pricing for the Managed Disks, Storage Transactions, and Bandwidth usage that will be associated with this VM. By estimating each of these thoroughly, you can get an accurate estimate of the total cost for the virtual machine.
You can add estimates for additional resources, then collapse the options on the display to get the big picture of your estimate. Here, I added an estimate for Databricks and an SQL database, then collapsed the details to see the summary.
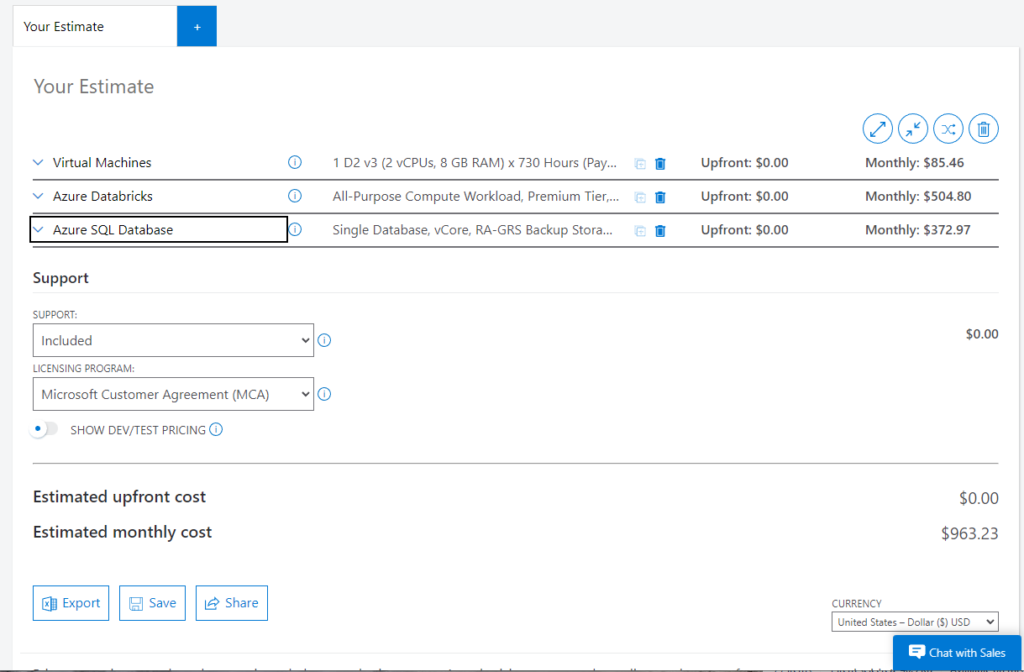
I have expensive tastes…