This blog will take you through step-by-step instructions on how to trigger a lambda function when the records in the DynamoDB table are updated, created, or deleted on AWS.
To follow along with this tutorial, you would need to set up an account with AWS. Instructions to set up an account can be found here.
The overall flow is going to be as shown in the diagram below. When a record is inserted, modified, or removed from the DynamoDB table, then it will trigger the lambda function and it will stream those records to the lambda function then later we can implement our login on how we want to process those records.

DynamoDB Table creation
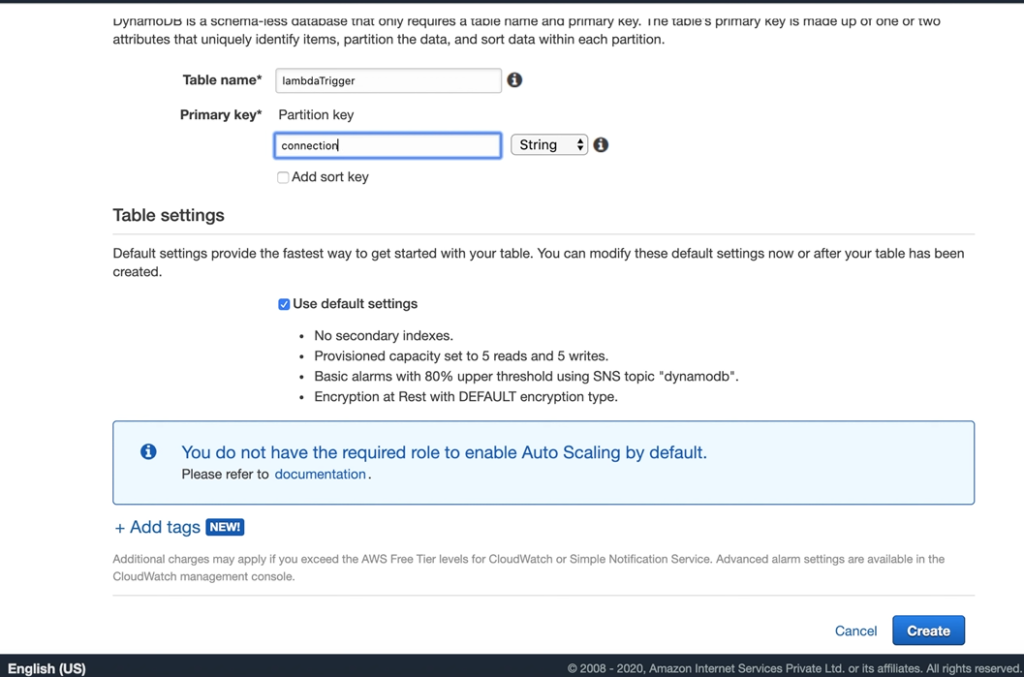
- Let’s start by creating a DynamoDB Table, from the AWS portal, search for DynamoDB service and click on Create table.
- Enter the table name and primary key for the table and leave other settings to default and click on Create and the table would be created successfully.
IAM role for lambda function
- For our functions to access the resources and services, we have to provide permissions.
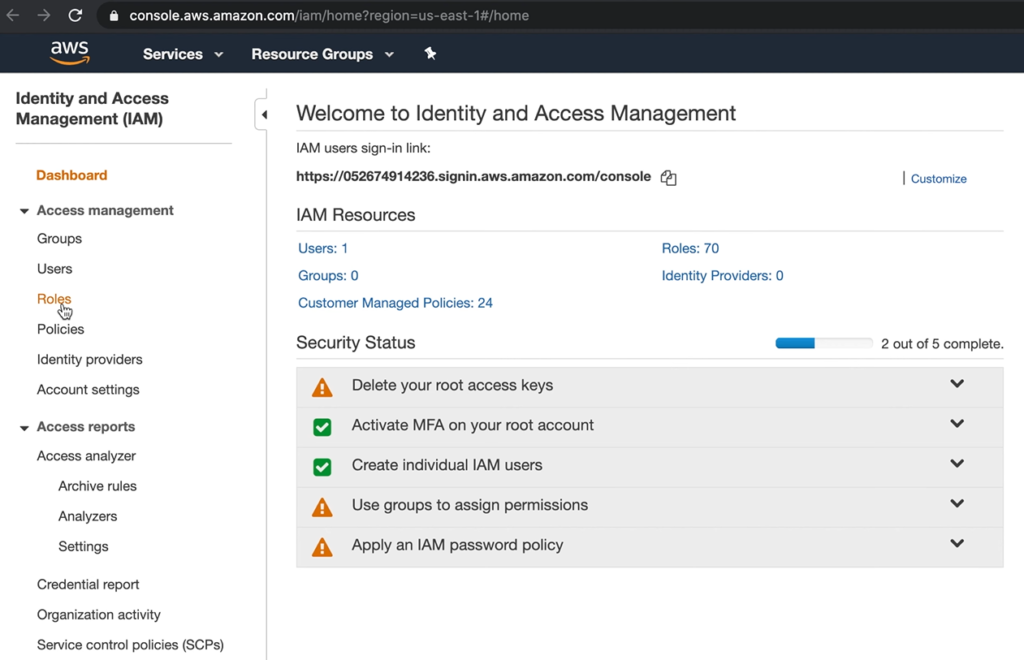
- From the AWS portal, search for IAM and navigate to the IAM management console.
- Go to roles on the left panel, under Access management, and click Create role.
- Select Lambda for the use case because we are going to create this role for the lambda functions.
- Go next to the permissions page, AWSLambdaDynamoDBExecutionRole this gives permission to Cloudwatch logs and DynamoDB
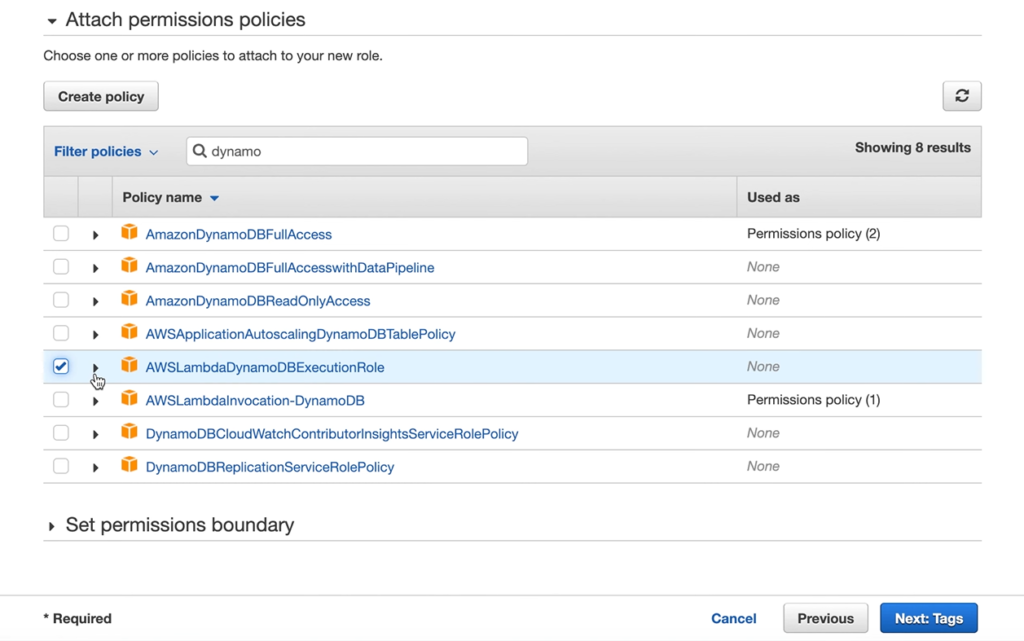
- Click next and add a tag if you want.
- Click next to review, add a role name and then click Create role.
Lambda function creation
- Let’s create our lambda function.
- From the AWS portal, search for lambda and navigate to the lambda management console.
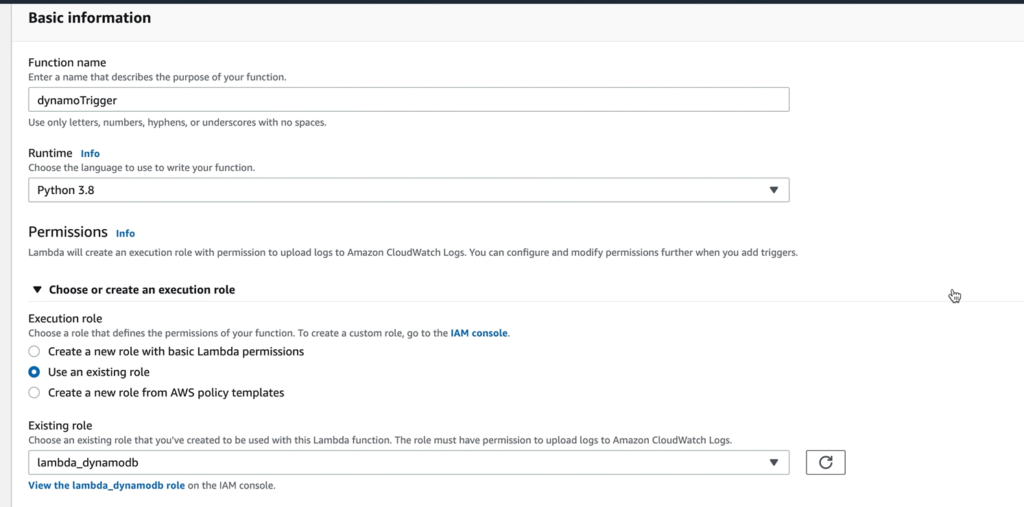
- Click on create function then provide a function name, and select python 3.8 for runtime.
- For permissions, choose to use an existing role and select the name of the role you created in the above steps.
- Click on create function.
Trigger setup
- Now we will set up the trigger, a trigger is an event that triggers the execution of the lambda function.
- We will set up our trigger when a modification is made to the DynamoDB table.
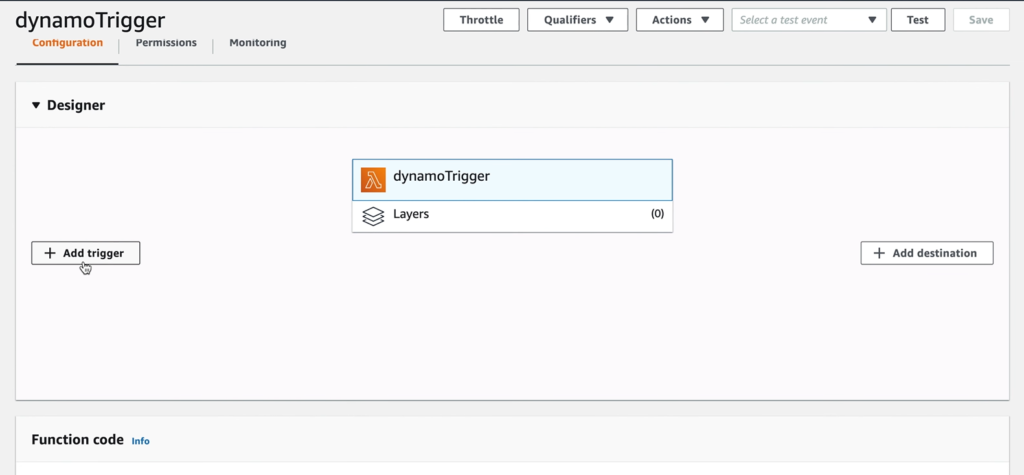
- Navigate to the lambda function, within the designer, and click on add trigger.
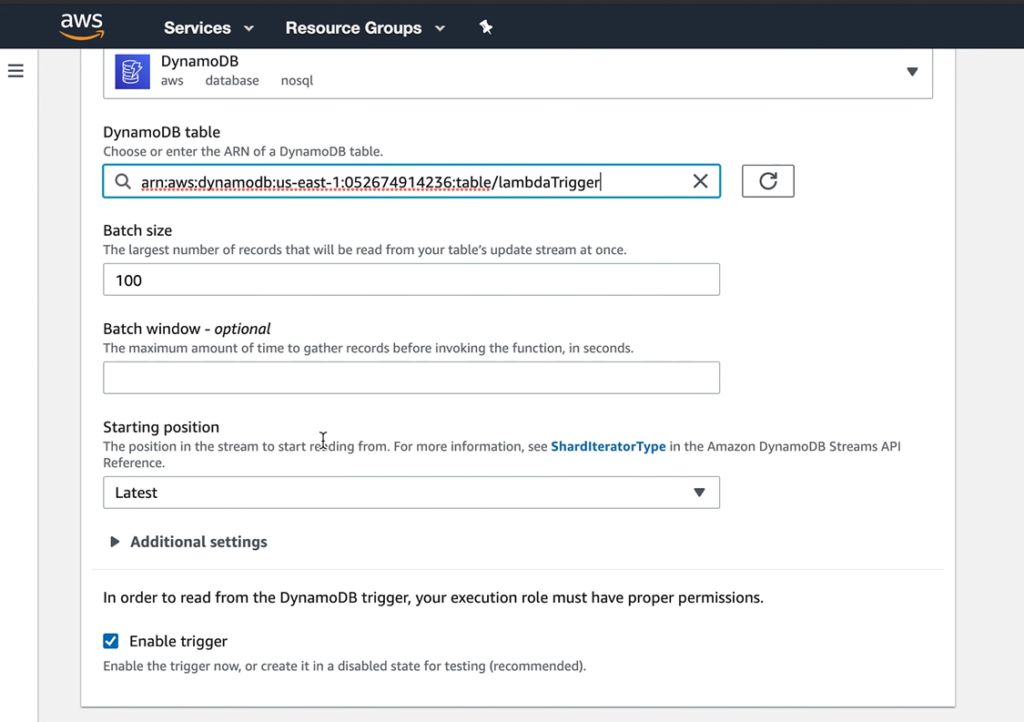
- For trigger configuration, search for DynamoDB
- Select the table that you created for the DynamoDB table and you can leave the other settings to default.
- Click add.
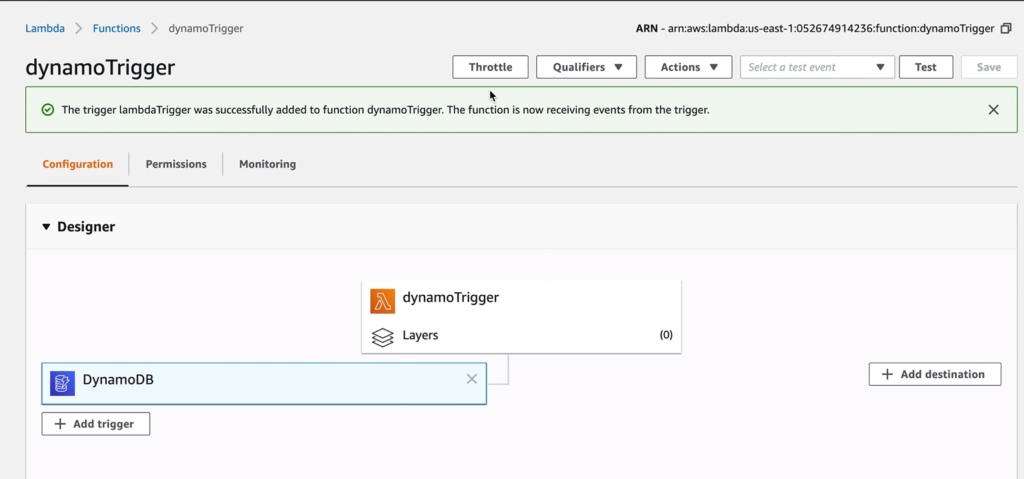
- We have successfully set up the trigger.
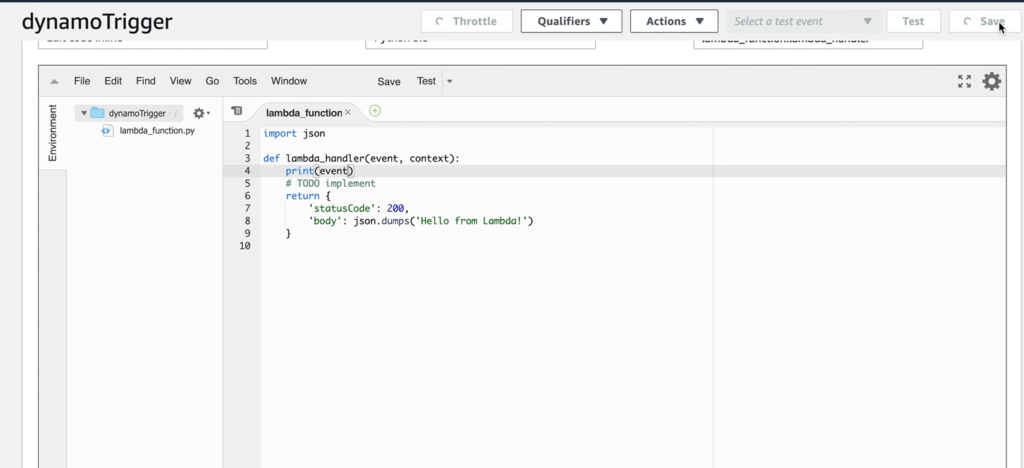
- Now we will add a print statement in our function code to print the event. This can help us identify if the function is triggered appropriately.
import json

def lambda_handler(event, context):
    print(event)
    # TODO implement
    return {
        'statusCode': 200,
        'body': json.dumps('Hello from Lambda!')
    }
Testing our trigger and function
- Navigate to our function and go to view logs from CloudWatch. Currently, we do not have any logs as we did not execute our function.
- Go to DynamoDB, and select the table that we created earlier.
- Click on items and then create an item.
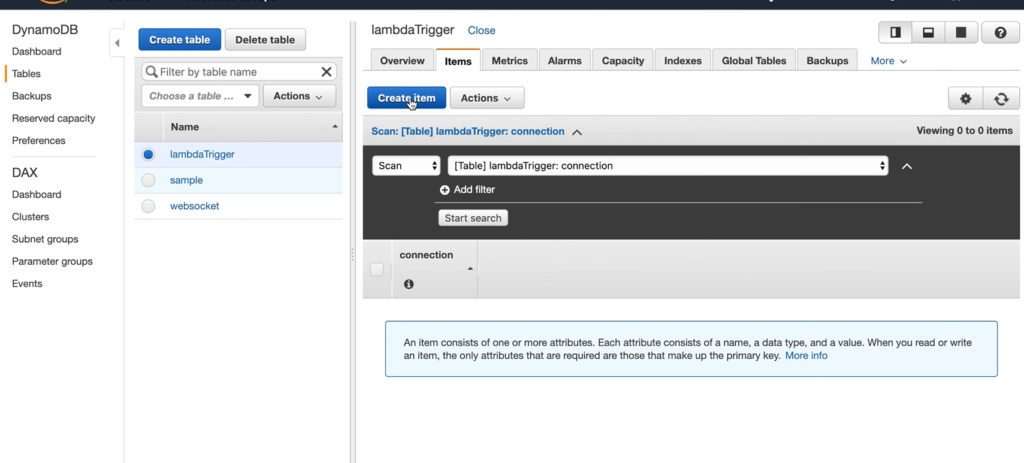
- Give any value to the connect string and save. This should trigger the lambda function.
- Take a look at CloudWatch logs and an entry would be created showing that the trigger was successful with the event time.
- You can see the type of modification, for example, insert, modify, delete (remove)


We have successfully created a DynamoDB trigger through the lambda function. Now we can update our function to perform any task that we want when it is triggered. For example, if we want to process some records that are only modified, then we can set a condition in our code that if the event name is equal to ‘modify’ then only the logic should be implemented.
Alternatively, we can also set up the trigger through DynamoDB. To do this:
- Navigate to DynamoDB, select the table, click on more, and then click on triggers.
- We already have this trigger setup that was through the lambda function.
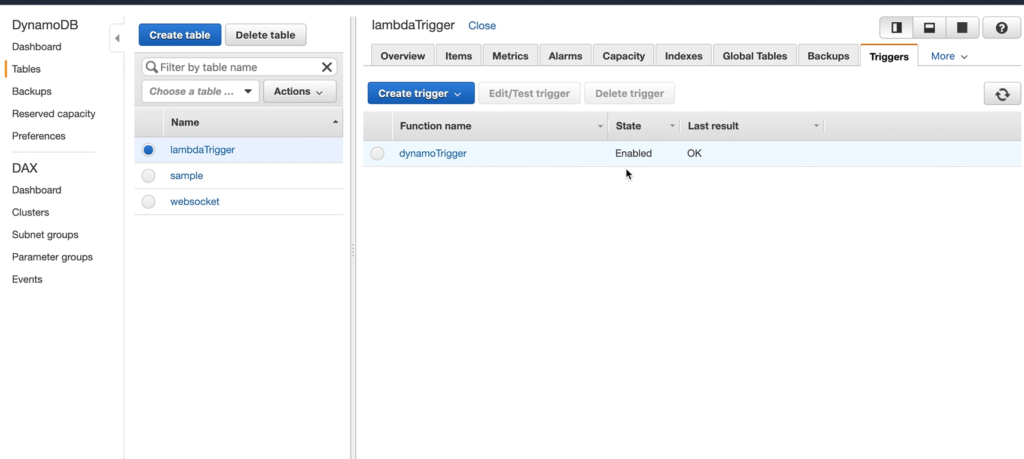
- Click on create trigger, it will give us two options whether we want to do a new function or use an existing function.
Thus, we have successfully created a DynamoDB trigger.