Amazon Web Services (AWS) provides a wide range of services and tools to help businesses of all sizes succeed in the cloud. One of those services is Amazon EC2, a virtualized computing environment that allows users to deploy and manage applications quickly. One of the features of EC2 is the ability to schedule the start and stop of EC2 instances, allowing users to reduce their costs by only running their instances when needed. This can be done manually, but for larger deployments, it can be a tedious and time-consuming process.
This blog provides an overview of how to use Amazon Web Services (AWS) to schedule the start and stop of EC2 instances. It covers the various services and tools available for automation, such as AWS Lambda and Amazon EventBridge Scheduler. It provides step-by-step instructions for creating an IAM role, writing code in the Lambda function, and setting up the EventBridge Scheduler. The blog also includes an example of the code used to start and stop the EC2 instances and sample logs from Amazon CloudWatch demonstrating the successful execution of the scheduled task.
Brief Introduction About the Services that We Use Now for this Task
- EC2 instance: Amazon Elastic Compute Cloud (EC2) is a web service that provides secure, resizable compute capacity in the cloud. It is designed to make web-scale cloud computing easier for developers. EC2 allows users to rent virtual computers to run their computer applications. EC2 provides users with complete control over the computing resources that they rent, allowing them to configure security and networking and manage storage, operating systems, and applications.
- AWS Lambda Function: AWS Lambda is a serverless computing service provided by Amazon Web Services (AWS). It allows you to run code without having to manage any servers. Lambda handles all compute resources, including provisioning, monitoring, and scaling, enabling you to focus on code. With Lambda, you can run code for virtually any application or backend service with zero administration. You can upload your code, and Lambda takes care of everything needed to run and scale your code with high availability.
- IAM role: AWS IAM (Identity and Access Management) is a service that helps you securely control access to AWS resources. It provides granular control over who can access your AWS resources and how they can use them. It also enables you to manage users, groups, roles, and their associated permissions. With IAM, you can control access to AWS services such as Amazon S3, Amazon EC2, and Amazon DynamoDB, etc.,
- Amazon EventBridge Scheduler: Amazon Eventbridge Scheduler is a serverless event scheduling service from Amazon Web Services. It provides an easy way to schedule and automate events to trigger AWS services and your custom applications. With Amazon Event Bridge Scheduler, you can create cron-like schedules to define when your events should be initiated and complex event patterns to trigger an event based on changes in another event.
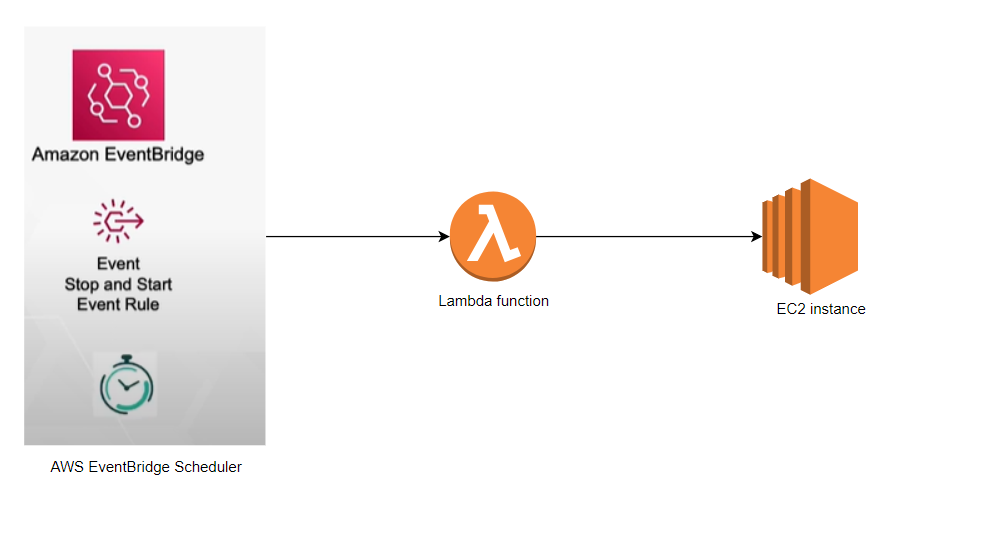
Workflow:
We use the Amazon EventBridge to Schedule an action, Start or Stop, which triggers the Lambda function. The Lambda function will execute the python code to stop or start the given Instance IDs.
Steps Involved in the Process: –
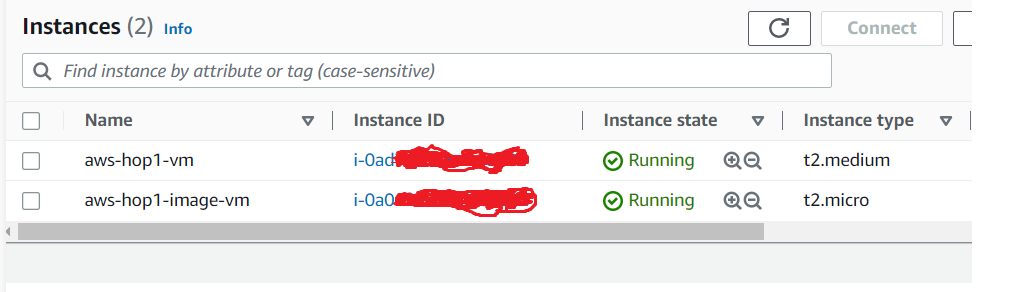
Step 1: Collect the VM Id’s
- Log in to the AWS console.
- Go to Services and choose EC2.
- Then make a note of your VM ids.
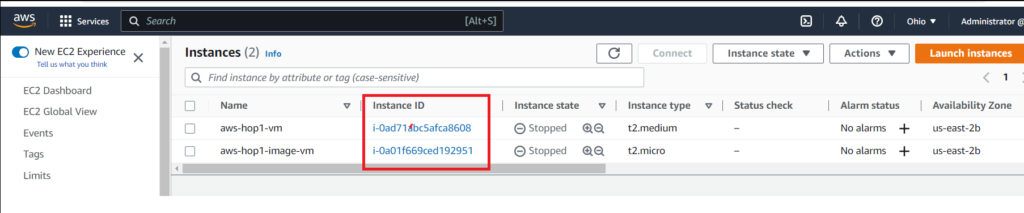
- If you don’t have any existing VMs, follow this link to create new VMs in AWS.
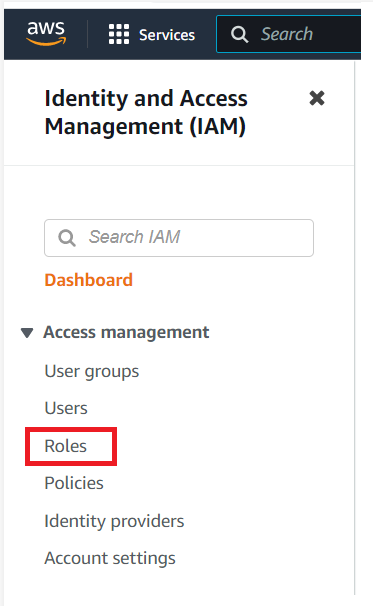
Step2: – Create IAM role
Create an IAM role to access the EC2 instance by the lambda function.
- Select IAM from the AWS services.
- Select roles.
- Create a role
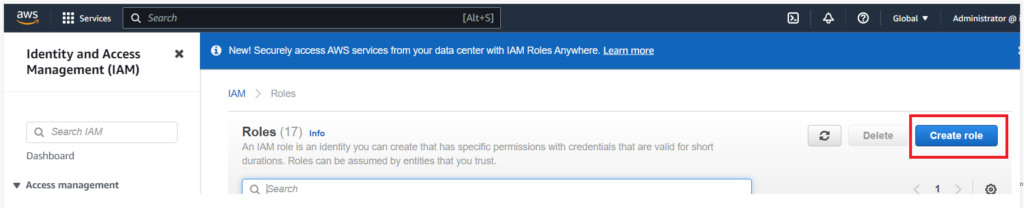
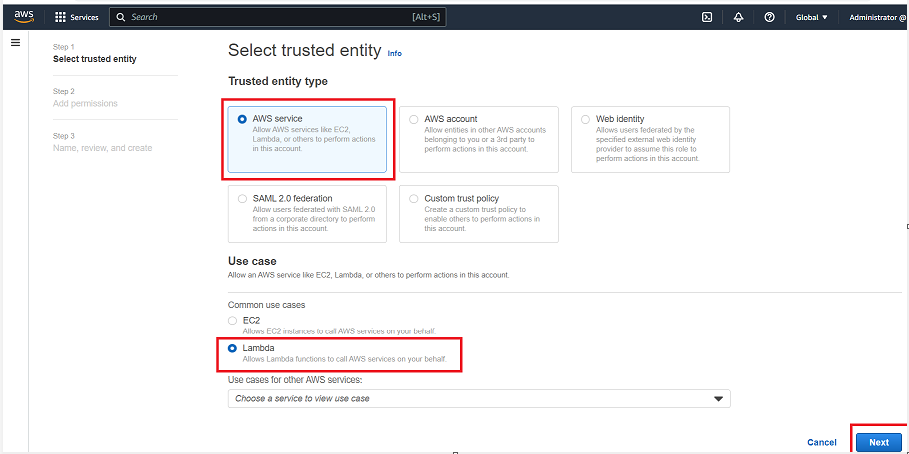
- Select the Trusted entity type as AWS Service and Common use case as Lambda and click next.
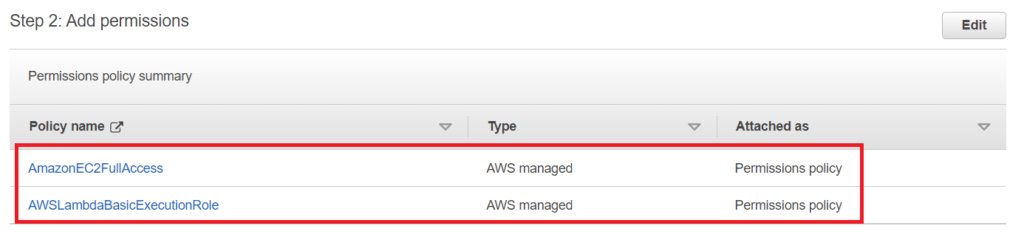
- Select AWSLambdaBasicExecutionRole and AmazonEC2FullAccess in the permission policy and click on next.


- On this page, give a meaningful name for the role we are creating and check whether the permission is correct. Below are the permissions needed for the lambda function to access the EC2 instance. Then click on the Create role.
- Refer Official AWS document here for IAM roles.
Step 3: Create a Lambda Function
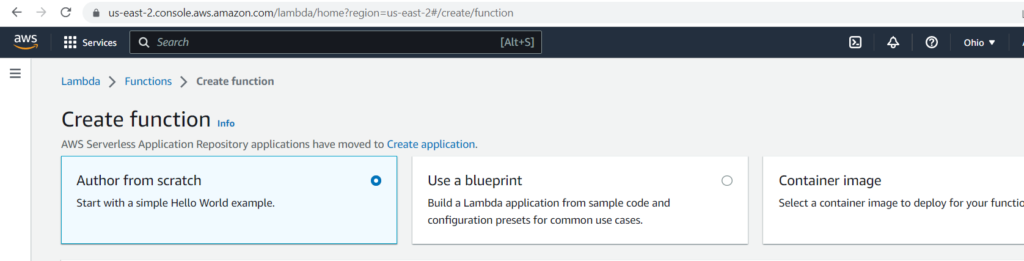
- Log into the Amazon Web Services (AWS) console and navigate the Lambda service page.
- Click “Create Function” and select the “Author from scratch” option.
- Enter a name for the function and select the runtime environment as Python 3.9.
- For the Architecture, choose the x86_64 option.
- In the Permissions, choose the Execution role as “Use an existing role.” Choose the role which you have created in Step 2.
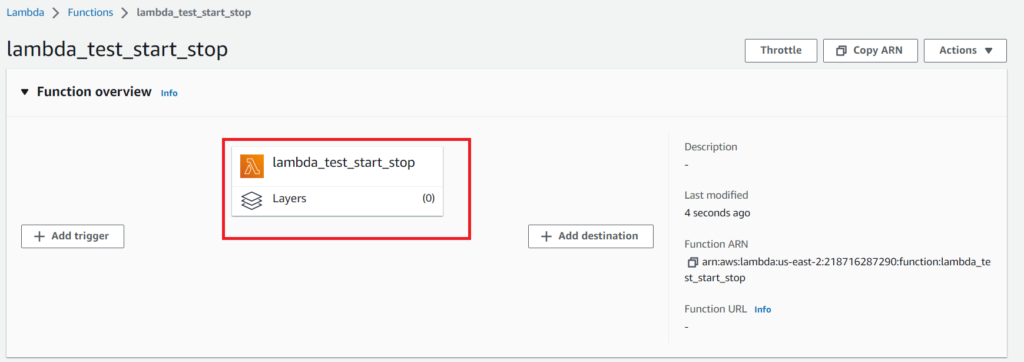
- Click on Create Function.
- Refer Official AWS document here for more information about lambda function.
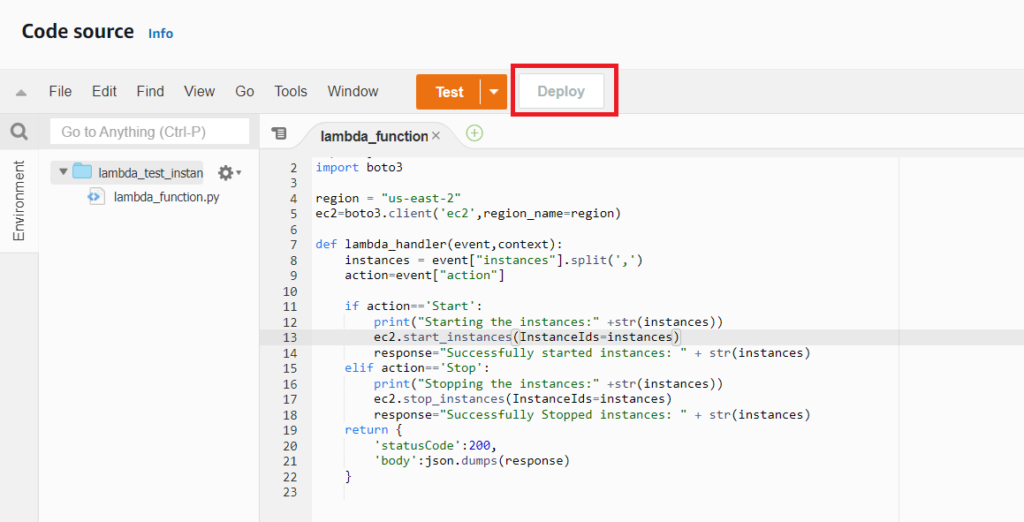
Step 4: Writing the code in the Lambda Function
In this step, we will write the code in the lambda function.
The Below code is a Lambda function written in Python for starting and stopping an EC2 instance in the AWS cloud. It uses the boto3 library to access the EC2 service. The code takes input from an event that contains the action to be taken. The step can either be to start or stop. The code takes a list of instances IDs as input from the AWSevent bridge trigger response and uses the start_instances and stop_instances functions to start or stop the cases, respectively. It then prints the response and returns it as a JSON object.
import json
import boto3

region = "us-east-2"
ec2=boto3.client('ec2',region_name=region)

def lambda_handler(event,context):
	instances = event["instances"].split(',')
	action=event["action"]

	if action=='Start':
		print("Starting the instances:" +str(instances))
		ec2.start_instances(InstanceIds=instances)
		response="Successfully started instances: " + str(instances)
	elif action=='Stop':
		print("Stopping the instances:" +str(instances))
		ec2.stop_instances(InstanceIds=instances)
		response="Successfully Stopped instances: " + str(instances)
	return {
		'statusCode':200,
		'body':json.dumps(response)
	}
- Refer AWS official Document here.
- Copy the above code, paste it into the code editor, and deploy it.
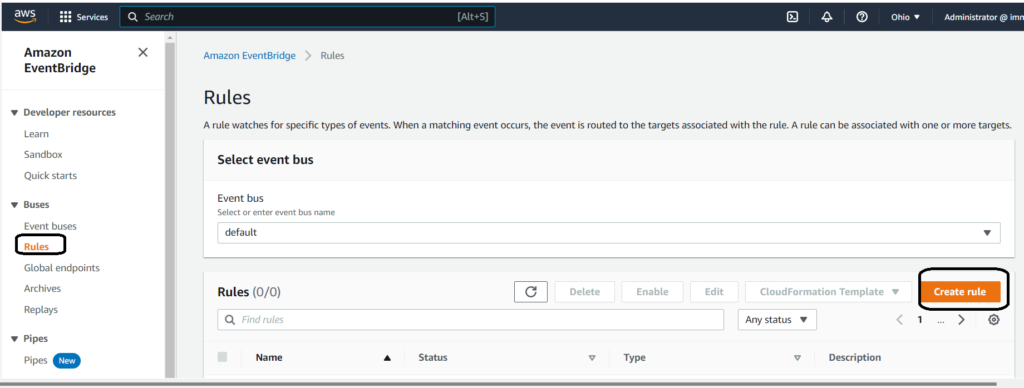
Step 5: Configure Amazon EventBridge Scheduler
- Go to AWS services -> Amazon Event Bridge ->Rules ->Create rule.
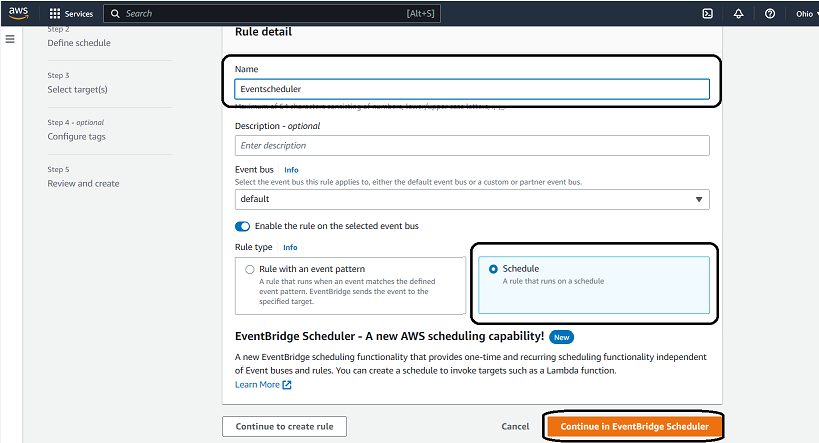
- Enter a meaningful name, select the rule type as schedule, and click continue in EventBridge Scheduler. You will be directed to the next page.
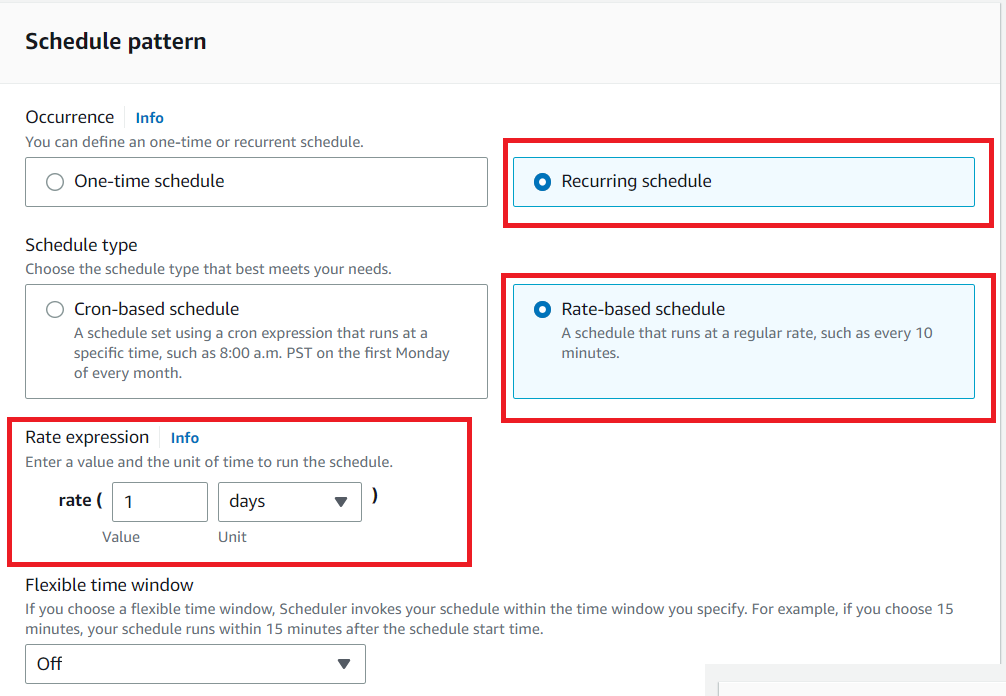
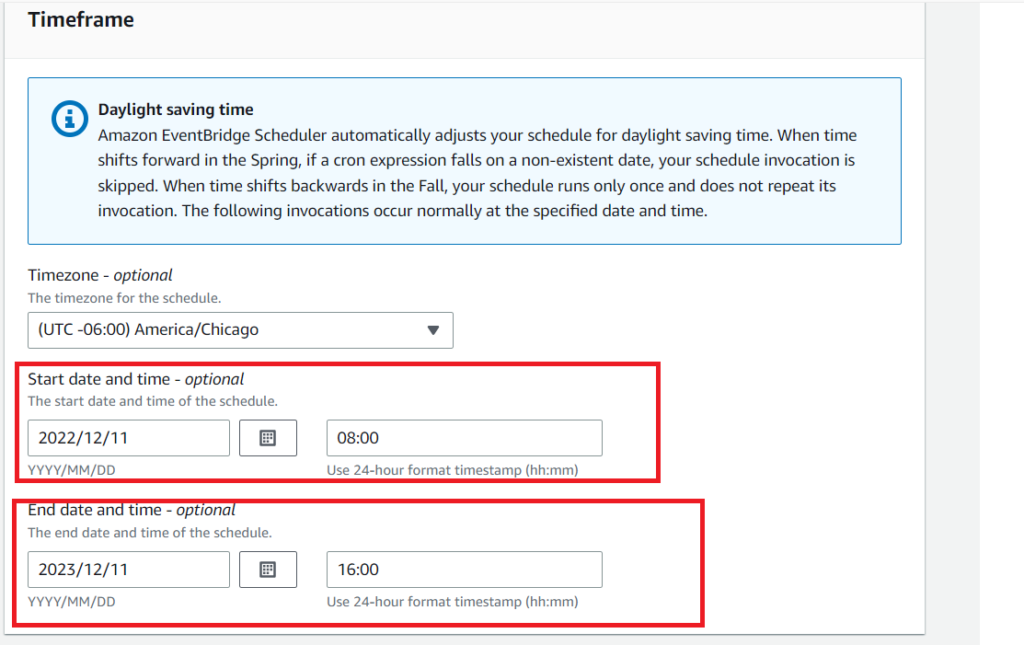
- On this page, Select the Schedule pattern as Recurring Schedule.
- A recurring Schedule helps us to select the cron expression in which we can start the instances at 8:00 Am in the morning and stop the instance at 6:00 PM in the evening from Monday to Friday throughout the year. Here is the link for the cron expression syntax. The day-of-month and day-of-week fields can be specified in different expressions.
- Here we are selecting the start and end timeframe for the function to invoke.
- Now select the Target API as AWS lambda .
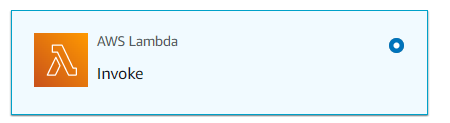
- Now choose the lambda function which you created in Step 3.
- Now enter the input JSON. In my case, I am starting an EC2 instance, so I am using Action as a start. Click the following option at the bottom of the page.

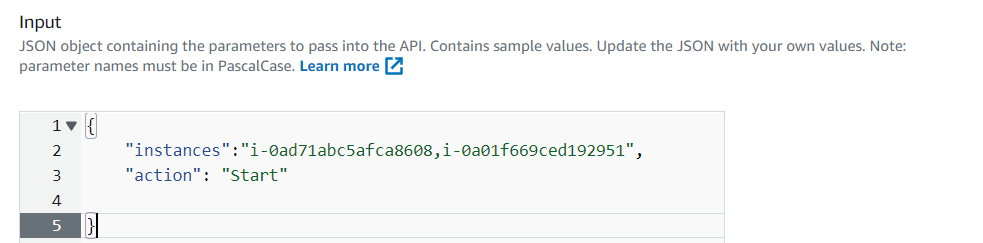
{
    "instances":"enter your instance id,enter your instance id",
    "action": "Start"

}
- If you want to stop the instance, use the code below as input JSON.
{
    "instances":"enter your instance id,enter your instance id",
    "action": "Stop"

}
- Here we pass the instance IDs in the event function rather than in the code. If you pass the instance IDs in the lambda function, you must redeploy it frequently, so to avoid redeployment, we are passing the instance ids in the event trigger response.
- Disable the retry policy in the settings page and leave the remaining fields as default. Click next.
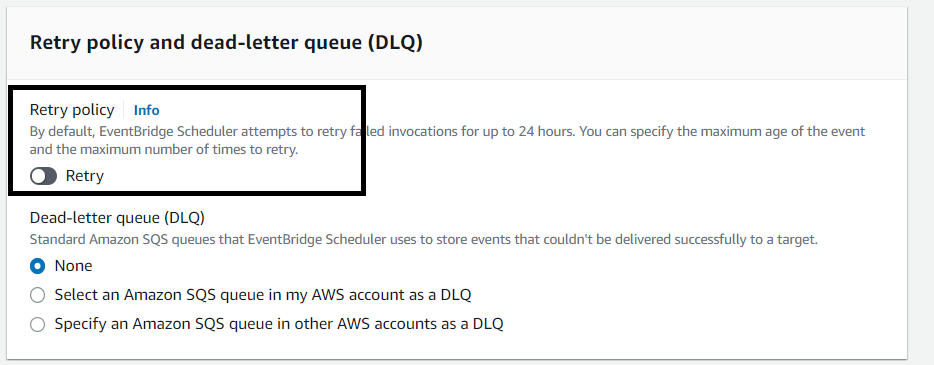
- Turning off the retry policy in an AWS Event Bridge function is important because it prevents unnecessary retries of the same events. This is important to ensure that events are not processed multiple times, which can lead to errors and unexpected behavior in your application. It also helps to prevent excessive costs associated with unnecessary retries.
- You will see the review page. Make sure you have all the correct information. Click the save Scheduler option. After that, you will see something like this saying successfully created.
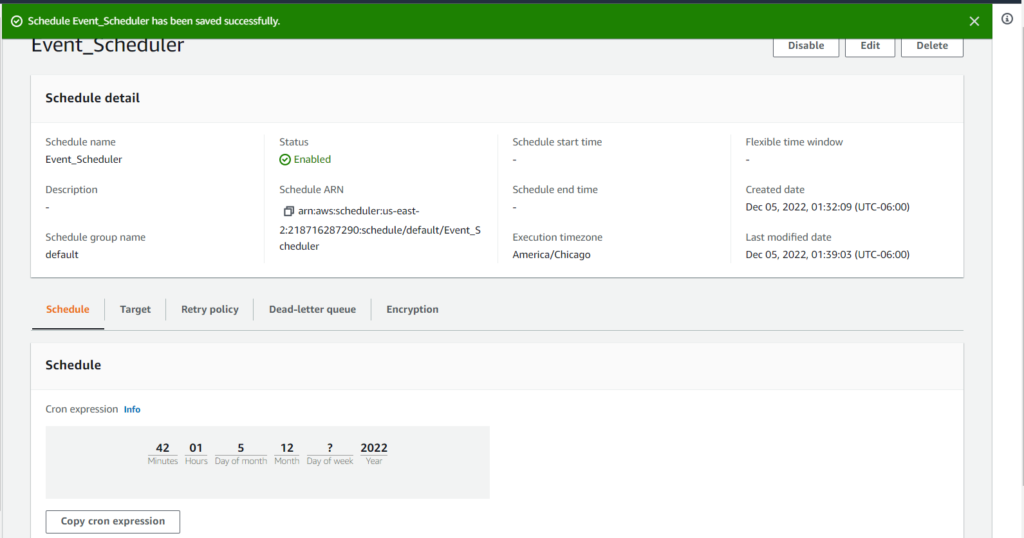
Finally, your instances will run once the scheduled cron expression has been triggered.
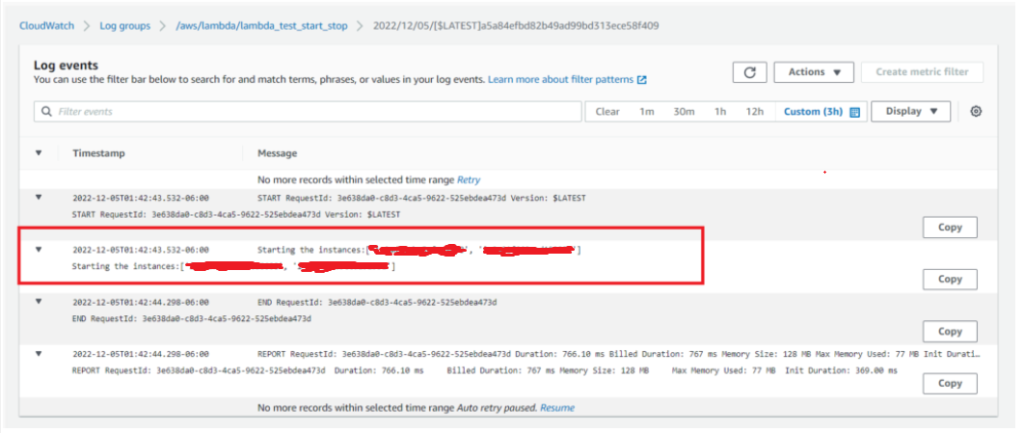
Below are the logs taken from the cloud watch, showing the details of my VM ID, which was successfully started.
In conclusion, scheduling the start and stop of EC2 instances can help businesses save costs by only running their instances when needed. This can be done manually, but for larger deployments, it can be a tedious and time-consuming process. This blog provided an overview of how to use Amazon Web Services (AWS) to schedule the start and stop of EC2 instances. It covered the various services and tools available for automation, such as AWS Lambda and Amazon EventBridge Scheduler. It provided step-by-step instructions for creating an IAM role, writing code in the Lambda function, and setting up the EventBridge Scheduler. Following the steps outlined in this blog, users can easily and quickly set up a scheduled start and stop of their EC2 instances and reduce their costs.
Thank you for reading my blog!