Serverless computing enables you to create and maintain applications and services without thinking about servers. It can be compared to a microservice or function as a service that is housed on a cloud computing platform. Azure Functions is a serverless application platform. It gives programmers the ability to host business logic that may be used without having to provision infrastructure. Azure Functions has built-in scalability, and you only pay for the resources you utilize. Any language, including C#, F#, JavaScript, Python, and PowerShell Core, can be used to create function code.
Prerequisite: Prepare Your Account (Azure)
Step 1 – Create Your Function App
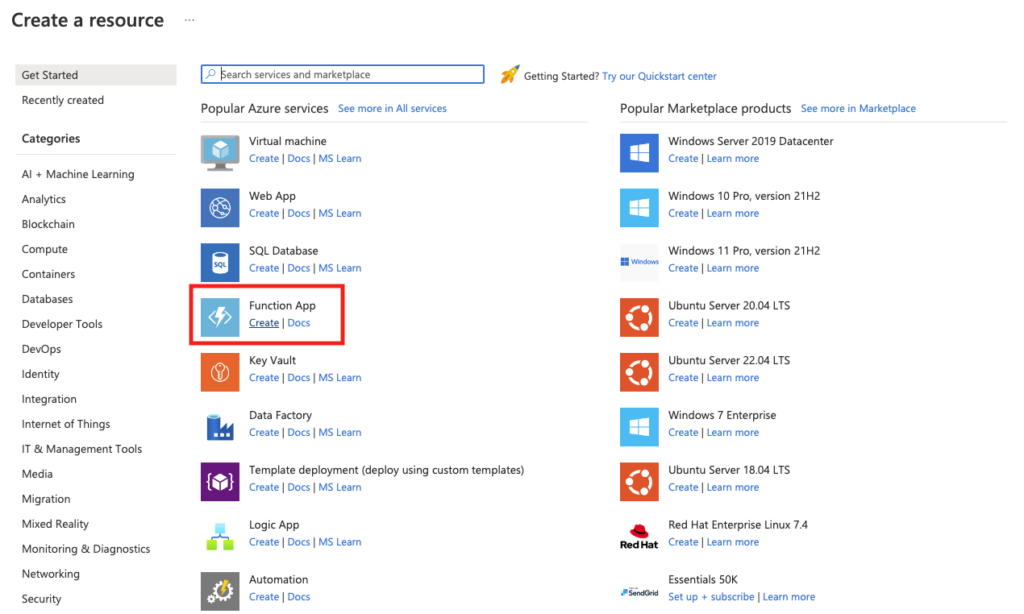
Functions are maintained in an execution context named function app. After signing into the Azure portal, click the Create a resource button.

A menu will open with a bunch of services. Click the Create button on the Function App.

- Under the Basics tab, select your resource group and write your function app name which becomes part of the base URL of your service. Note that it has to be globally unique.
- Select Node.js for the Runtime stack.
- Select Review + create, and then select Create.
- Deployment takes a few minutes and you will receive a notification upon completion.

When the deployment process is finished, click the Go to resource button. You can verify that your function app is running by selecting the URL link in the Overview section. A default Azure web page opens on a new browser with a message that your Functions app is up and running.
Before you start writing any code, we need to understand these two topics – Triggers and Bindings.
Triggers
Since functions are event driven, they execute in response to a specific event. A trigger is a specific kind of event that initiates a process. A single trigger must be specified for each function. Azure supports triggers for several services including:
- Blob Storage: Starts a function when a new or updated blob is detected.
- HTTP: Starts a function with an HTTP request.
- Azure Cosmos DB: Start a function when inserts and updates are detected.
- Timer: Starts a function on a schedule.
- Queue Storage: Starts a function when a new item is received on a queue.
Bindings
A binding is used to connect data and services to your function. You don’t need to develop the code to connect to data sources and handle connections in your function because bindings communicate with different data sources. In the binding code, the platform handles the complexity on your behalf. Every binding has a direction, with your code reading from input bindings and writing to output bindings. A function may have zero or more bindings.
Step 2 – Create a HTTP Trigger
We will be creating a HTTP trigger for the purpose of this blog. Select Functions under the Functions app menu.

Then, click the Create button to create the function. While selecting a template, click the HTTP trigger template. You can also rename the function name under New Function. I will leave that as HttpTrigger1 and finally click the Create button.

Step 3 – Write Your Code With Azure Functions
By clicking Code + Test from the Function menu, you can test and run the code, save or delete changes you make, or get the published URL in the command bar. You can also test use cases for requests using query strings and values by selecting Test/Run from the command bar.
Let’s write our business logic in the index.js file where if the water pressure is below 40, the reading is displayed as LOW. If the water pressure is in between 40 and 80, you get the reading as NORMAL and any value above that, the reading will be displayed as HIGH. Replace the default code with the code below:
module.exports = function (context, req) {
    context.log('Water Pressure Service triggered');
    if (req.body && req.body.values) {
        req.body.values.forEach((value) => {
            if(value.pressure < 40) {
                value.status = 'LOW';
            } else if (value.pressure>=40 && value.pressure<=80) {
                value.status = 'NORMAL';
            } else {
                value.status = 'HIGH'
            }
            context.log('Reading is ' + value.status);
        });

        context.res = {
            body: {
                "values": req.body.values
            }
        };
    }
    else {
        context.res = {
            status: 400,
            body: "Send an array of values in the request body."
        };
    }
    context.done();
};
Step 4 – Test Business Logic
We will be using the Test/Run feature to test the function. To make our model request, click the Input tab, leave the key as the default host key and swap out the text in the Body text field with the following code:
{
    "values": [
        {
            "id": 1,
            "pressure": 23,
            "timestamp": 1577862061
        },
        {
            "id": 2,
            "pressure": 45,
            "timestamp": 1585720861
        },
        {
            "id": 3,
            "pressure": 81,
            "timestamp": 1591005661
        }
    ]
}
At the bottom of the trigger function window, expand the Logs frame. In the drop-down menu at the top of the Logs frame, choose Filesystem Logs. Notifications should begin to accumulate in the log frame every minute. Click the Run button. The HTTP response code and content will be displayed in the Output tab.

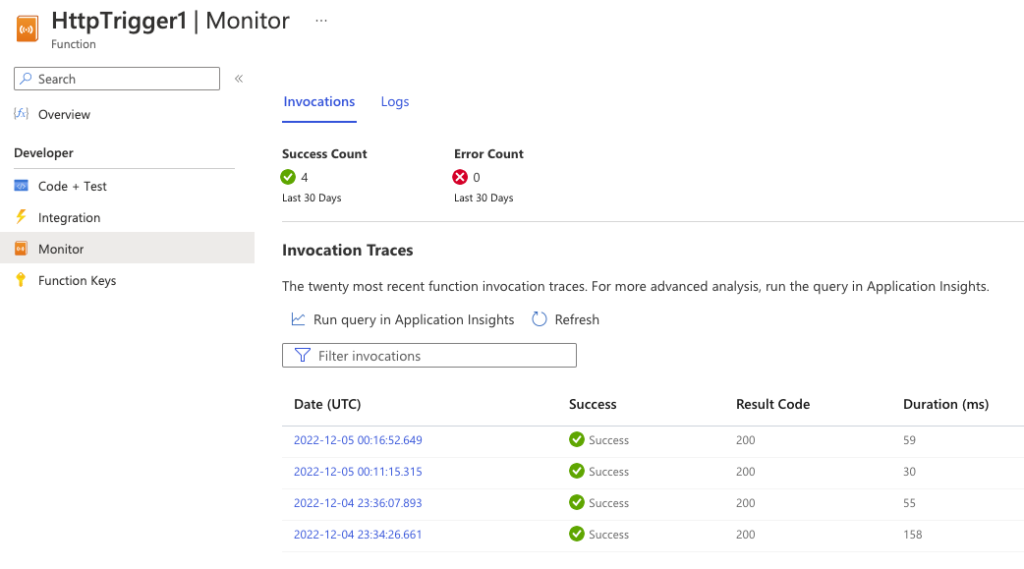
You can also select Monitor from the Developer menu on the left to see if the request has been logged to Application Insights.

Conclusion
We learned how to host business logic services in the cloud using Azure Functions. Thanks for taking the time to read my blog!