This article describes how to integrate Azure Cache for Redis into a Python application to gain access to a private, dedicated cache that can be accessed from any Azure application.
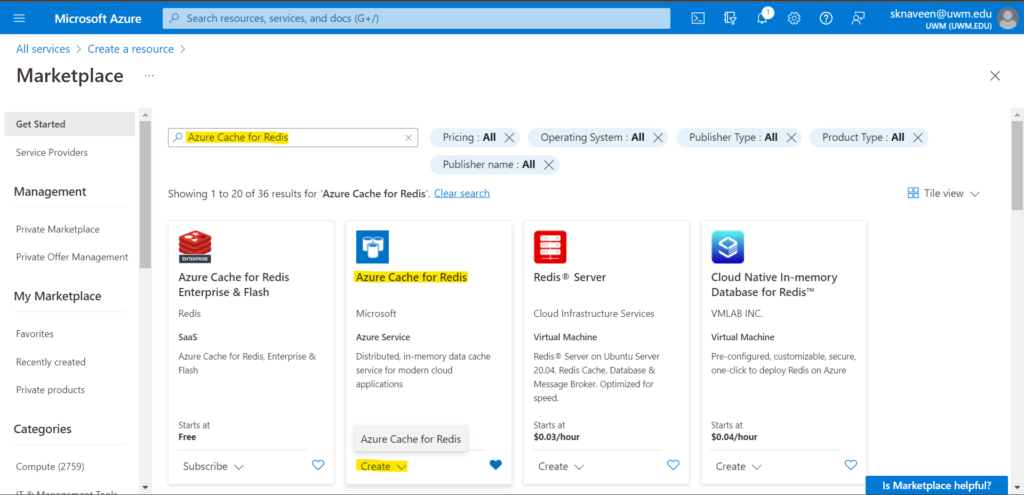
Create an Azure Cache for Redis Instance
Log in to the Azure portal and click on create Resource. Choose Databases, then type Azure Cache for Redis in the search bar and click on create.
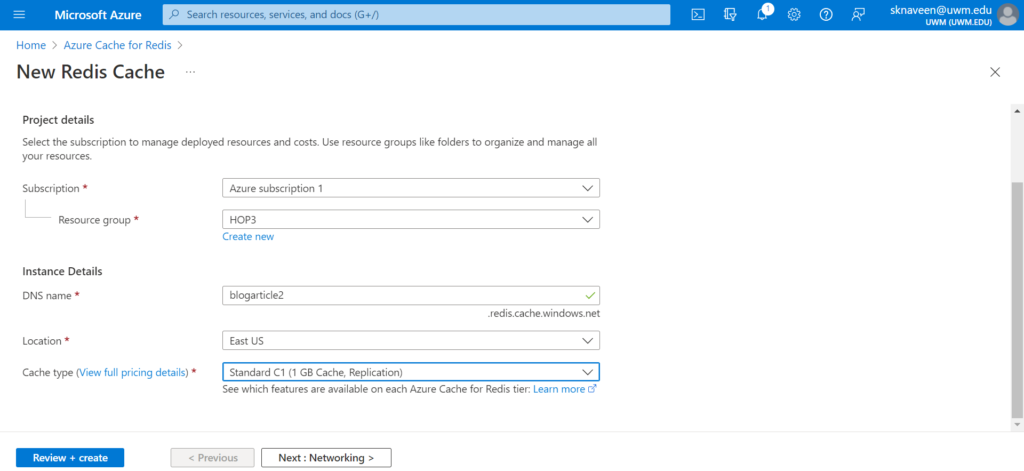
Now configure the settings for your new cache.
- Click on the Subscription under which you want to create this new Azure Cache for the Redis instance.
- Drop down and select a Resource group, or select create new and enter a new resource group name. By putting all your app resources in one resource group, you can easily manage or delete them together.
- Enter a unique DNS name. The cache name must be a string between 1 and 63 characters that contain only numbers, letters, or hyphens. The name must start and end with a number or letter, and can’t contain consecutive hyphens.
- Your cache instance’s hostname will be <DNS name>.redis.cache.windows.net.
- Drop down and select a location that is near the other services that will use your cache.
- For cache type, Drop down and select a tier that determines the size, performance, and features that are available for the cache based on your requirements.
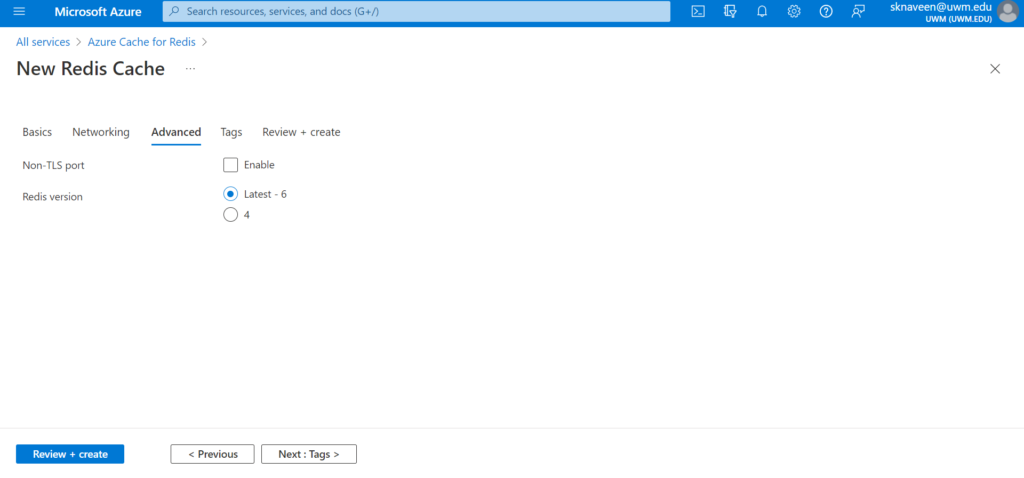
- In the Networking tab, select your connectivity method.
- In the Advanced tab for a basic or standard cache instance, select the enable toggle if you want to enable a non-TLS port. You can also select which Redis version you would like to use, either 4 or 6.
- Select Review + Create. It takes a while for the cache to create. You can monitor progress on the Azure Cache for the Redis Overview page. When the status shows as Running, the cache is ready to use.
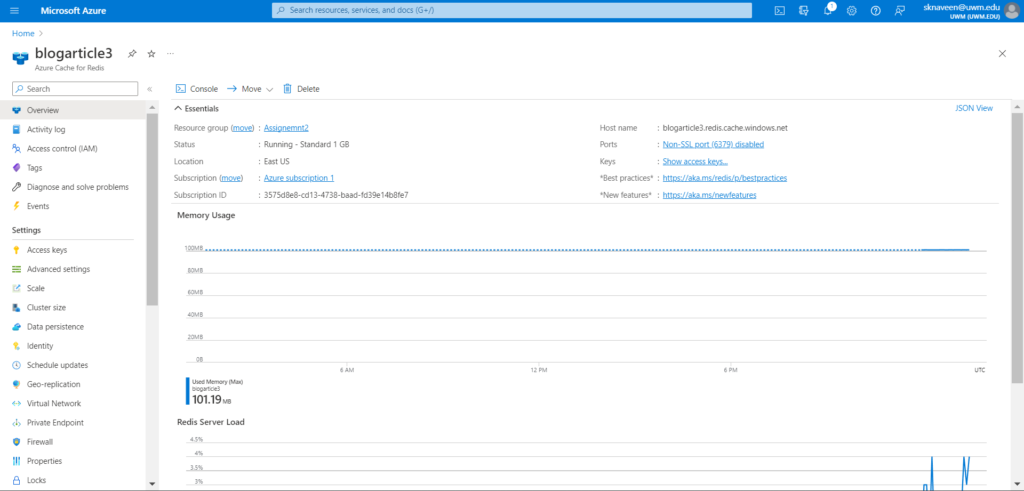
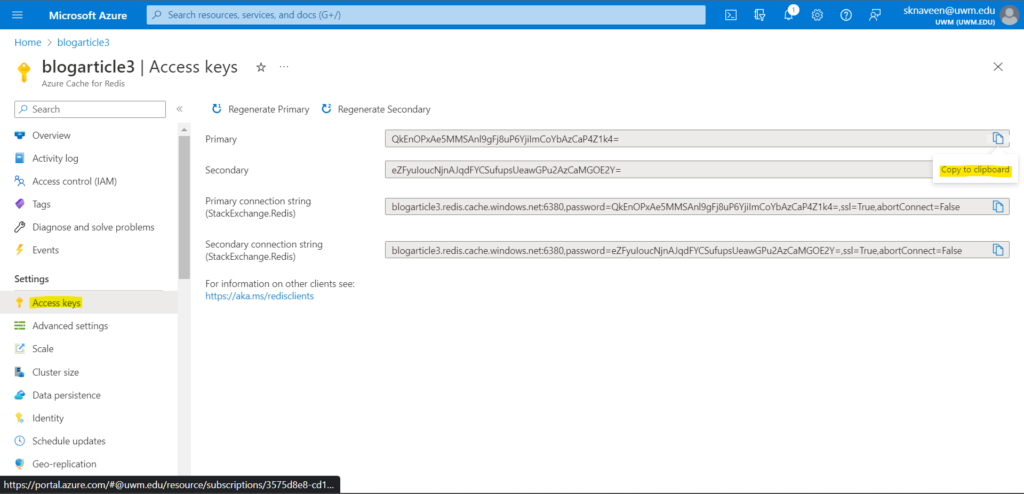
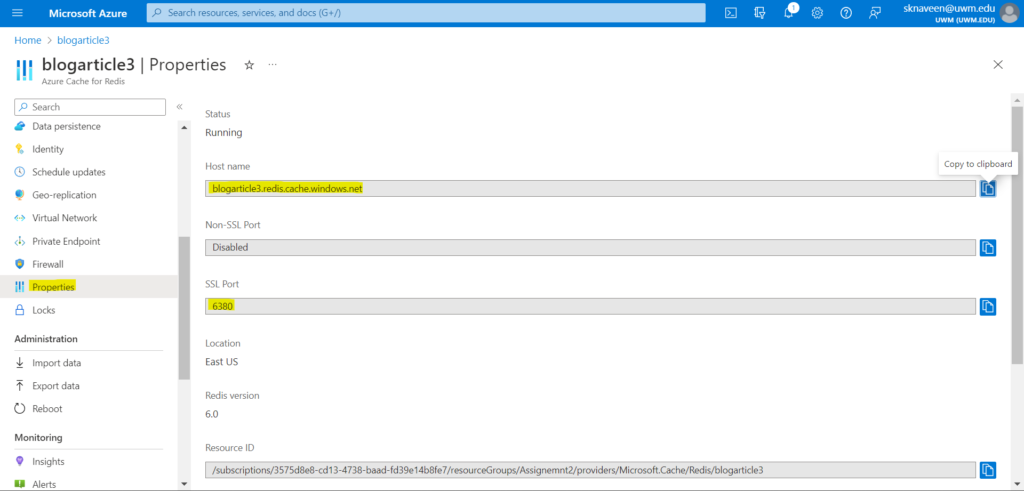
Retrieve the hostname, port, and access keys from the Azure portal
To connect your Azure Cache for the Redis server, the cache client needs the hostname, ports, and a key for the cache. You can get the hostname, ports, and keys from the Azure portal.
- To get the access keys, from your cache left navigation, select Access keys.
- To get the hostname and ports, from your cache left navigation, select Properties. The hostname is of the form <DNS name>.redis.cache.windows.net.
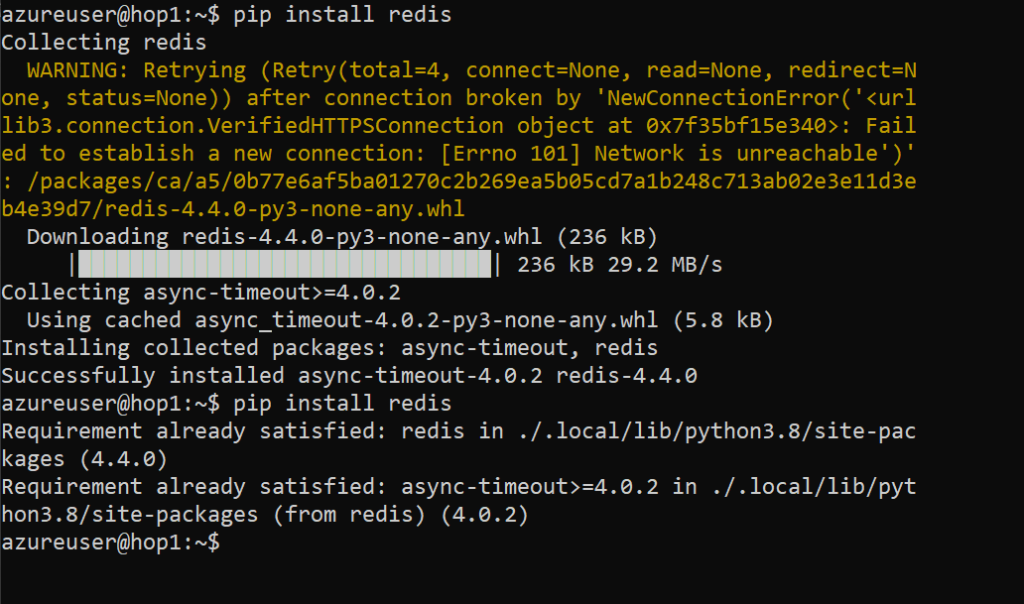
Install Redis-py
Redis-py is a Python interface to Azure Cache for Redis. Use the Python packages tool, pip, to install the Redis-py package from a command prompt.
pip install redisThe output looks something like this.
Create a sample python app
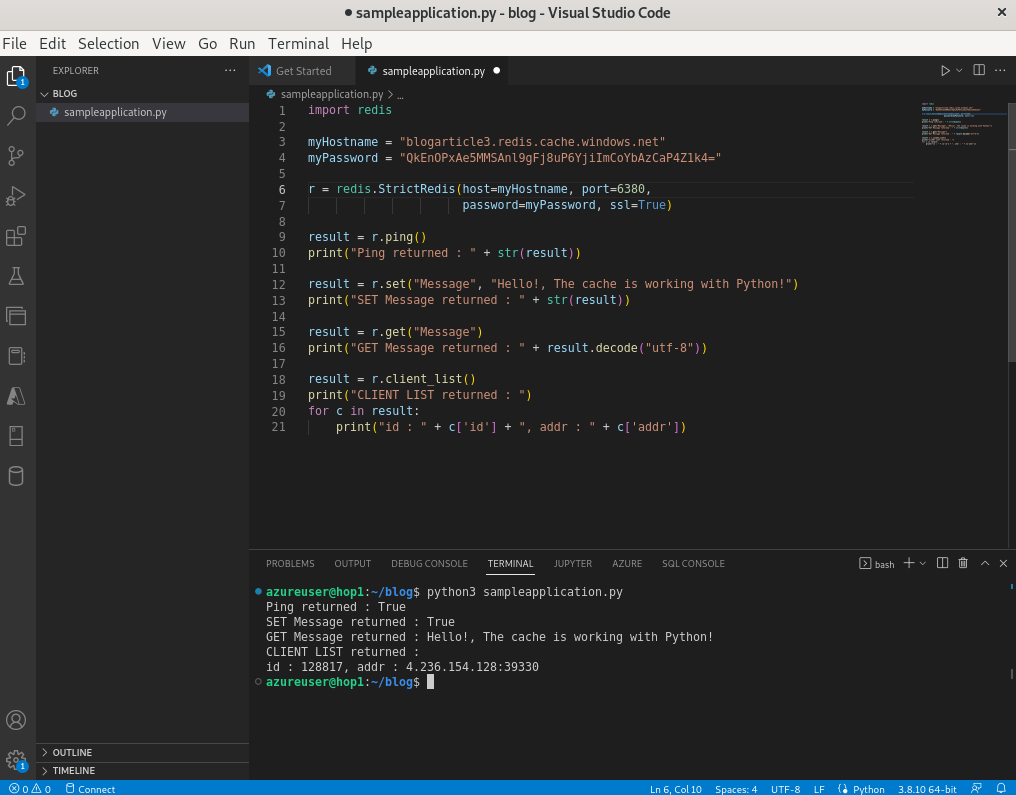
Create a new text file, add the following script, and save the file as sampleapplication.py. Replace <Your Host Name> and <Your Access Key> with the values from your Azure Cache for the Redis instance. Your hostname is of the form <DNS name>.redis.cache.windows.net.
import redis

myHostname = "<Your Host Name>"
myPassword = "<Your Access Key>"

r = redis.StrictRedis(host=myHostname, port=6380,
                      password=myPassword, ssl=True)

result = r.ping()
print("Ping returned : " + str(result))

result = r.set("Message", "Hello!, The cache is working with Python!")
print("SET Message returned : " + str(result))

result = r.get("Message")
print("GET Message returned : " + result.decode("utf-8"))

result = r.client_list()
print("CLIENT LIST returned : ")
for c in result:
    print("id : " + c['id'] + ", addr : " + c['addr'])
Run sampleapplication.py with Python.
python3 sampleapplication.pyYou should see results like the following example:
Clean up resources
If you’re finished with the Azure resource group and resources you created, you can delete them to avoid charges.