AWS Simple Storage Service (S3)
S3, is the object storage service provided by AWS. It is probably the most used, go-to storage service for AWS users given the features like extremely high availability, security, and simple connection to other AWS Services. AWS S3 can be used by people with all kinds of use cases like mobile/web applications, big data, machine learning and many more.
To store our data in Amazon S3, we work with resources known as buckets and objects.
Working in Buckets:
A bucket is a container for objects. To store an object on Amazon S3, create an account and then upload the object into a bucket. If the file is in the bucket, then we can access it, download it, and delete it. When we no long need the resource, we can remove it.
For example, if the object named photos/puppy.jpg is stored in the DOC-EXAMPLE-BUCKET bucket in the US West (Oregon) Region, then it is addressable using the URL https://DOC-EXAMPLE-BUCKET.s3.us-west2.amazonaws.com/photos/puppy.jpg
Creating Buckets
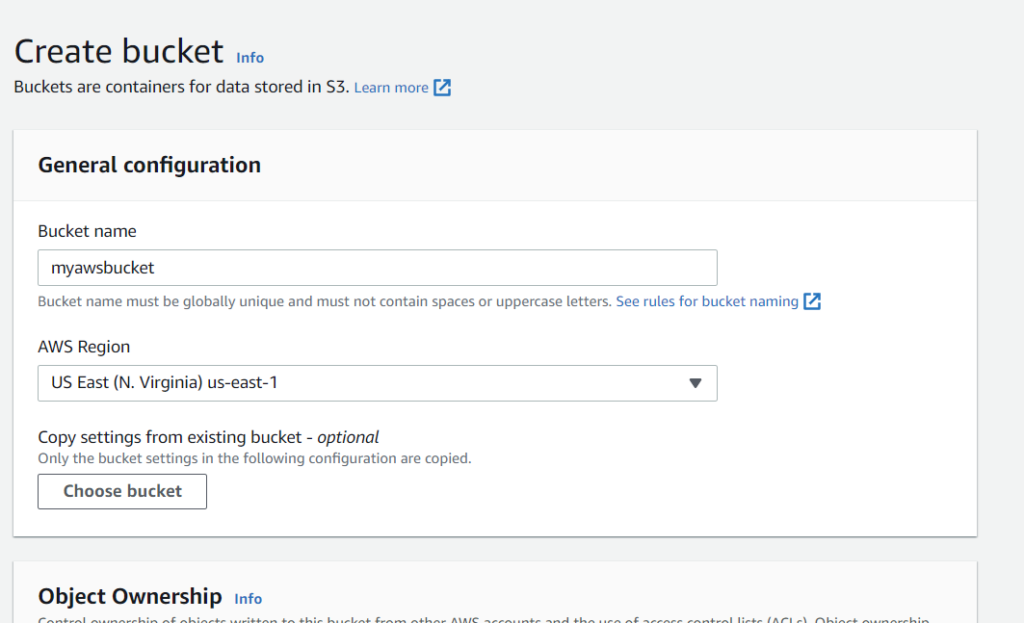
When we create a new bucket, we must specify a bucket name and region. We can optionally specify additional storage management settings for the bucket. Once we created a bucket, we cannot modify its name or region.
We can upload any number of files or objects to the bucket. By defaults, we can create up 100 buckets in each of the AWS accounts. If we require more buckets, we can raise our account bucket limit to 1,000 buckets by requesting an increase in service limits.
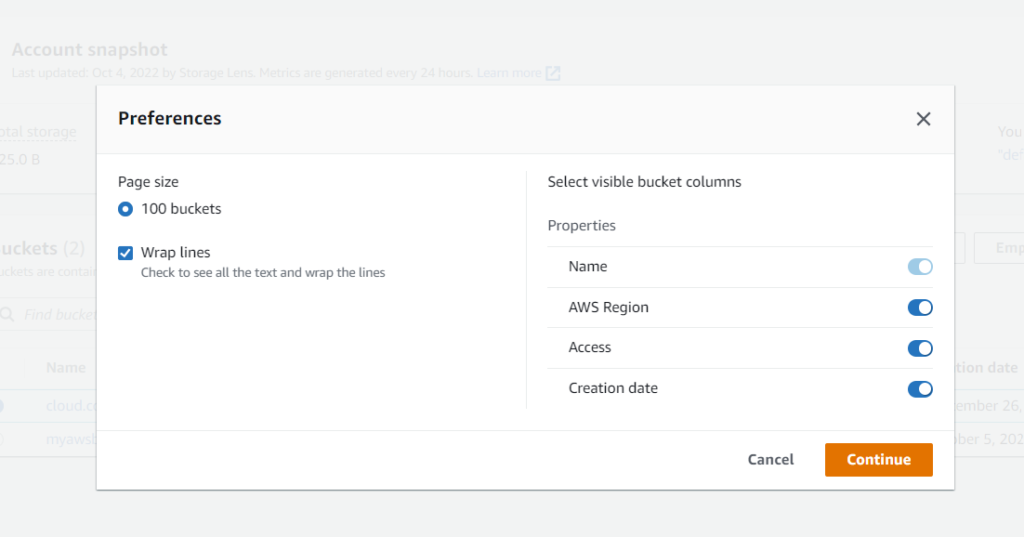
We can use the Amazon S3 console, Amazon S3 APIs, AWS CLI, or AWS SDKs to create a bucket. Now we are covering only how to create Bucket using console.
Steps to create a bucket in AWS
- From AWS console Home –> S3 –> Create Bucket.
- Enter a bucket name.
Bucket names must be unique across all AWS accounts in all the AWS Regions within a partition.
- Select Region.
Choose a Region close to you to minimize latency and costs and address regulatory requirements. Objects stored in a Region never leave that Region unless you explicitly transfer them to another Region
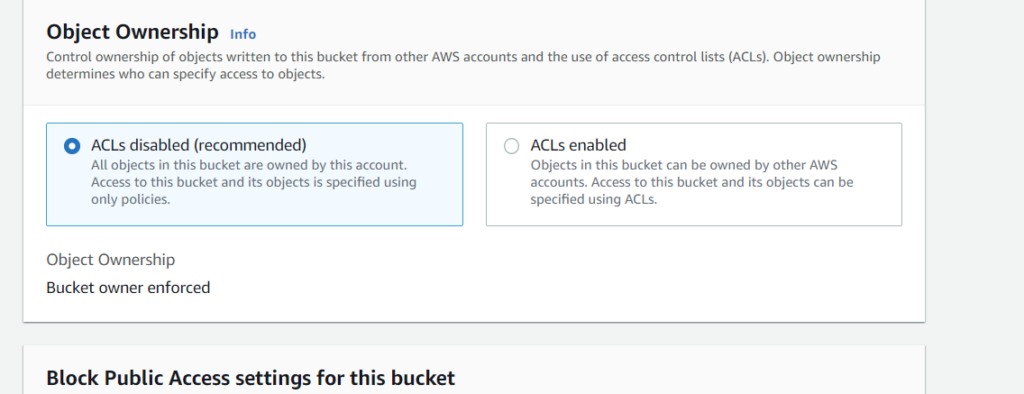
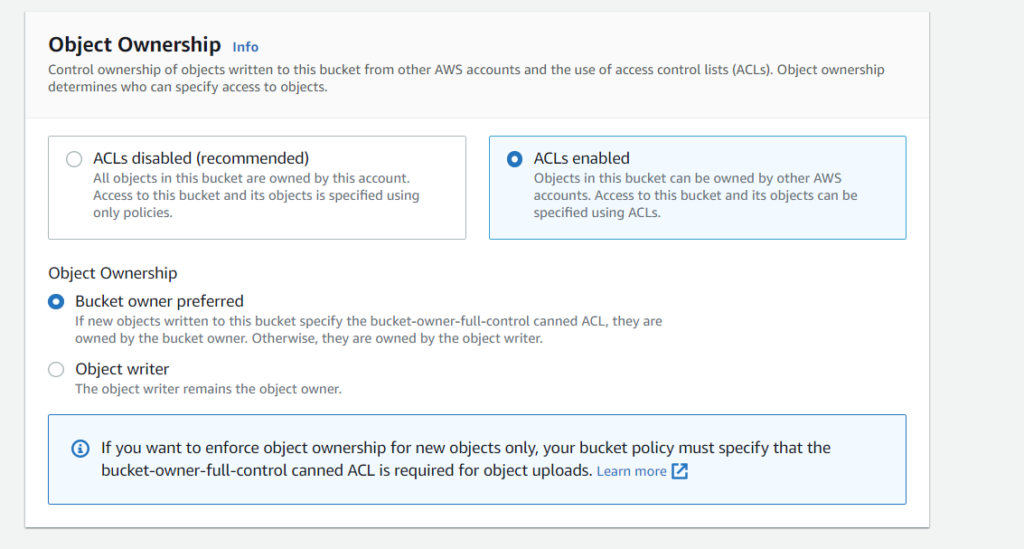
- Object Ownership: to disable or enable ACLs and control ownership of objects uploaded in your bucket
- ACLs disabled
- Bucket owner enforced –the bucket owner automatically owns and has full control over every object in the bucket.
- ACLs enabled
- Bucket owner preferred – The bucket owner owns and has full control over new objects that other accounts write to the bucket with the bucket-owner-full-control canned ACL.
- Object writer – The AWS account that uploads an object owns the object, has full control over it, and can grant other users access to it through ACLs.
- ACLs disabled
- Bucket settings for Block Public Access
Block Public Access settings that you enable for the bucket are also enabled for all access points that you create on the bucket.

- Advanced settings
To enable Object Lock, choose Enable, read the warning that appears, and acknowledge it.

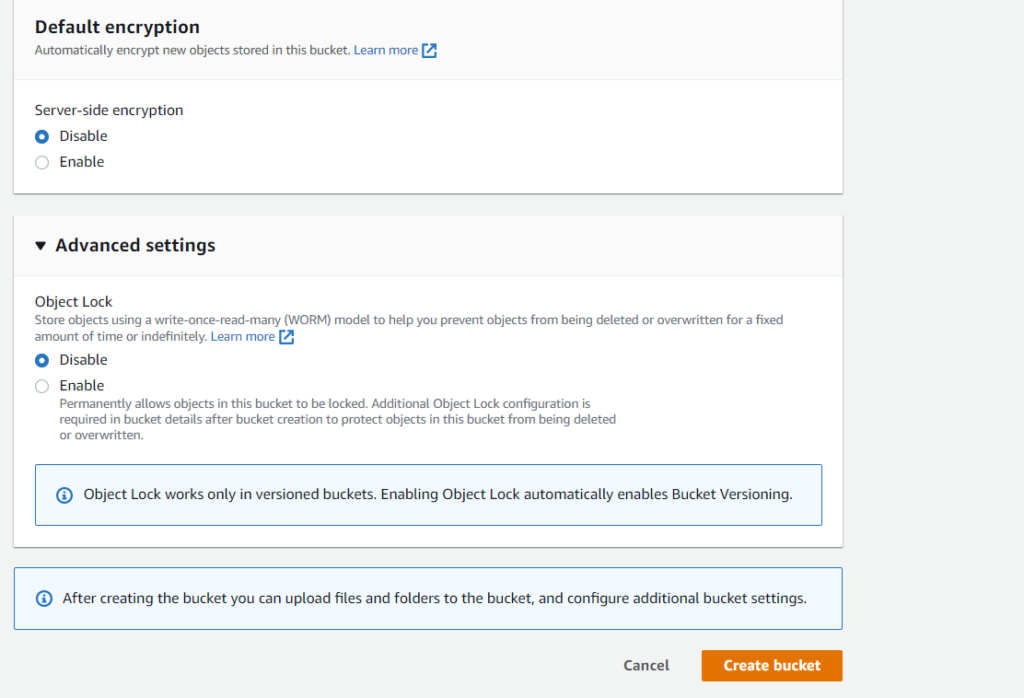
- Create Bucket.
Delete Bucket
- Console Home –> S3 –> select the bucket which needed to be deleted from the bucket list
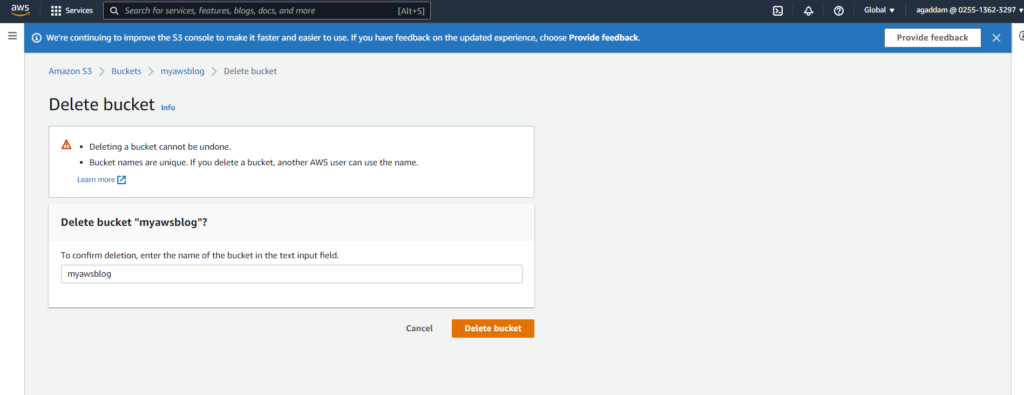
- Click Delete we will redirect to delete bucket page
- On the Delete bucket page, confirm that you want to delete the bucket by entering the bucket name into the text field, and then choose Delete bucket.
Note: If the bucket contains any objects, empty the bucket before deleting it. If you delete a bucket, another AWS user can use the name.

Empty Bucket:
- Console Home –> S3 –> select the bucket which needed to be empty from the bucket list
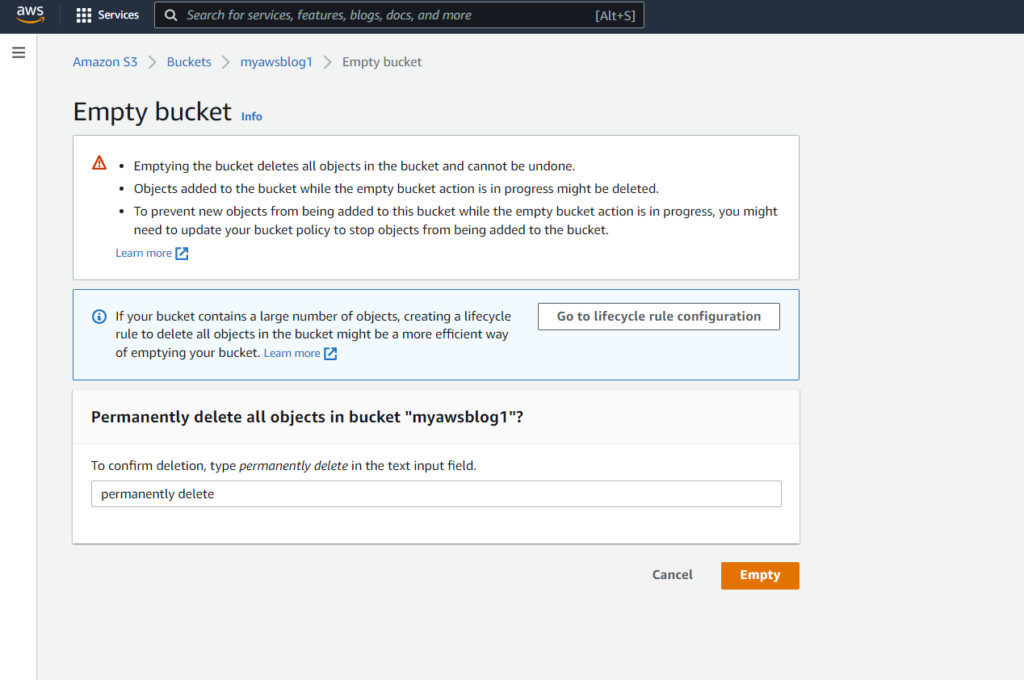
- Click Empty we will redirect to Empty bucket page
- On the Empty bucket page, confirm that you want to empty the bucket by entering the bucket name into the text field, and then choose Empty.

We can view the properties of the bucket we created to know more information please visit here Viewing the properties for an S3 bucket – Amazon Simple Storage Service