Data storage is important to any cloud based project. Azure offers multiple solutions to solve any and all data related concerns. The main Storage Accounts being: File, Queue, Table, Disk and Blob. This article will delve into Blob Storage as well as instructions on creating your first Blob Storage account and uploading your data right away!
Azure’s Answer to Cloud Storage
Before we can delve into Blob Storage, we have to quickly go over the other storage accounts solutions.
- Azure Files
- Mainly used to manage file sharing within existing NAS file servers, introducing remote access
- Azure Queues
- Used to manage high quantity messages from application to application.
- Azure Tables
- Used to store non-relational structured data (NoSQL) with remote cloud access.
- Azure Disks
- Virtualized Disk within the cloud for Virtual Machine usage
What is Blob Storage and Why Use It?
Blob Storage is used to store massive quantities of data in the cloud. The individual stored data is called a Blob, hence the name Blob Storage. The Blob’s them self are unstructured, meaning that they don’t have to be a specific data type/model (text, binary, JSON, mp4, etc…)
As any type of data can be uploaded, stored or accessed, this allows Azure Blob storage to be very flexible for data storage.
Azure offers many convenient ways to access the data via the use of Azure Storage REST API, Azure PowerShell, Azure CLI, HTTP/HTTPS and Access Keys.
Common Blob storage Use Cases:
- Serving images or documents directly to a browser.
- Storing files for distributed access.
- Streaming video and audio.
- Writing to log files.
- Storing data for backup and restore, disaster recovery, and archiving.
- Storing data for analysis by an on-premises or Azure-hosted service.
Blob Resources
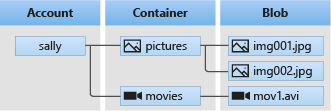
There are 3 main resources when it comes to Azure’s Blob Storage: “Storage Account”, “Container“, and “Blobs”. The image below shows the relationship between the 3 resources.
- Storage Account
- With Blob Storage, you can create multiple “accounts” for different containers.
- These endpoints can be accessed via the use of a public URL
- E.G. name your Storage Account “uwmblobstorageexample”
- the public endpoint will be https://uwmblobstorageexample.blob.core.windows.net/data
- Types of Storage Accounts
- General-Purpose V2
- Standard for blobs, file shares, queues and tables.
- Block Blob
- Block blobs and append blobs for high transaction smaller objects
- Page Blob
- Only for Page Blobs
- General-Purpose V2
- Containers
- Used to organized blobs into different “containers”, easy way to organize the data
- Containers can have unlimited blobs inside them
- Storage accounts can have unlimited containers
- Blob
- Block Blobs: used to store text and binary data and individually managed.
- Append Blobs: blocks of blobs, ideal for logging data from VMs
- Page Blobs: Virtual Hard Drive that can be randomly accessed.
The following diagram shows the relationship between these resources.
Blob Storage Access Tier
Data is stored and accessed depending on a variety of scenarios and use cases. Azure offers different tiers of access, optimized for minimal costs to user, broken down into Hot, Cool and Archive Tier respectively.
- Hot Tier
- Hot Tier is for stored data that is frequently modified or accessed. Data in Hot Tier are optimized for low cost to access but high cost to store.
- If a blob is repeatedly modified, Hot Tier is ideal.
- Cool Tier
- Cool Tier is for stored data that is infrequently modified or accessed. Data in Cool Tier are optimized for high cost to access but low cost to store.
- Blobs that are not modified for a minimum of 30 days are in the Cool Tier.
- Both Hot and Cool Tier are considered “Online” short term storage.
- Archive Tier
- Archive Tier is for stored data that is rarely modified or accessed. Data in the Archive have high latency (slow access times).
- Data in Archive Tier have to be “re-hydrated” to be access, having significant down time compared to Cool and Hot Tiers.
- Blobs that are not modified for a minimum of 180 days are in the Archive Tier.
- Archive Tier is considered for offline long term storage.
Creating a Blob Storage Account
- Step One: Log-in to your Azure Account on a web browser
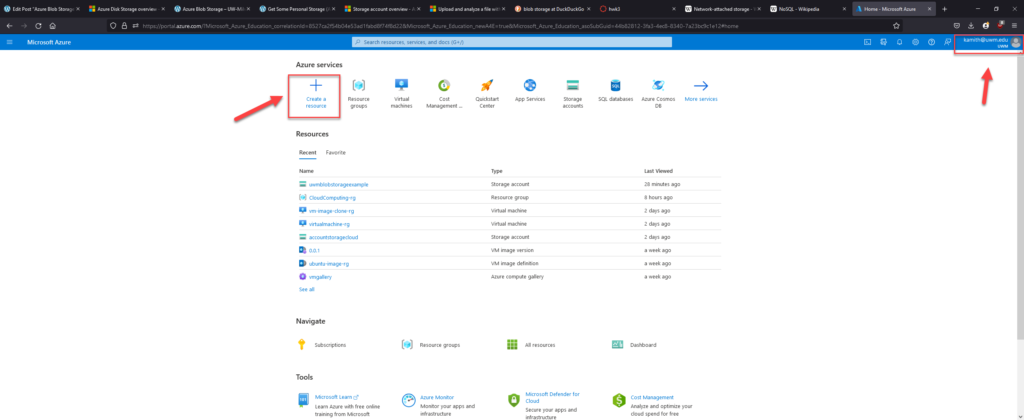
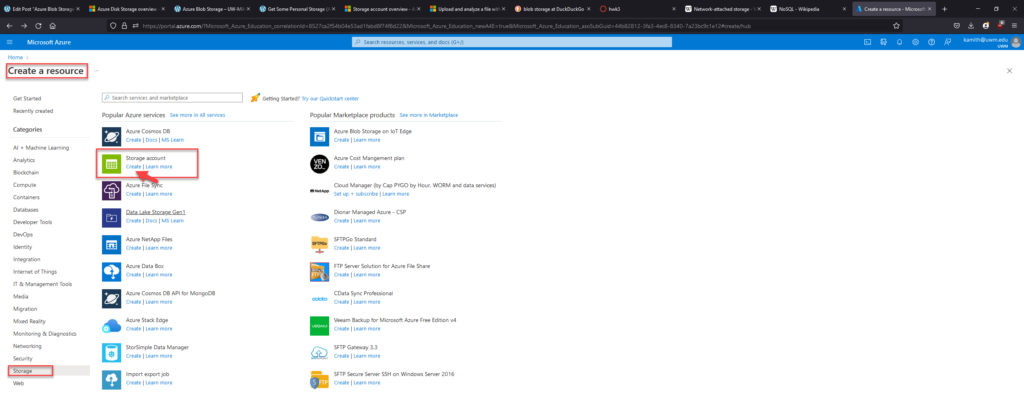
- Step Two: Navigate to “Create a Resource”
- Click on “Storage” under “Categories”
- Find “Storage Account”
- Click “Create”
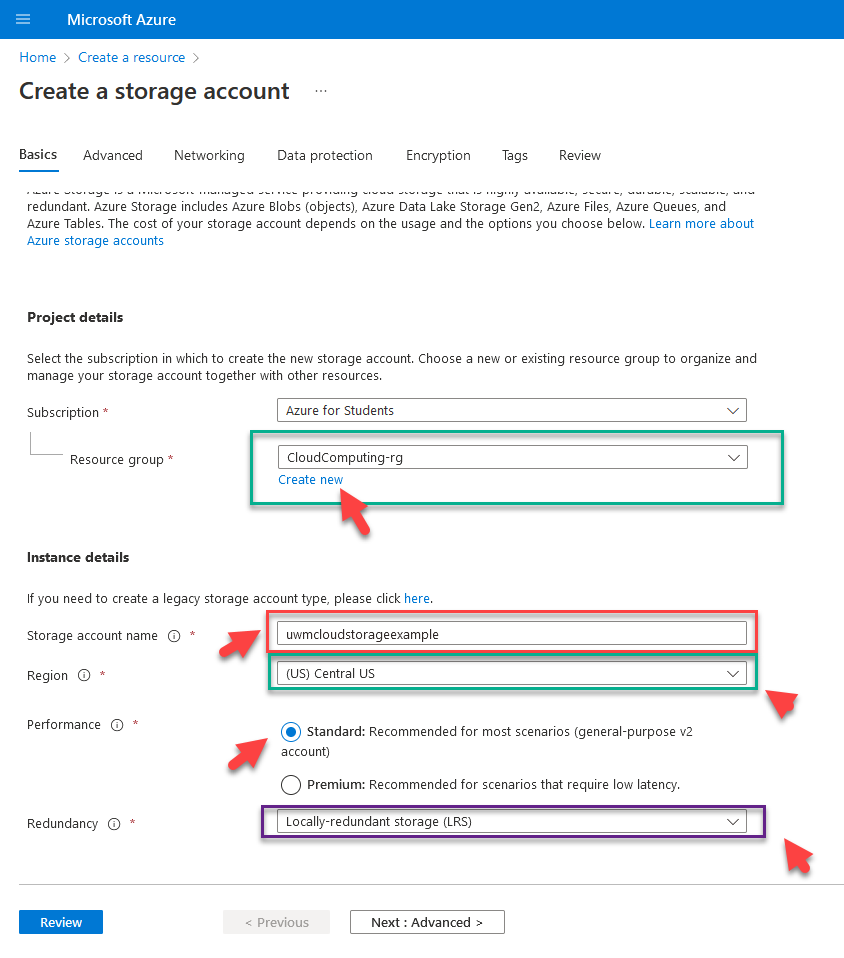
- Step Three: Basics Tab
- Resource Group: Create a new resource group, otherwise use an existing one.
- Storage Account Name: All lower case, no spaces, unique
- Region: Select the closest region for lowest latency
- Performance: Standard for most cases
- Redundancy: LRS for our purposes, lowest cost
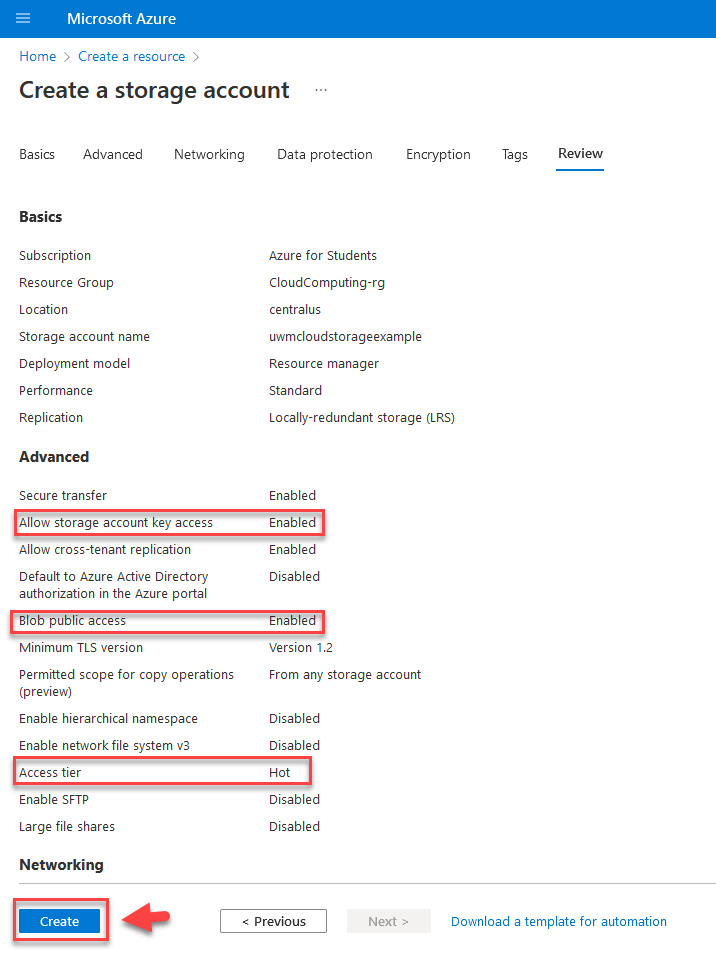
- Step Four: Review and Create – Default Advanced Settings
- “Allow Storage Account Key Access” gives us the ablility to create access keys for Azure Storage Explorer and many other services that require assess to our blobs.
- “Blob Public Access” gives us public URLs to our blobs that are accessible with permission.
- “Access Tier” Hot Tier gives us fast access
- Click “Create” to make our Blob Storage!
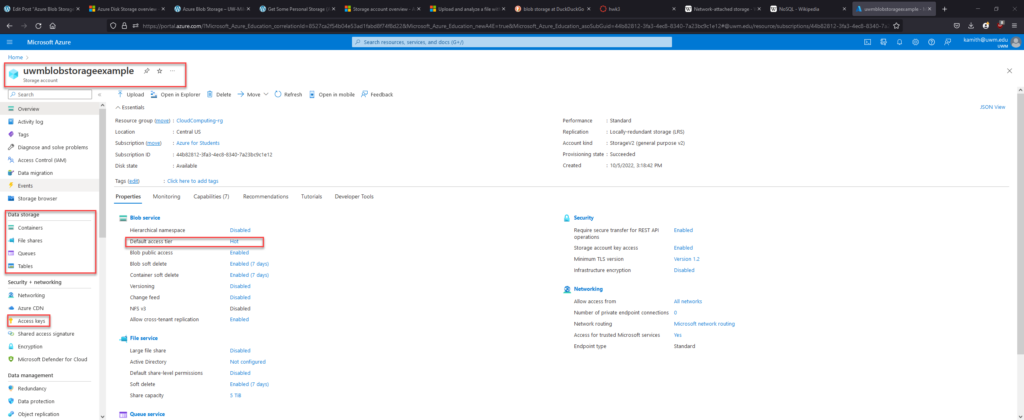
- Step Five: Search uwmblobstorageexample within resource explorer
- Main overview page shows us the different resources available to us.
- Data Storage Tab: shows us the different type including “Containers” for our blob storage
- Access Key Tab: shows us the access keys required to gain access to the Blob Storage
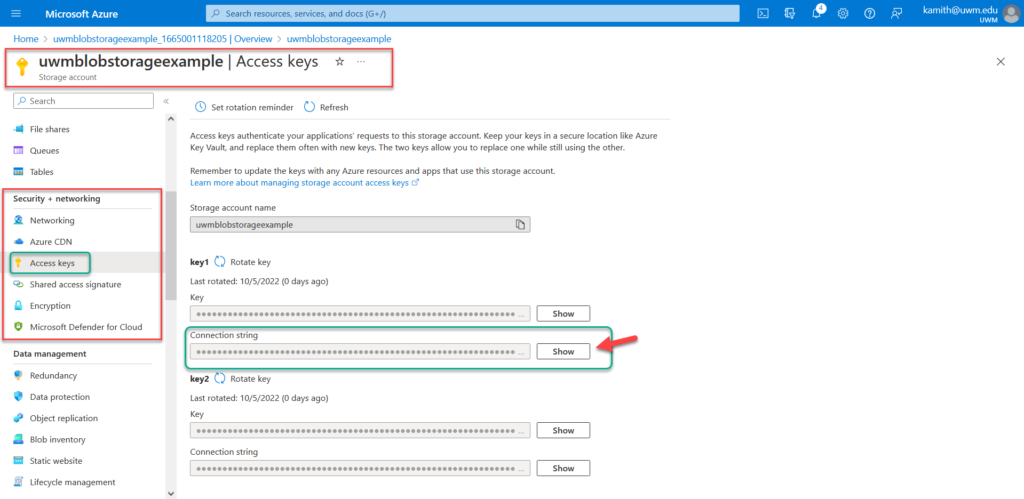
- Step Six: Access Keys
- We can see the connection strings used by APIs and Store Explorer

Connecting from Microsoft Azure Storage Explorer
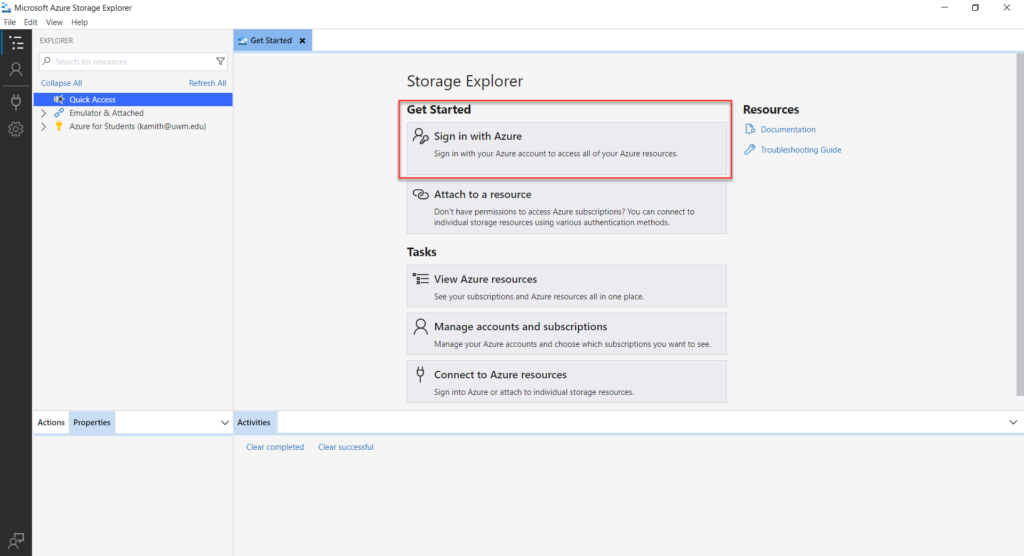
- Step One: Install Microsoft Azure Storage Explorer
- Step Two: Open the application
- Sign-in to your Azure Account
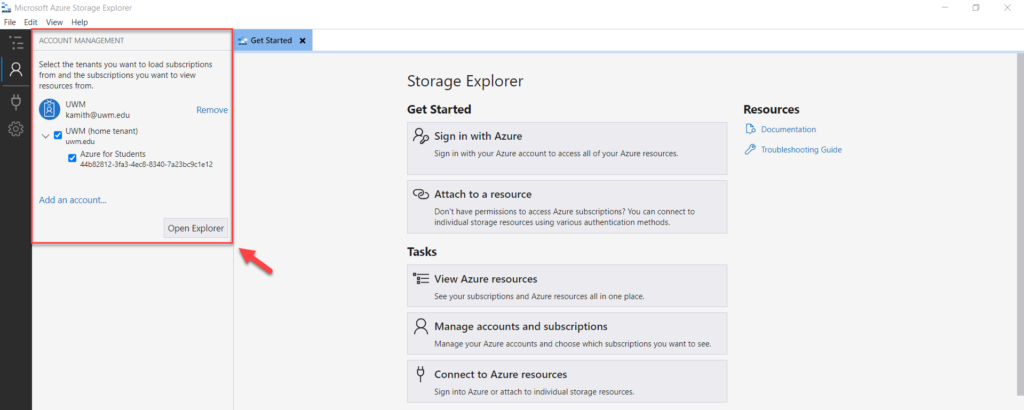
- Step Three: Navigate to Account Management
- Select the correct resource
- Click “Open Explorer”
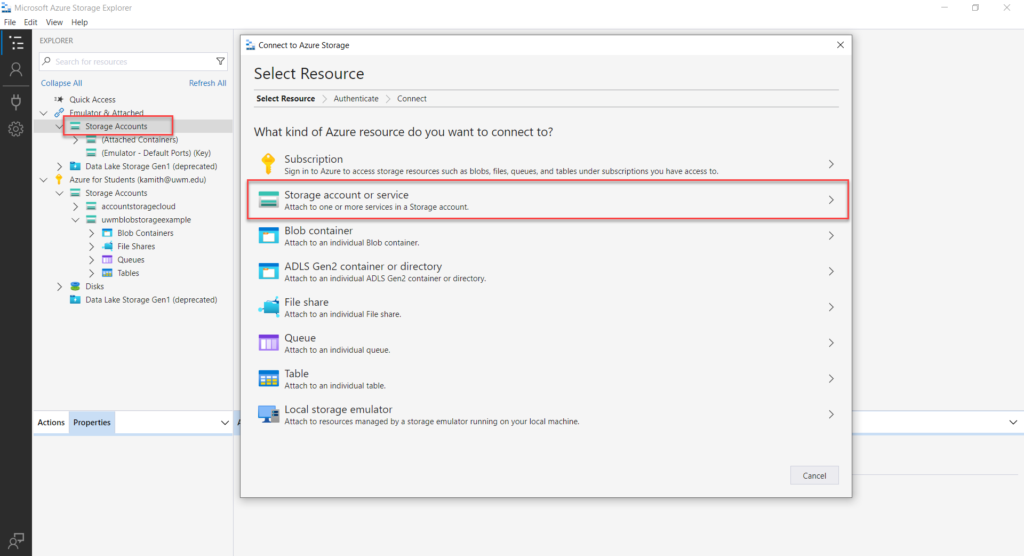
- Step Four: Expand the options in the Explorer
- Right Click on “Storage Accounts” under “Emulator & Attached”
- For Resource type Click “Storage account or service”
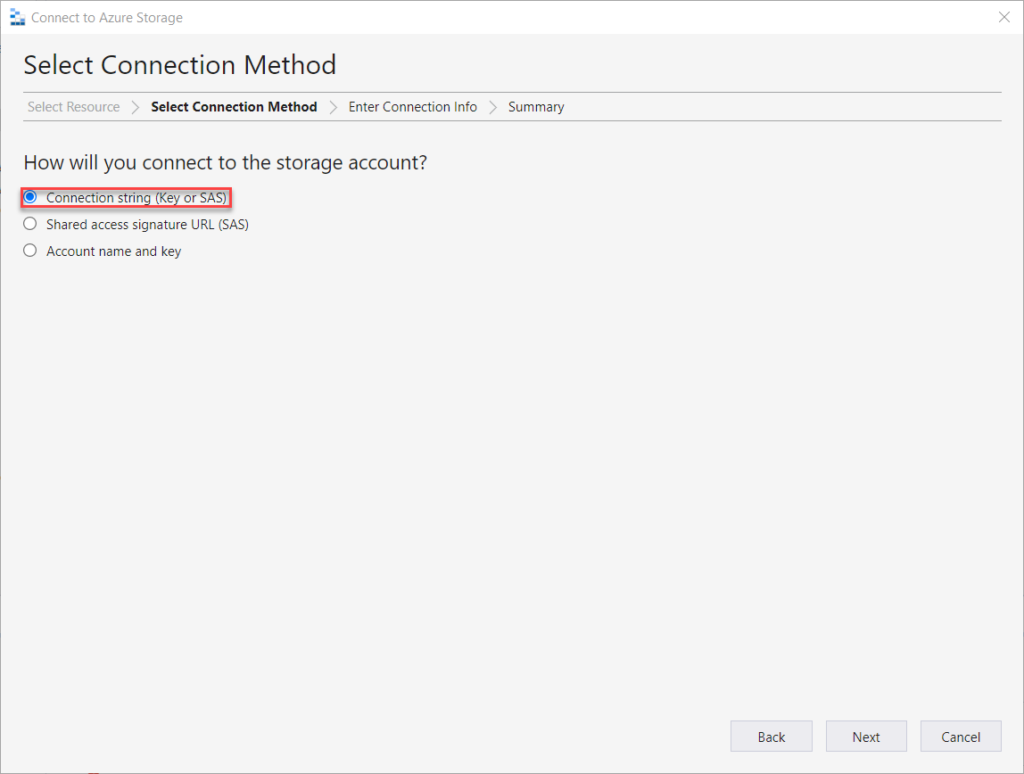
- On Select Connection Method, Click “Connection String (Key or SAS)”
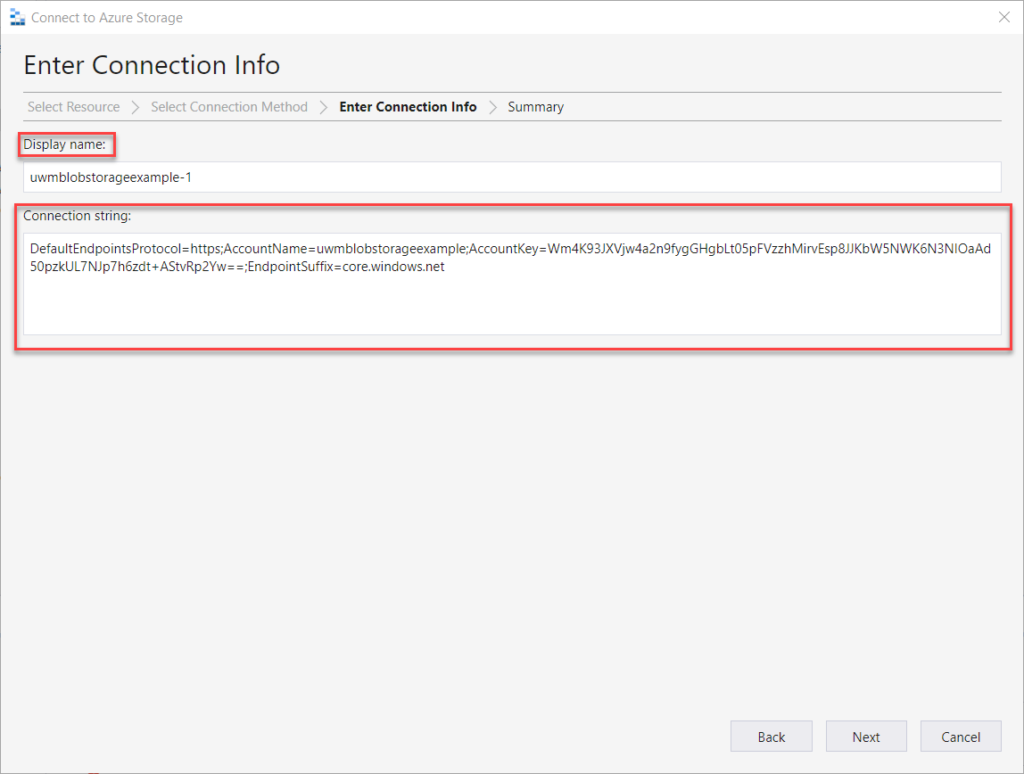
- Copy the “Connection String Key” for the Storage Account from Azure
- Step Five: Refresh the Explorer
- Under “Emulated & Attached” the new storage account is added “uwmblobstorageexample”
- Expand the new storage account
- Blob Containers should only contain the $logs
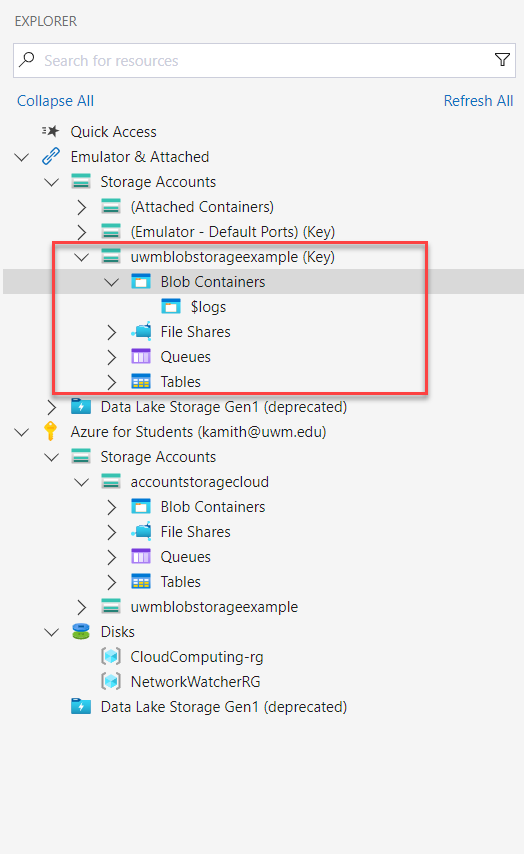
- Step Six: Editing Blob Containers
- Right Click “Blob Containers”
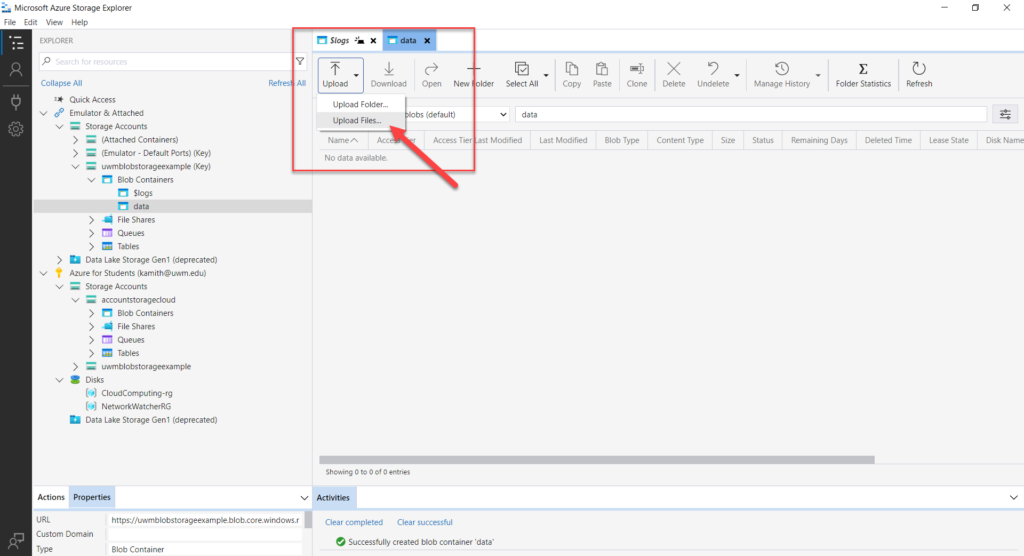
- Click “Create Blob Container” and name it “data”
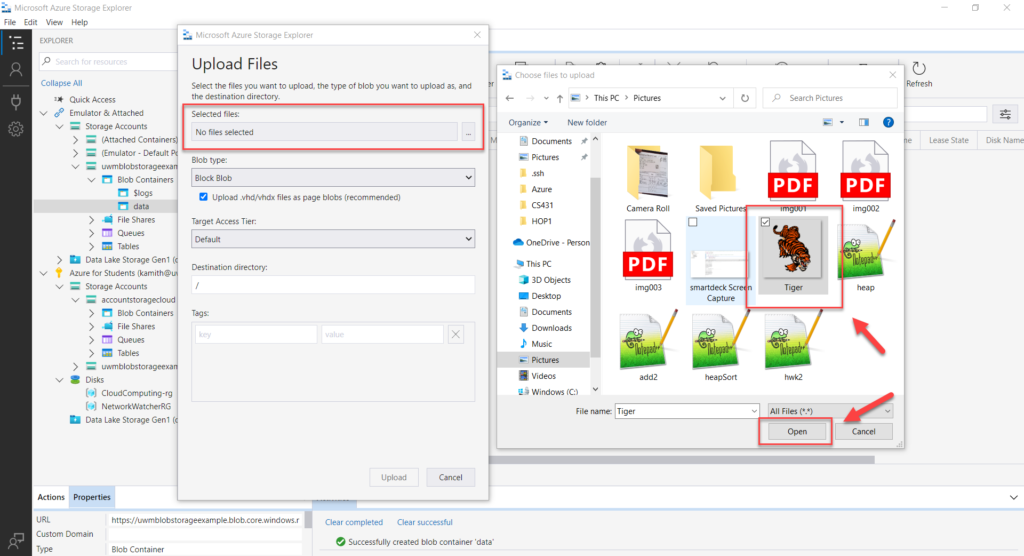
- Upload a file into the newly created Blob Container “data”
- Click Selected Files and Click Upload after finding a file.
- New “Tiger.png” file will be added to the “data” container
- Right Click “Blob Containers”

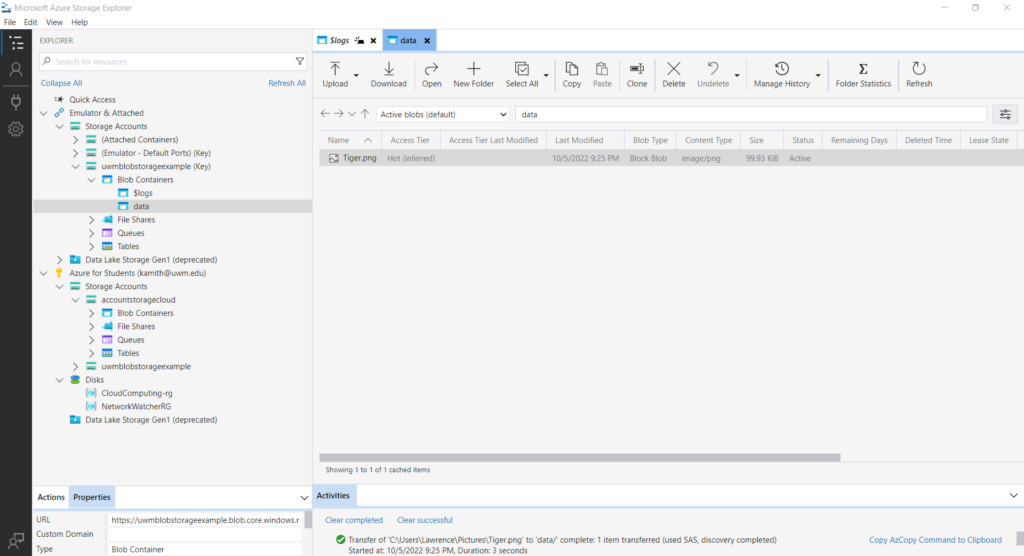
- Step Seven: Data Explorer – Container Actions
- Upload: Upload Files and Folders from local environment into the storage account
- Download: Download onto local environment any selected files
- Open: Open any selected files (Picture or Text)
- New Folder: Create a new folder within the “data” container
- Copy/Paste/Clone: Copy/Paste/Clone selected file
- Delete: Delete selected blob

Source:
https://azure.microsoft.com/en-us/products/storage/blobs/#overview