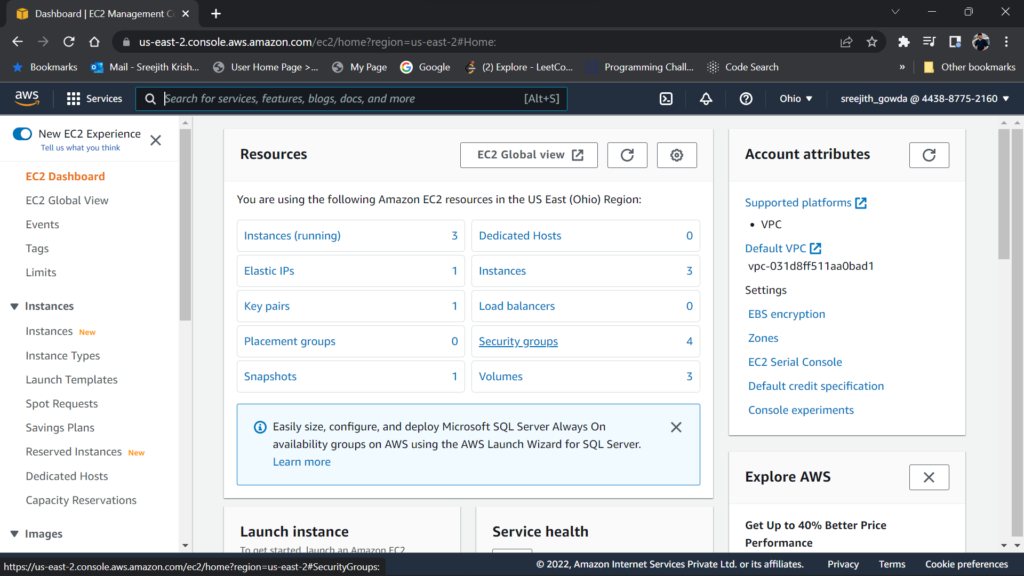
On AWS, do the following steps to expand the storage on a Linux EC2 instance
- From the AWS portal, Navigate: EC2 -> Instances. Click on the instance in which you want to expand the storage.
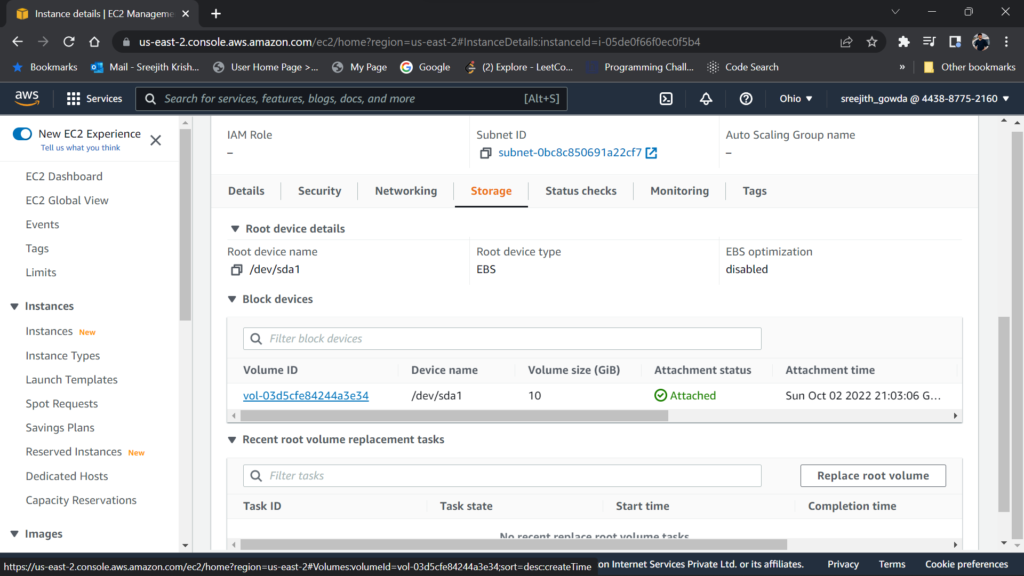
- Scroll down and select Storage.
- In the Block devices, Click on the volume ID.
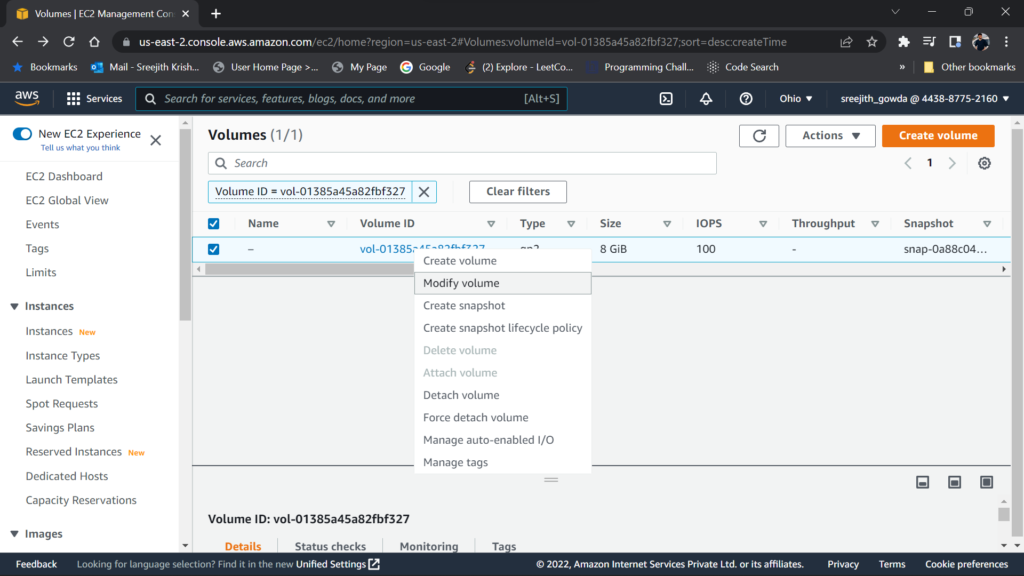
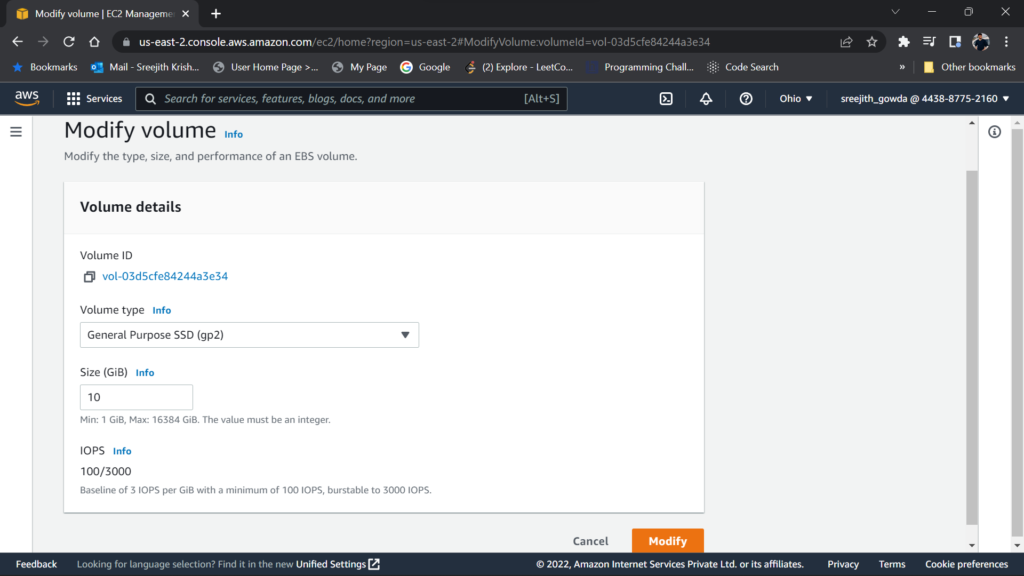
- You will be directed to a new page, right-click on the Volume ID, and select Modify volume.
- Enter a new size for your instance and click on Modify
- Go back to the Volumes and check if the change is implemented.
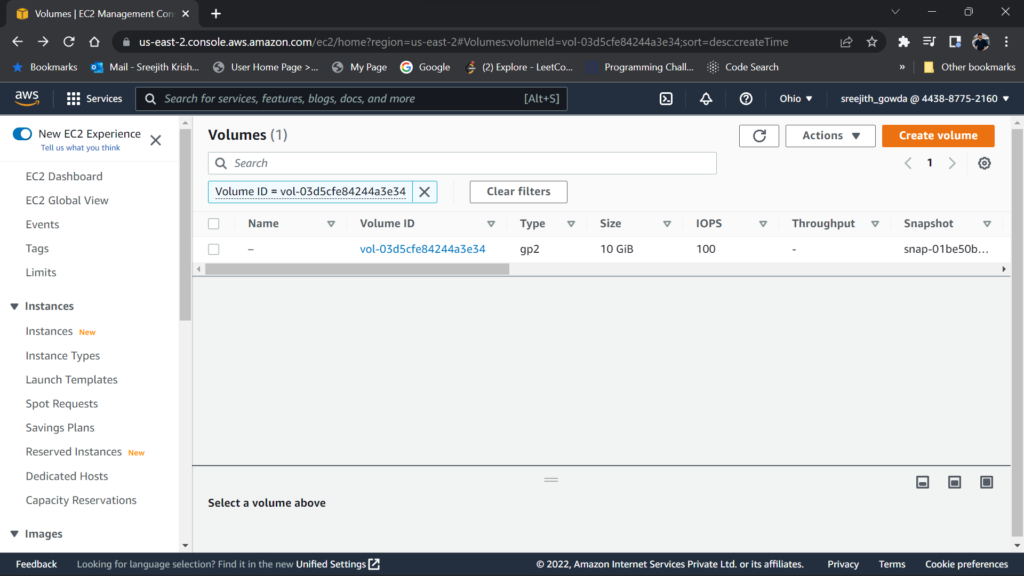
You can see the size is changed from 8GiB to 10GiB. If there is no change, wait for some time and try refreshing the page.
Now let us connect to our Instance via Bitvise and check if the change has been implemented.
- Connect to your instance via Bitvise and open the terminal window and press Ctrl + L.
- In order to navigate to the root user type the following in the terminal window,
sudo su- Now that you’re in the root user, check the storage of your instance by typing
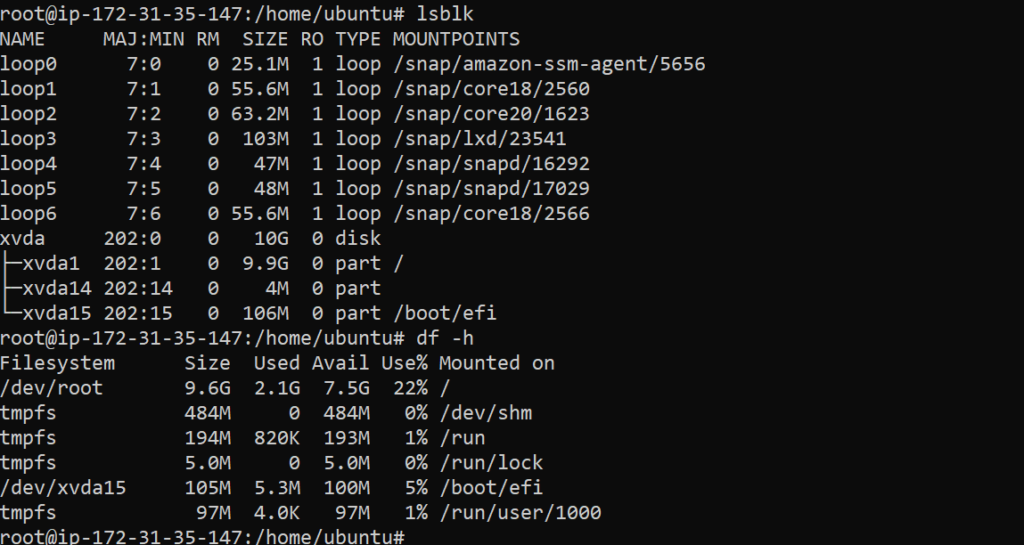
lsblklsblk lists information about all available or the specified block devices.
df -hThe “df” command displays the information of device name, total blocks, total disk space, used disk space, available disk space, and mount points on a file system.
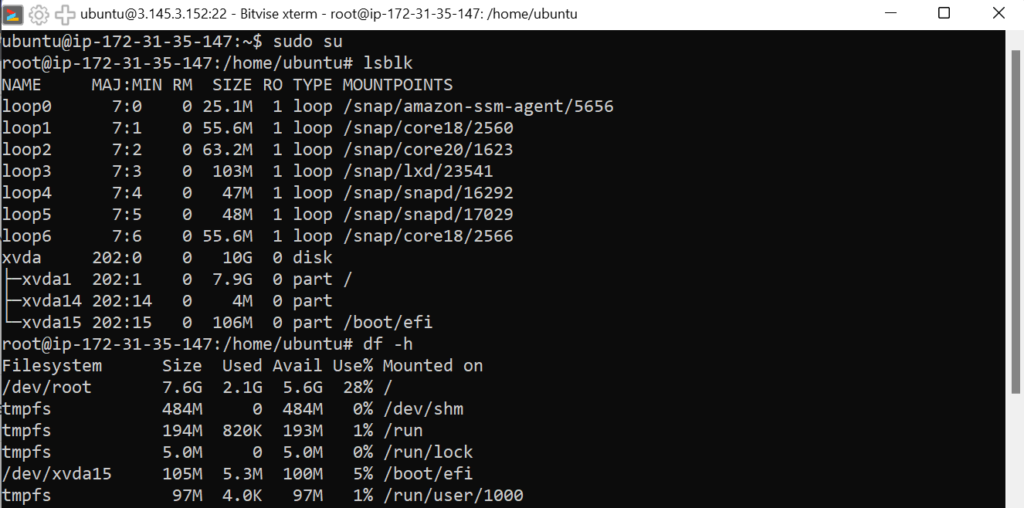
Oops, the change has not been implemented in our instance. As you can see above in /dev/root the size of our instance is still 7.6GB (approx 8GB) but we changed it to 10GB, in order to resize the instance, execute the following two commands in the terminal.
growpart /dev/xvda 1growpart is used to extend the last partition of the disk to fill the available free space on the disk.
resize2fs /dev/xvda1The resize2fs program will resize ext2, ext3, or ext4 file systems. It can be used to enlarge or shrink an unmounted file system located on the device.
Now if you check the size(Use the commands lsblk and df -h in terminal), the change will be implemented. The new size of /dev/root is 9.6GB(approx 10GB)
