Google Cloud Services (GCS) is a leading cloud service provider next to Azure and AWS. This guide will cover instructions for creating an account, creating basic storage, and creating a virtual machine, all with GCS.
Creating an Account
Navigate to the registration page to create a new GCS account (you will need to be signed in with a Google account). GCS provides a generous $300 in free credit, which is valid for 90 days. You may receive an additional $100 in free credit on top of this if you use a Google account featuring an .edu email address for registration. You will need to provide a credit/debit card number or bank account information, but GCS will not charge you anything, even after your free trial, unless you manually switch to a paid account.
If you are prompted for a business name, you can change the account type to “individual” so that you need not provide one.
After registering, you will be asked a few additional questions, and then you will have access to the main dashboard.
You now have a GCS account. Next, we will create a bucket, which is the basic method for storage in GCS.
Creating a Bucket (Storage)
In GCS, cloud storage is done in “buckets”. We will create a bucket and manage files in it.
Assuming you are logged in, navigate to the dashboard. You can do this at any time by clicking the Google Cloud logo in the upper-left corner. Using the navigation menu on the left of the window, navigate to Cloud Storage ==> Buckets. If you ever don’t see this menu, there may be a triple horizontal line symbol to the left of the logo that you can click to produce it.
Click “Create Bucket”. Give it a name: Its name must be globally unique across all buckets hosted on GCS, so you are unlikely to get a short and clean name. Some strings and symbols are not allowed, but in short, you can use lowercase letters, numbers, hyphens, underscores, and periods. An example of a reasonable name is “demo-bucket-244865” (but you can’t use that one because I did).
You’ll then choose where to store your data. This is permanent; you’ll want to choose a location near your actual physical location or near other relevant resources such as virtual machines, in order to maximize performance. Select “Region”, which is cheaper than the other options but suitable for this demo, and choose a region. I’m choosing us-central1 (Iowa).
The remaining options can be left as default. Click “Create”. A dialog will appear confirming that public access will be prevented–this is one of the options we left as default. You should leave it as-is (enabled), which will prevent random people from accessing your bucket. This can be changed at any time later. Press “Confirm”.
You should now have a bucket!
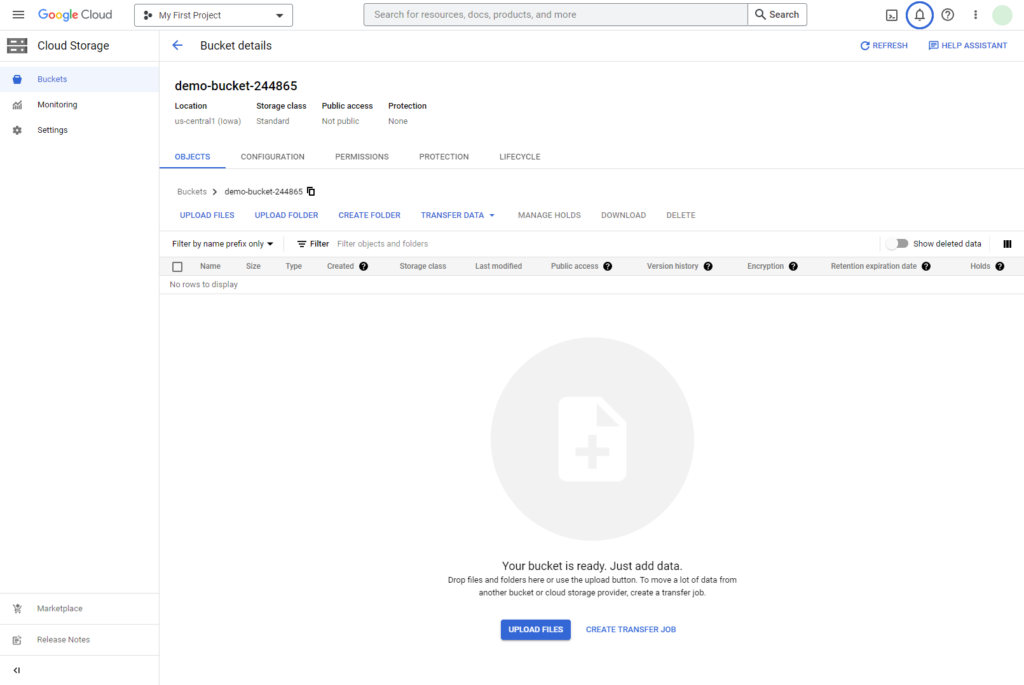
Uploading/downloading files is straightforward. Locate or download a small file, such as this free stock image. You can upload by clicking “upload files”, or you can simply drag and drop your files onto the page. Once uploaded, GCS provides useful information about each file such as whether it is publicly accessible, its upload date, and its expiration date (if you enable expiration in the bucket’s settings, which we did not). If you uploaded the file but you don’t see it on the page, try clicking “refresh” near the top right of the page.
There are several ways to download your files, but one quick way is clicking the purple download button toward the right side of the window on your file.
If you click on your file’s name, you will see more detailed information about the file, as well as an in-window preview of the file.
You are charged (or your credits are charged) for storage space that you use. You may want to delete your files from the bucket. To do this, select the files you want to delete, and click the delete button above the list of files. This button will be grayed-out until you select a file.
You can also delete entire buckets all at once. To do this, navigate to the main buckets page (Cloud Storage ==> Buckets). Select the buckets you want to delete, and click the “delete” button that appears above.
You now have basic experience with buckets in GCS. Next, we will explore virtual machines.
Creating a Virtual Machine
GCS allows us to create virtual machines (VMs) that can be accessed remotely. Here, we will do just that.
Navigate to the dashboard. In the navigation menu, go to: Compute Engine ==> VM instances.
Whoops! You (probably) don’t have access to that page yet because the API is disabled.
GCS has users organize resources into “projects”. You were given an empty project automatically when you logged in, which is named “My First Project”. This is a convenient method of organization.
If this is the first time you are using Compute Engine resources in this project, as it likely is, then you will need to enable the Compute Engine API. If this is the case, you will now see a prominent blue “enable” button for this. Click it. It may take a few minutes for GCS to process this request, but you will be notified in this window when it is finished.
Once the API is enabled, again navigate to Compute Engine ==> VM instances. This time you should get the correct page.
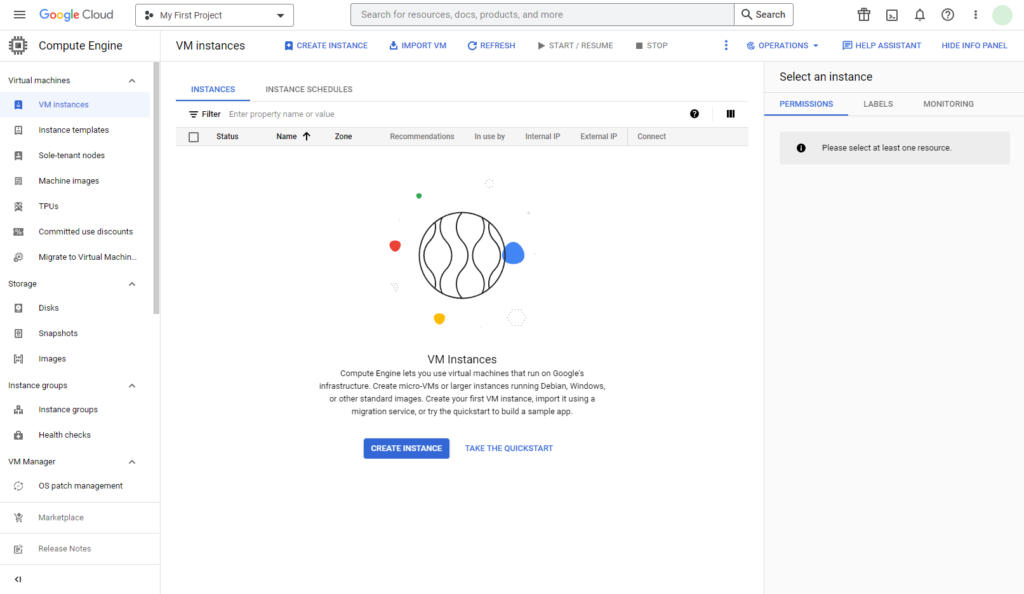
Click “create instance”.
Name the instance. You can hover over the question mark in the name field to see the naming rules. I’m using “demo-vm-instance”.
Like with the bucket earlier, we will need to choose a permanent location for the VM. The same considerations from before still apply: you probably want whatever is closest to your actual location. I chose the region us-central1 (Iowa). As for “zone”, choose any. These are isolated locations within your selected region. I chose us-central1-c.
As we give our specifications for our VM, GCS will display a handy cost estimate on the right side of the window, which will update as we make changes. This is a quick way to make judgements related to performance and your budget.
Under “Machine Configuration”, select a machine. GCS does not give relevant costs here, however you can simply check the estimate on the right to get a good idea of what things will cost. Let’s go with the cheapest option. Select General-Purpose. For the series, choose N1, and for machine type, choose f1-micro.
Continue down to “boot disk”. Click “change”, and choose Ubuntu 20.04 LTS (x86/64) for the operating system and version. You can leave the other settings as default. You could reduce the disk size down from the default of 10 GB, however if you go too low then the VM will not function properly. You should leave it as default for this demo. Click the “select” button to close this window and return to the VM configuration page.
Under “Firewall”, enable “Allow HTTP traffic”. This will allow us to connect to the VM with HTTP.
All other options can be left as default. Click “Create” and GCS will begin creating your VM. You’ll be brought to the VM instances summary page, and you should see your new instance. Its status may appear to be loading until it has been fully created, at which point the status will be a checkmark. This may take a few minutes.
Once the VM is ready, you can connect to it. GCS conveniently allows you to connect immediately in-browser. To do this, click “SSH” on your VM instance.

If you instead want to connect with local software such as Bitvise, we will need to add an SSH key to the instance. From any Compute Engine page, use the navigation pane on the left to go to Settings ==> Metadata. Click the “SSH keys” tab. Click “add SSH key”, and paste a public SSH key into the field that is created. If it is not formatted correctly, you will see an error message. Click “save”. Note the associated username. For me, GCS used the comment in my public key as the username.
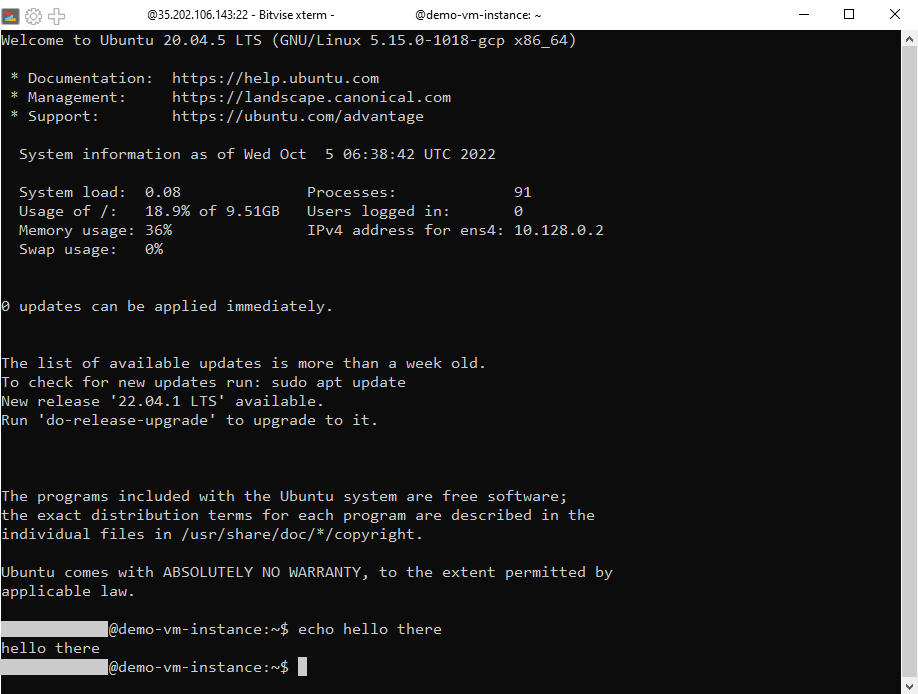
If you are using Bitvise: Paste the VM instance’s public IP into the host field (you can find it on the instance’s summary page in GCS). Provide the relevant username. The initial method should be publickey, and you can set Client key to Auto. Assuming your key is already present in Bitvise, you can now connect. After connecting, you can access the VM terminal by clicking “new terminal console”.
If you don’t have an SSH key set up or have not used Bitvise before, consider these guides: Creating an SSH key pair and using Bitvise.
If you’re finished with your VM, you may want to delete it to avoid being unnecessarily charged for it over time. We will do this now.
Navigate again to Compute Engine ==> VM instances. Select the VM instance, and click the triple dot symbol toward the right side of the window on this VM instance to produce a dropdown menu. Here, you can perform actions such as starting, stopping, and suspending the VM instance, as well as deleting it. Assuming you left the options that we did not discuss as default, deleting the VM will also delete the relevant boot disk (which you otherwise would continue paying for). You will see this information in the confirmation dialog when you try to delete the VM. Click “delete” and confirm it in the dialog window, and the VM instance will be deleted after a few minutes.
You now have a GCS account and basic experience with storage and virtual machines in GCS!
A Brief Comparison to Azure and AWS
GCS offers similar cloud services to Azure and AWS in general. When it comes to very basic use, such as what we did in this demo, these services are more or less interchangeable. Some notable differences do exist, however. For instance, GCS offers more generous free credit than its competitors, and has a cleaner, less cluttered user interface, in my opinion. This may make it better suited to users who are new to cloud services. Additionally, GCS includes an elegant system of unobtrusive tutorials that I found impressive.
There was one major convenience offered by GCS that I did not see (at least not prominently) in Azure or AWS: the ability to connect to a VM instance’s terminal directly in-window with literally one click. This doesn’t require any extra software or configuration, so can be useful for users who are less interested in getting into the relative details of authentication and internet communication. This also means that a user can easily access their VM from any computer that has a web browser and internet access, providing extra flexibility.