Hey folks, you created an IAM user in the initial period in your AWS account. AWS users can be added, their rights can be managed, new policies can be made, and much more with the help of IAM (Identity & Access Management). In this article, you will learn how to perform a variety of tasks on an AWS IAM account using the AWS python SDK Boto3. Python programs may utilize Boto3 to interface directly with AWS services.
Let’s describe a few words before we get started.
- IAM is a service offered by AWS for Identity and Access Management. AWS Identity and Access Management (IAM) is a web service for securely controlling access to AWS services. With IAM, you can centrally manage users, security credentials such as access keys, and permissions that control which AWS resources users and applications can access. For more details, please read here.
- A Python SDK for AWS is called boto3. You use the AWS SDK for Python (Boto3) to create, configure, and manage AWS services, such as Amazon Elastic Compute Cloud (Amazon EC2) and Amazon Simple Storage Service (Amazon S3). The SDK provides an object-oriented API as well as low-level access to AWS services. For more details, please read here.
Prerequisites
- Python3
- VS Code
- Boto3
- AWS Credentials
Use the steps below to install AWS Python SDK and access AWS services using AWS Credential:
Use the Python SDK to Access Cloud Storage – AWS
Your credentials are saved in two files on the file system of your virtual machine (VM) after the AWS configure command is finished:
- the config file: ~/.aws/config,
- the credentials file: ~/.aws/credentials
Key Takeaways
After completing the following exercise in AWS python SDK boto3 for AWS IAM, you will learn the following things:
- How to create a user?
- How to list all users?
- How to update a user?
- How to create an IAM policy?
- How to list all IAM policies?
- How to attach a policy to a user?
- How to create a Group?
- How to add a user to a group?
- How to attach an IAM policy to a group?
Let’s Code
Create and save a Python program for implementing AWS IAM using AWS python SDK boto3 as follows:
How to create a user?
When setting up a new AWS account, AWS advises against using the root account and instead advises creating a new IAM user.
import boto3

def create_user(username):
    iam = boto3.client("iam")
    response = iam.create_user(UserName=username)
    print("Output")
    print(response)

create_user("test-iam-user")
The output of this function is in JSON format and human recognizable:

How to list all users?
We’ll then look at how to list every IAM user associated with the AWS account. The answer from AWS will be iterated over using a paginator.
Why you should use a paginator?: Some operations return results that are incomplete and require subsequent requests to attain the entire result set. The process of sending subsequent requests to continue where a previous request left off is called pagination.
def list_users():
    iam = boto3.client("iam")
    paginator = iam.get_paginator('list_users')
    for response in paginator.paginate():
        for user in response["Users"]:
            print(f"Username: {user['UserName']}, Arn: {user['Arn']}")

list_users()
The output would look something like this:

How to update a username?
We can also update the username for a particular user using the update_user function.
def update_user(old_user_name, new_user_name):
    iam = boto3.client('iam')
    # Update a user name
    response = iam.update_user(
        UserName=old_user_name,
        NewUserName=new_user_name
    )
    print(response)

update_user("test-iam-user", "sample-iam-user")
list_users()
The output would be:

You can view the newly created user in your AWS IAM Accounts:

How to create an IAM policy?
Creating a new IAM policy will then be covered using the boto3 library. A policy is a written document that outlines the user’s actionable items and the resources those items may influence. A policy is an object in AWS that, when associated with an identity or resource, defines its permissions. AWS evaluates these policies when an IAM principal (user or role) makes a request. You can refer to the following link for the detailed IAM Policies and Permission.
For the sake of this example, let’s build an IAM policy that grants access to 2 actions across all DynamoDB resources.
import json

def create_iam_policy():
    # Create IAM client
    iam = boto3.client('iam')

    # Create a policy
    my_managed_policy = {
        "Version": "2012-10-17",
        "Statement": [
            {
                "Effect": "Allow",
                "Action": [
                    "dynamodb:GetItem",
                    "dynamodb:Scan",
                ],
                "Resource": "*"
            }
        ]
    }
    response = iam.create_policy(
        PolicyName='testDynamoDBPolicy',
        PolicyDocument=json.dumps(my_managed_policy)
    )
    print(response)

create_iam_policy()
Here’s how we can review this approach:

How to list all IAM policies?
We’ll then examine how to list every IAM policy in an AWS account. For this illustration, we’ll filter all of our own IAM policies.
def list_policies():
    iam = boto3.client("iam")
    paginator = iam.get_paginator('list_policies')
    for response in paginator.paginate(Scope="Local"):
        for policy in response["Policies"]:
            print(f"Policy Name: {policy['PolicyName']} ARN: {policy['Arn']}")

list_policies()
The output of this function would be:

You can view the newly created policy in your AWS IAM Accounts:

How to attach a policy to a user?
Users can be granted additional rights by attaching IAM policies to them. By providing the policy’s ARN, we may link a policy to a specific user.
def attach_user_policy(policy_arn, username):
    iam = boto3.client("iam")
    response = iam.attach_user_policy(
        UserName=username,
        PolicyArn=policy_arn
    )
    print(response)

attach_user_policy(policy_arn="arn:aws:iam::851799637821:policy/testDynamoDBPolicy", username="sample-iam-user")
We can see that the IAM policy we created looks like this:

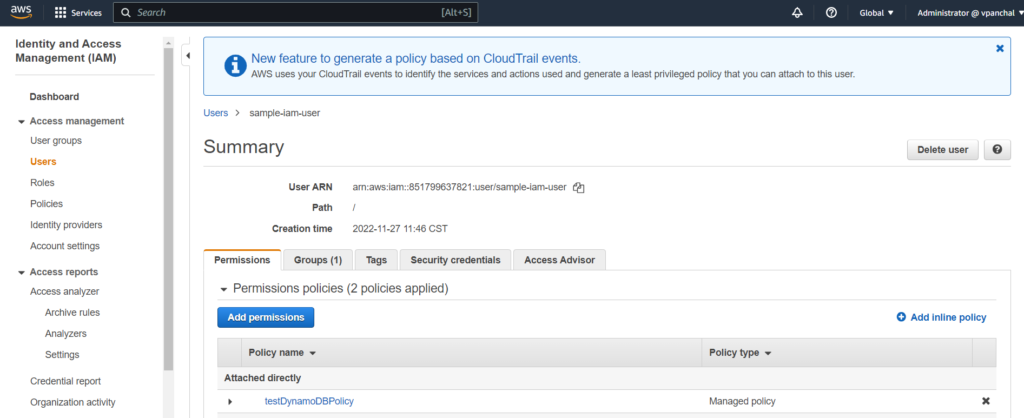
You can also view that policy is attached to the user in your AWS IAM Accounts:

How to create a Group?
In situations when there are many users to manage, adding permissions to each individual user might be challenging. Instead, we might first build a Group and then include users in it. All users who are a part of a group will also be covered by any IAM policies that are associated with that group.
def create_group(group_name):
  iam = boto3.client('iam') # IAM low level client object
  iam.create_group(GroupName=group_name)

create_group("my-test-group")
The output of this function would be:

You can also view a newly created group in your AWS IAM Accounts:

How to add a user to a group?
We can add a user to a group using the add_user_to_group method.
def add_user_to_group(username, group_name):
    iam = boto3.client('iam') # IAM low level client object
    response = iam.add_user_to_group(
        UserName=username,
        GroupName=group_name
    )
    print(response)

add_user_to_group("sample-iam-user", "my-test-group")
The output of this function would be:

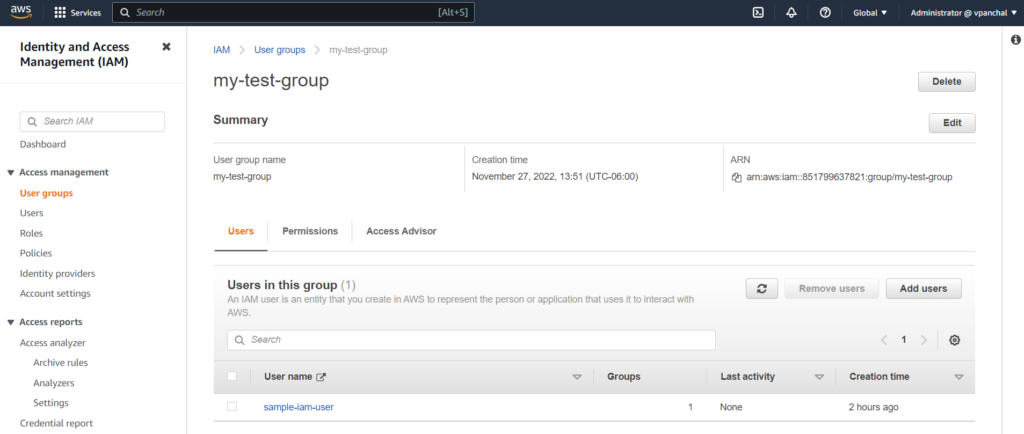
You can also view that user is added to a group in your AWS IAM Accounts:

How to attach an IAM policy to a group?
Attaching a policy to a group is similar to attaching a policy to a user.
def attach_group_policy(policy_arn, group_name):
    iam = boto3.client("iam")
    response = iam.attach_group_policy(
        GroupName=group_name,
        PolicyArn=policy_arn
    )
    print(response)

attach_group_policy(policy_arn="arn:aws:iam::851799637821:policy/testDynamoDBPolicy", group_name="my-test-group")
The output of this function would be:

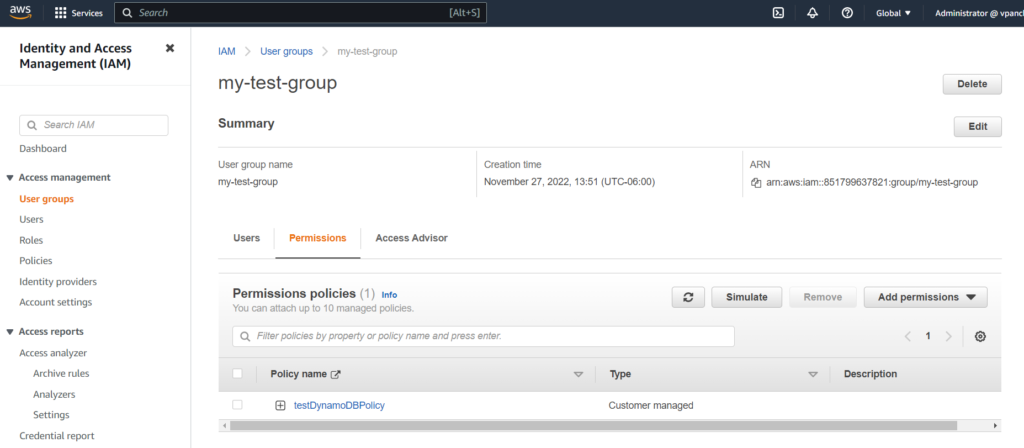
You can also view that the IAM policy is attached to a group in your AWS IAM Accounts:

You can find the source code available here.
Conclusion
Cheers! We successfully used Boto3, the Python SDK for AWS, to access Amazon IAM. To recap just a bit, we installed Boto3 and connected using AWS credentials, created and updated the user and also listed, created, and listed IAM policies, created a group, and then finally attached the policy with the user, user to a group, and policy to a group. Hope you find this blog useful. Happy cloud traversing!