This post provides instructions for installing MySQL Server and the Community Workbench for use on a development computer. The server will be configured for localhost access using the root account.
Update Software if Necessary
Installing MySQL on a system with fully updated software often pre-empts other problems. There is more of an incentive to do version upgrades for this install than for other routine installations. Perform the following steps:
sudo apt updatesudo apt upgradeInstall MySQL Server and Verify Installation
MySQL Server is available in a standard Ubuntu Linux package repository, so we can just use apt to install it:
sudo apt install mysql-serverOnce the installation is complete, verify that the install succeeded with the following command, which should return the version of MySQL currently running:
mysql --versionSecure Your MySQL Server
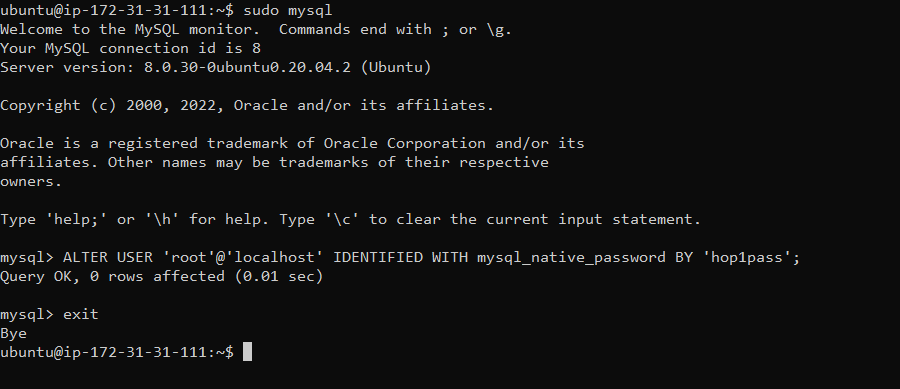
MySQL server is now running but is not secure. We will run commands to secure it with a root password. Because this is just a localhost development machine, we can cut corners on how secure and private this password is. On a production MySQL server, we would need to do a much better job with the password itself and also on keeping the password private. Please enter the following commands one at a time:
sudo mysqlALTER USER 'root'@'localhost' IDENTIFIED WITH mysql_native_password BY 'hop1pass';exitYou can use whatever password you like, but you need to remember it for later. The sequence looks like this:
Continue securing your server:
sudo mysql_secure_installationYou will get a series of prompts. Please provide the following responses:
- Validate password component: no
- Change password for root: no
- Remove anonymous users: yes
- Disallow remote root login: yes
- Remove test database: yes
- Reload privilege tables: yes
At this point, your MySQL server is ready for use.
Note: At this point, the norm with respect to user ID’s is to create at least on non-root user with an appropriate password and then grant needed database privileges to that user. In using the root account, we are intentionally cutting corners because this is a development-only machine.
Install MySQL Community Workbench
Community Workbench is not necessarily the best MySQL client available, but it’s pretty god, and it’s free. We will be using it to work with the database in this project.
To install Community Workbench, please complete the following steps:
- From Ubuntu Desktop, start Activities –> Firefox and navigate to https://dev.mysql.com/downloads/workbench/.
- Click on Archives, then select Ubuntu Linux for Operating System. Choose the version for Ubuntu 20.04 without debug symbols (mysql-workbench-community_8.0.29-1ubuntu20.04_amd64.deb (28.0MB) ). See image blow, which shows the version you need.

3. Open a terminal window and run the following commands:
cd ~/Downloadssudo apt install ./mysql*4. From Ubuntu Desktop, select Activities –> Show Applications. Search for mysql. When MySQL Workbench appears, add it to your Favorites.
Verify Connectivity to Your Database from MySQL Workbench
Let’s make sure that we can connect to your MySQL server on localhost from MySQL Workbench:
- From Ubuntu Desktop, start MySQL Workbench (Activities –> MySQL Workbench).
- Select Local instance 3306, then enter your root password. The connection should be successful.
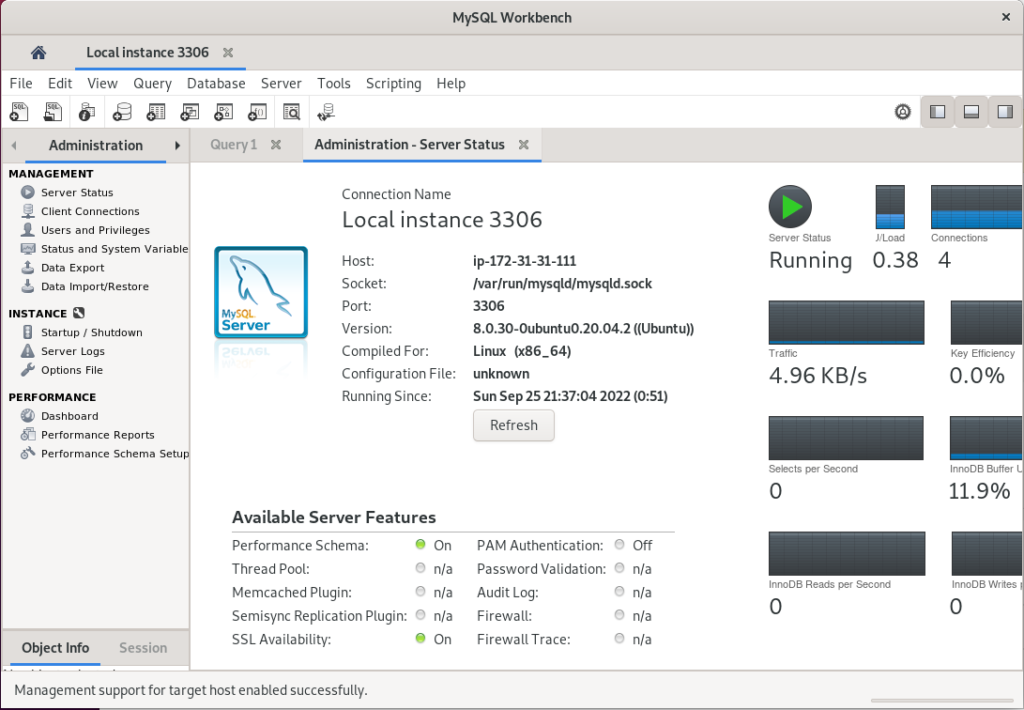
- Click on Server Status at the left. If you get a screen like the one below, everything is good to go.