This is step 2 of 5 of Hands-On Project 4 for Amazon Web Services. In this step, you install updated application code on your cloud PC, then build and initialize the production database for the e-commerce demo application.
Approach
To complete this step, we will use the same approach that we used to install the application and seed the application database on our cloud development PCs. That is, we will use a combination of MySQL Workbench (from our cloud PC) and the Django migration features to create and load the initial data. The difference is that in doing so, we will connect to the production database rather than a development database. This is a bit of a shortcut. In a live production deployment, populating the database and migrating its content to the production environment is likely to be done using a more tightly controlled process. This simple approach will be sufficient for our purposes.
Upload, Install, and Verify Updated Application Code
To get ready for production deployment, the application codebase was revised to get it ready. The following changes were made prior to starting this project:
- A home page was created for the API. This page will display when a user enters the root URL of the deployed application from a browser.
- Static resources for the application (e.g. fonts, images, stylesheets, javascript modules) were collected into a single /static folder. This is a required step for Django applications to account for the difference between the development and production web servers.
- The settings.py file was split into 3 files: common.py, dev.py and production.py. This provides for different parameters to be used for the development and production environments.
- The Django debug feature was turned off for the production configuration and left on for the development configuration.
- All secrets were removed from the production configuration, and references to environment variables were added. As a result, no production secrets would ever be pushed to a source code repository.
- The gunicorn web server module was included in Pipfile. This is the web server we will be running in production. We include in the pre-production application so that we can verify that the app runs successfully using the production web server software.
The starting point for this project contains the above changes and can be downloaded from here:
After downloading the code, upload it to your cloud development PC and install it the same way that you did in Project 2, but change all of the names to storefront4 from storefront3. The instructions to complete this are here:
Deploy a Demo Application to Your Cloud PC
Within the above instructions, you only need to complete the steps through “Start the Test Web Server and Tour the Application”. There is no need to do a thorough test of the web API. Note that to modify the Django development settings, you will be making the changes in /storefront/settings/dev.py. Also, you will be creating a MySQL database called storefront4 on your cloud PC. This is intentionally kept separate from the storefront3 database.
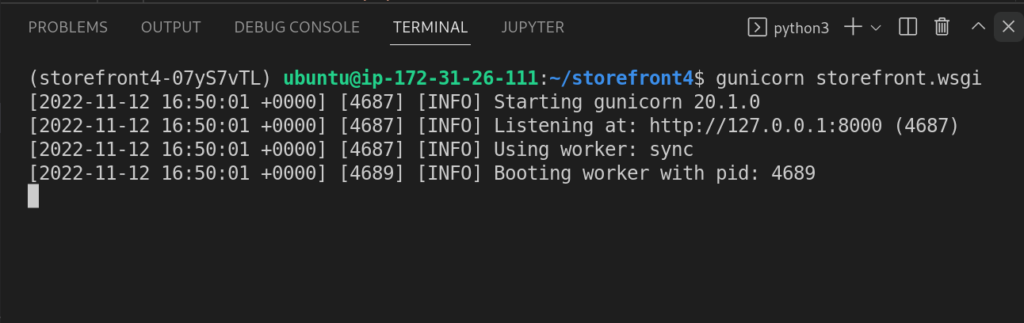
Verify that Gunicorn Can Run Successfully
Our Django configuration contains a Python file (/storefront/wsgi.py) to run the application under gunicorn. Since we will be running gunicorn in production, we should verify that the application runs successfully under gunicorn on the cloud development PC. In the VS Code terminal, run the following:
gunicorn storefront.wsgiThe web server should start successfully:
Establish a Connection to the Production Database
Your production database server was provisioned when you created your Elastic Beanstalk environment. Since you did not specifically provide a server name, we need to locate the production database and then create a connection to it. Our initial connection will be using MySQL Workbench, since we will be using it to manually create the database schema.
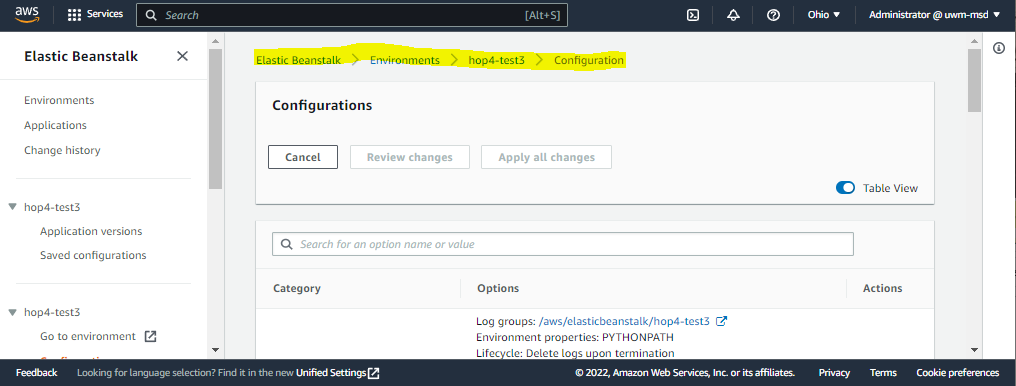
Within the AWS Management Console, navigate to the configuration page for your Elastic Beanstalk environment, then scroll to the bottom to locate the endpoint address for the database:
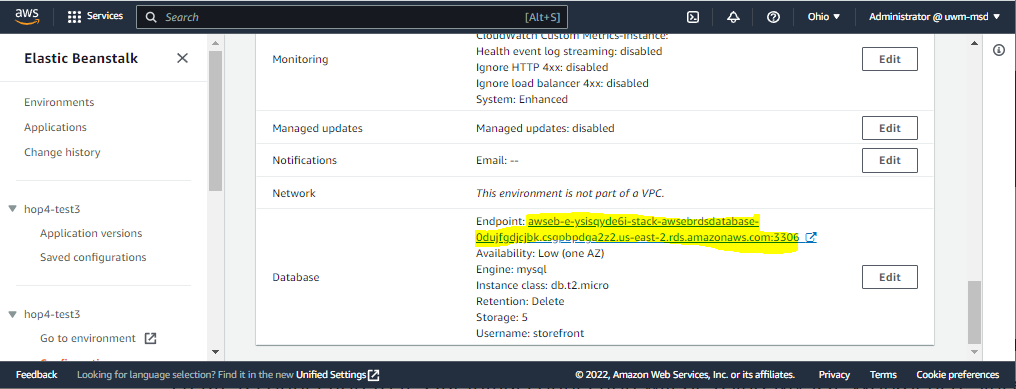
Click on the link and navigate to the database resource. The database endpoint address is under Connectivity & Security:
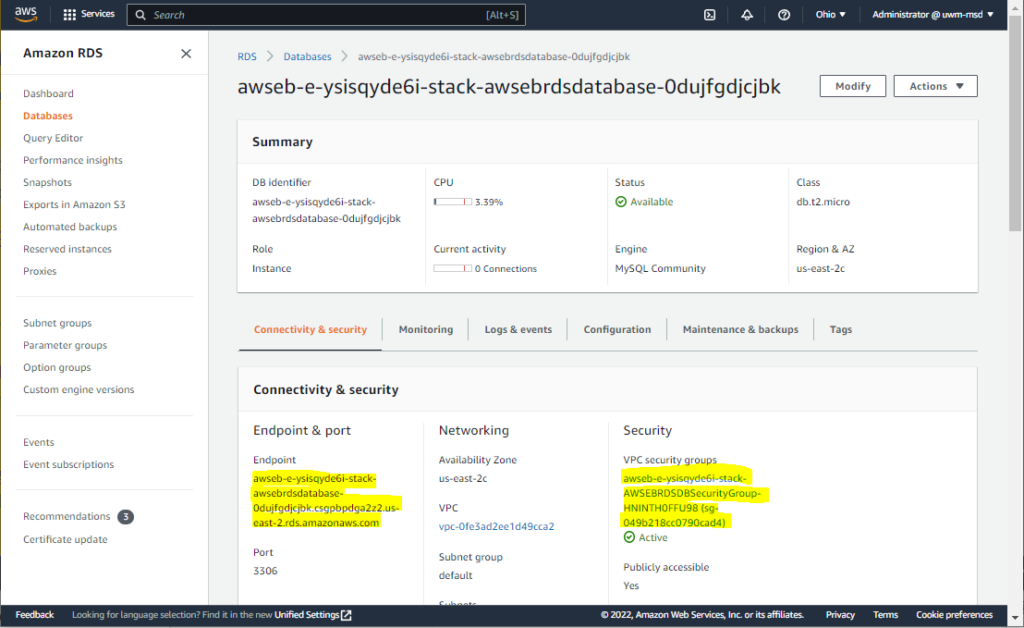
Note also that the security group name is highlighted under Security. Currently, our database server’s security group has an inbound rule that allows access to the database only from our Elastic Beanstalk web server. In order to configure the database from outside of Elastic Beanstalk, we need to open a port to allow MySQL Workbench to connect from our cloud PC.
Navigate to the database server’s security group and add an inbound rule for TCP port 3306 from any IP address. This screenshot shows the Edit Inbound Rules page after adding the inbound rule:
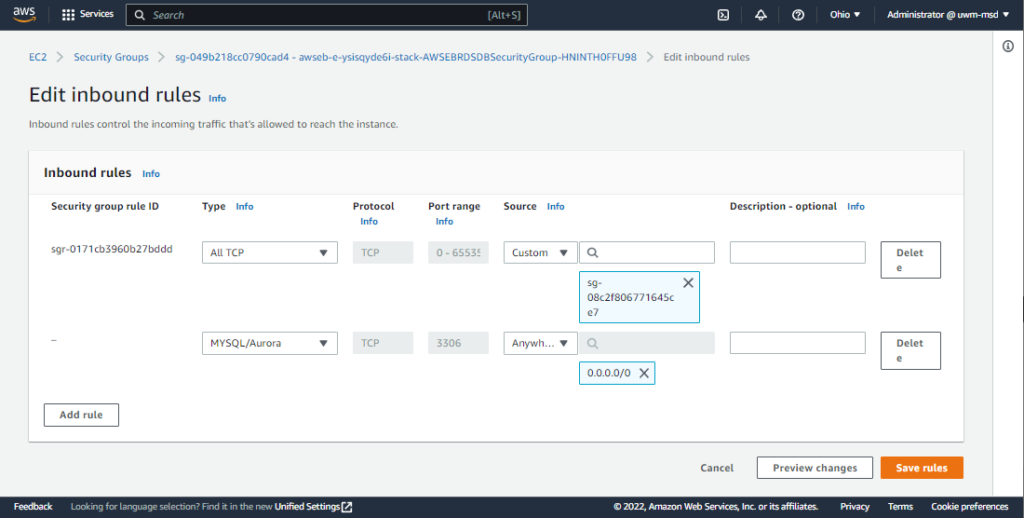
Save the inbound rule change. Then, from your cloud PC, run MySQL Workbench, create a connection to the production database, and test the connection. For the hostname, copy in the database endpoint address from the Management Console (in my case, the server address was awseb-e-ysisqyde6i-stack-awsebrdsdatabase-0dujfgdjcjbk.csgpbpdga2z2.us-east-2.rds.amazonaws.com). For user ID and password, use the credentials you selected when you created your Elastic Beanstalk environment.
Here is a screenshot from MySQL Workbench just prior to testing the connection:
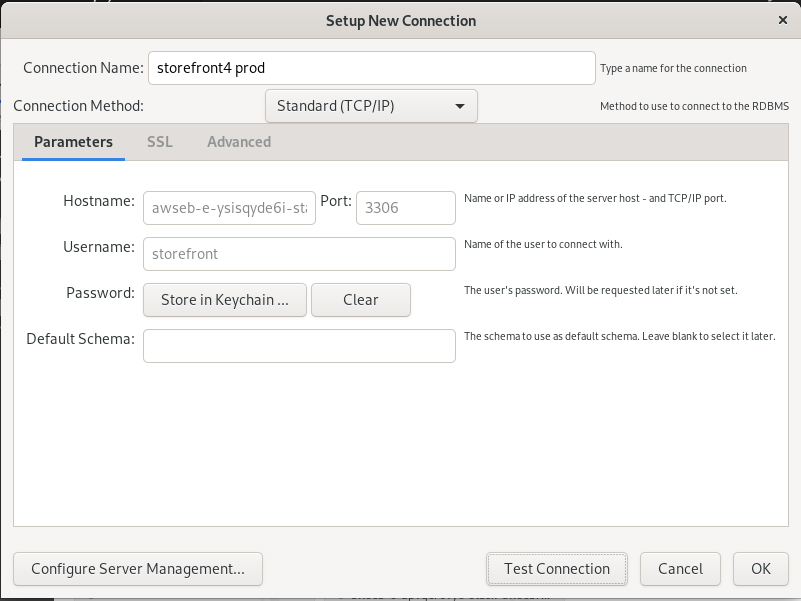
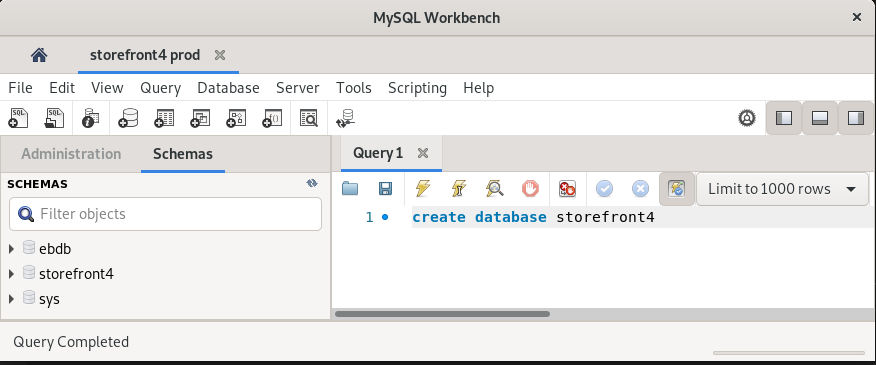
Save this connection information in MySQL Workbench, then connect to the production server and create the storefront4 database:
Populate the Production Database
Once you have a connection to the production database, you can populate the database the same way you did the development database on your cloud PC’s localhost. Begin by modifying the development database settings in /storefront/settings/dev.py to point at the production database:
DATABASES = {
    'default': {
        'ENGINE': 'django.db.backends.mysql',
        'NAME': 'storefront4',
        'HOST': 'awseb-e-ysisqyde6i-stack-awsebrdsdatabase-0dujfgdjcjbk.csgpbpdga2z2.us-east-2.rds.amazonaws.com',
        'USER': 'storefront',
        'PASSWORD': '<production password>'
    }
}
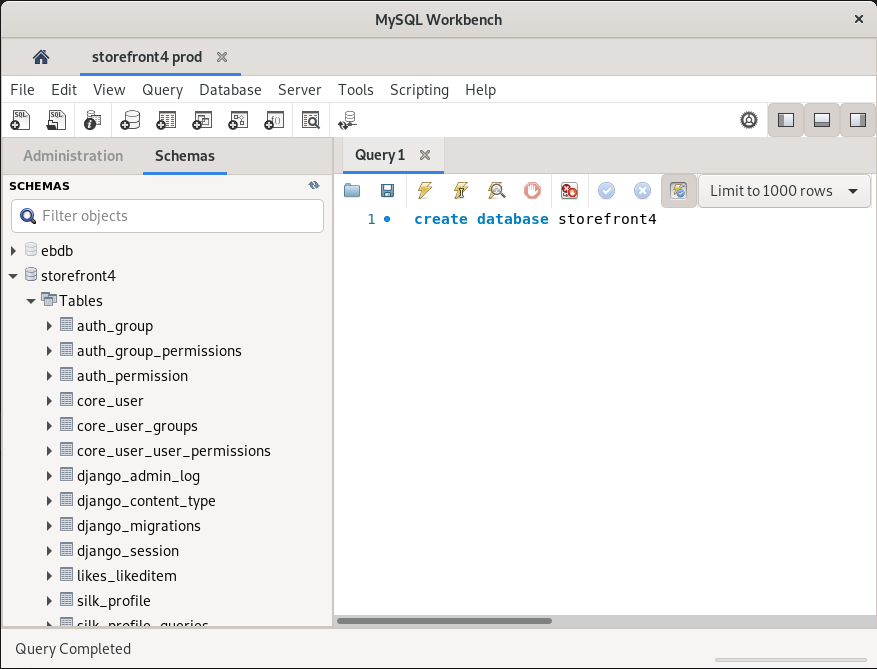
The above code block shows my configuration (minus the production password). Save this configuration, then in the VSCode terminal virtual environment, run:
python manage.py migrateYou can then use MySQL Workbench to verify that the tables were created successfully:
Once this is finished, you can complete the setup of the production database with the following steps:
- Open the seed.sql script from ~/storefront3/data/ and run it against the storefront4 database to load the seed data.
- Return to VS Code and run python manage.py createsuperuser to create the admin account in the production database.
Production Database is Now Ready
Once you get this far, the production database is ready for the application deployment. You can remove the inbound rule for port 3306 to make your database more secure, or leave the rule in place to allow you to query the database for support purposes.