To get one example of provisioning Instance on Azure Databricks, let’s start with this 8 minute video tutorial:
Create your workspace and cluster:
1. Log in to the Azure portal
Note: If you don’t have the Microsoft Azure account, create a new account using this blog: prepare your Azure account
2.Navigate: Portal’s Main page -> choose create a resource
3. And search for Databricks. Choose Azure Databricks from the list that appears.
4. Then click on create.
5.On the next Azure Databricks Service page, create a Databricks Workspace. Here you can create a new resource group or you can use the existing resource group for this workspace. Enter a Databricks workspace name. These names must follow certain rules. Enter a name with a blank in it and the web page will display these rules to you and provide the pricing tier, location. For the remaining all leave default settings.
6.Then click on the “Create” button in the Azure Databricks Service blade tab.
7.Click on “Go to Resource,” then on the “workspace name(mentioned while creating the Databricks workspace)” screen, click on the “Launch Workspace” button.
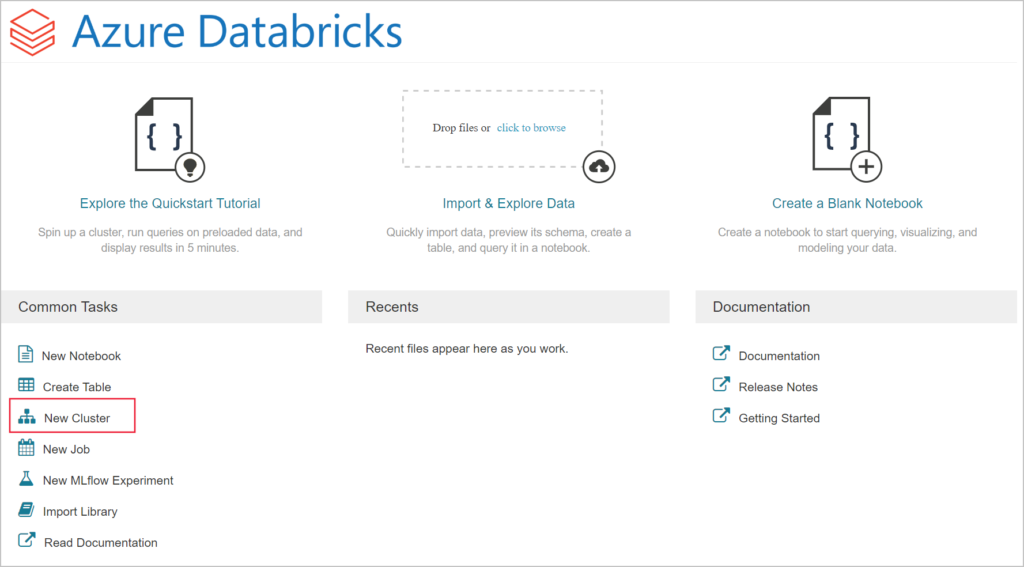
8.Under Common Tasks, click on “New Cluster”.
9. In the cluster page, please provide the new values to create a cluster.
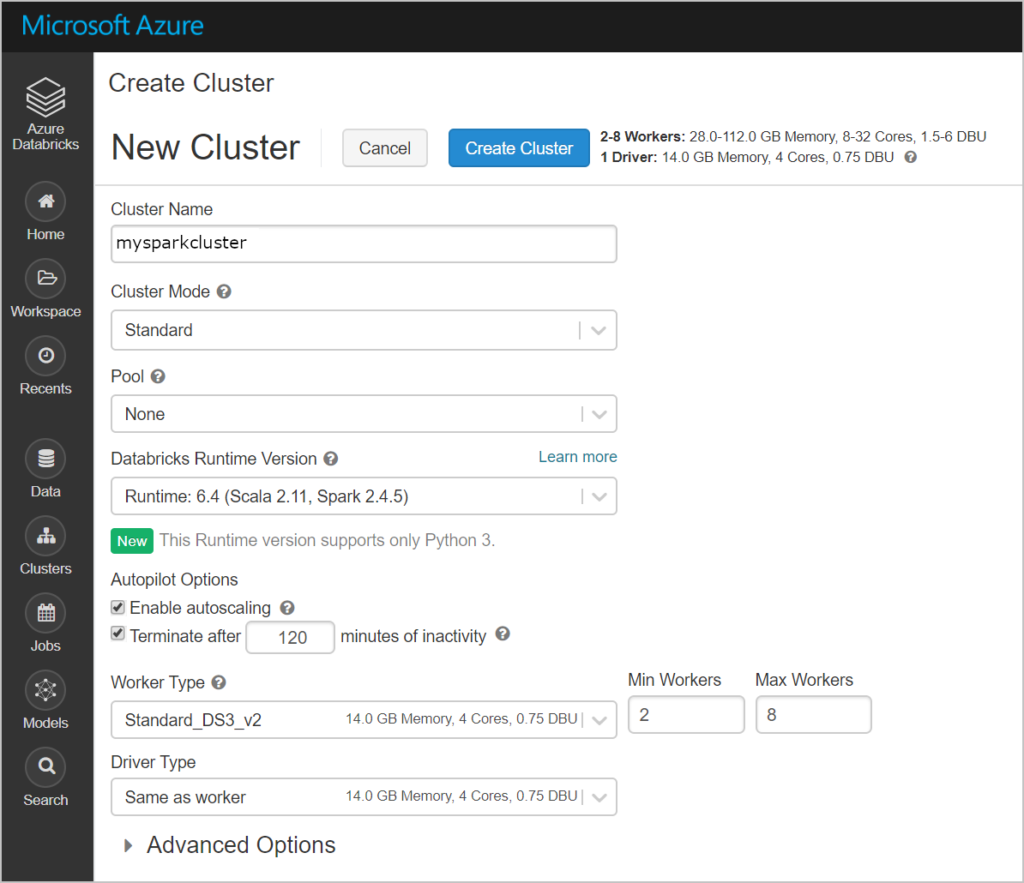
Accept all other default values other than the following:
1.Enter a name for the cluster.
2.create a cluster with 10.4LTS runtime.
3.Make sure you select the Terminate after __ minutes of inactivity checkbox. Provide a duration (in minutes) to terminate the cluster, if the cluster is not being used. Select Create cluster. Once the cluster is running, you can attach notebooks to the cluster and run Spark jobs.
For more information on creating clusters, see Create a Spark cluster in Azure Databricks.