This is the post – 2 of the Machine Learning services – AWS vs Azure. This post contains hands-on on creating a workspace, importing data, testing and training the model in AWS.
Steps to initialize notebook instance in SageMaker:
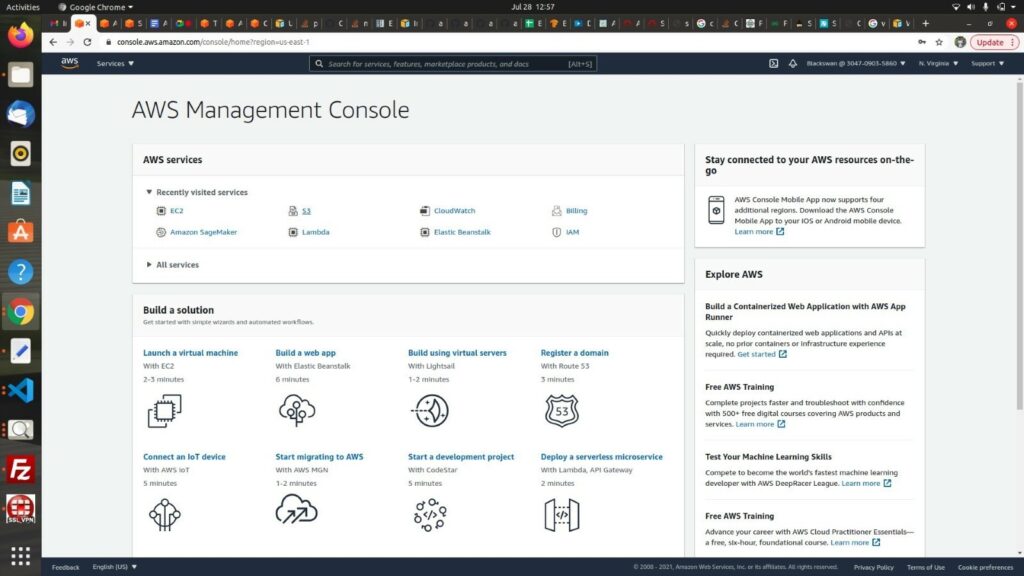
- Login to AWS Console using AWS Credentials.
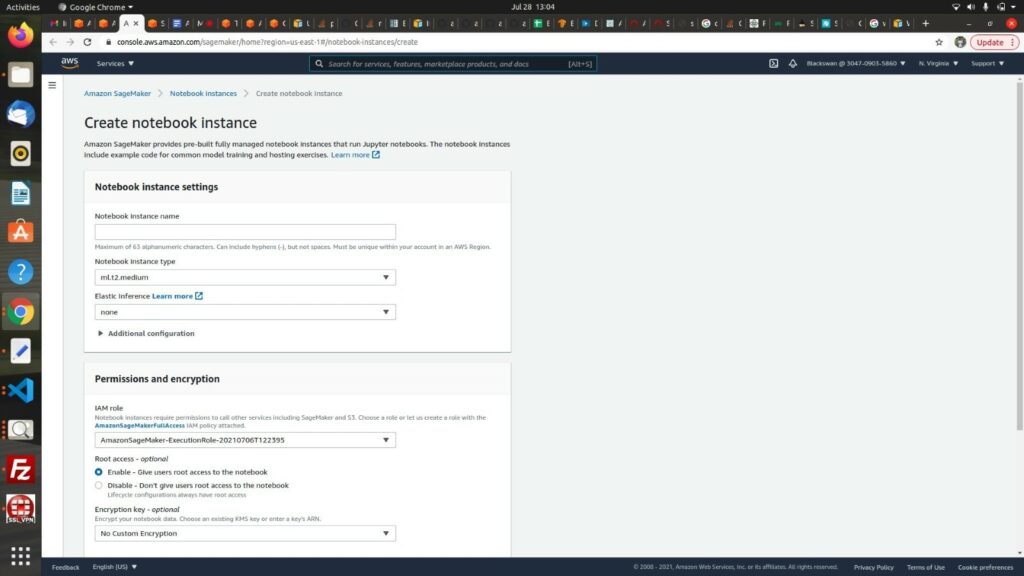
- In the left panel, under Notebook select Notebook Instance, and create an Instance with given requirements. For example, with Instance type: ml.p3.2xlarge, IAM role. Etc.

- In the left panel, under Notebook select Notebook Instance, and create an Instance with given requirements. For example, with Instance type: ml.p3.2xlarge, IAM role. Etc.
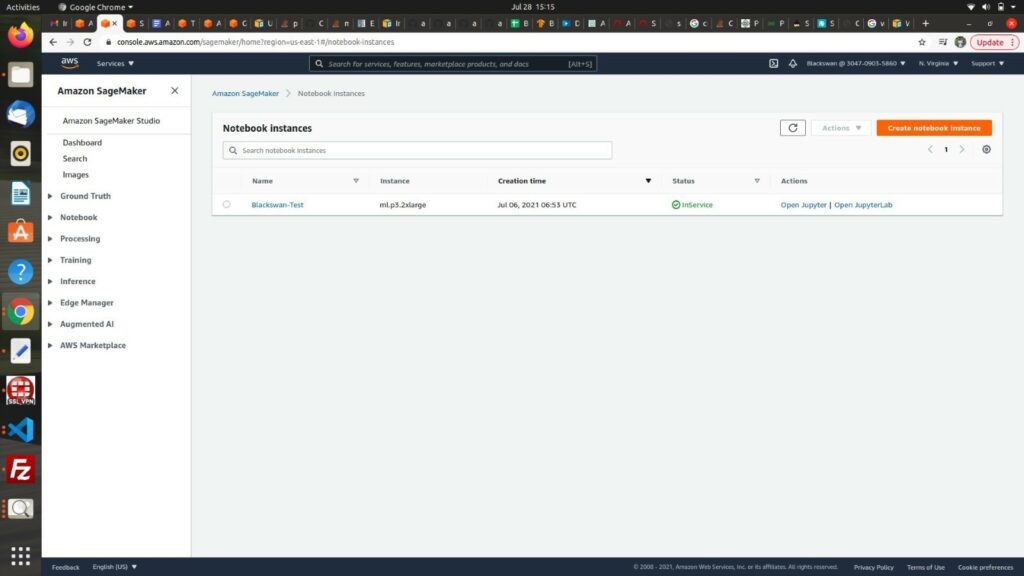
- After creating the instance, you will find the new instance in the same dashboard from step 2. under notebook instances. You can start the instance to start working through Jupyter Notebook.
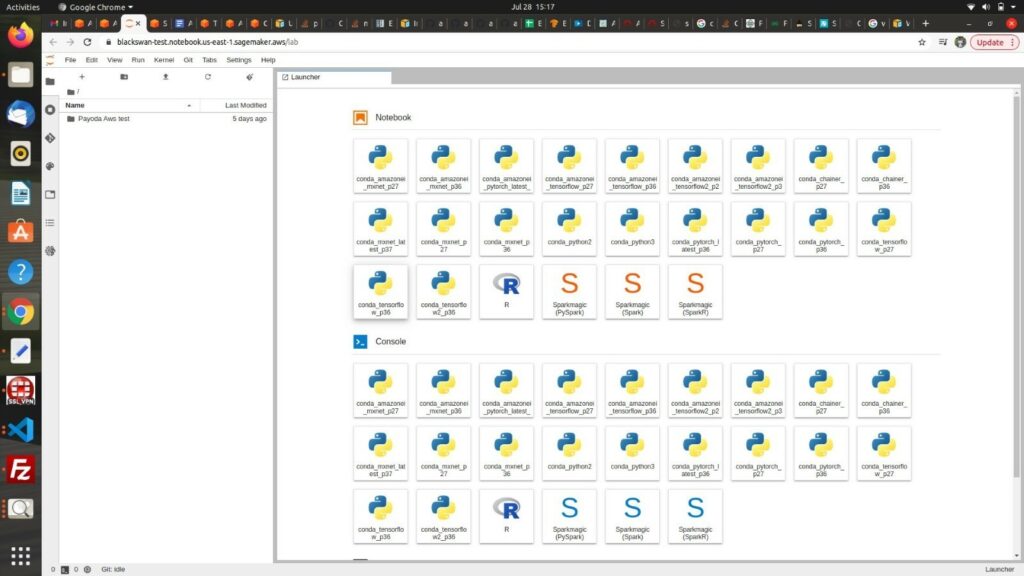
- On clicking the JupyterLab, you will be redirected to the JupyterLab where you can create notebooks to run your machine learning algorithms.
Steps to Run Classification algorithm in SageMaker:
- Open a notebook with conda_python3 as console.
- Import necessary packages needed to run specific algorithms. For example: the script running uses tensorflow, so you must import tensorflow from sagemaker.
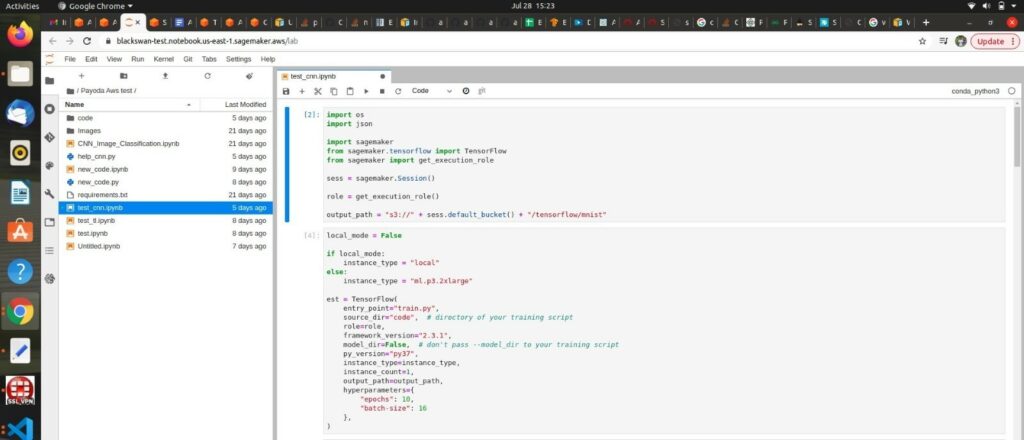
As we are running the script on cloud, we have set the local_mode as False and provide the instance type. Next, initialize the Estimator with Tensorflow function passing the required parameters, such as:
- Entry point – The CNN script created to initialize the models and layers needed to train the model.
- Framework Version – The specific version of Tensorflow used to run the script.
- Instance type – Type of the instance, such as ml.p3.2xlarge
- Instance count – Count of instances
- Hyperparameters – The parameters that need to be passed to the entry point script to train the model
- Set both Train and Test data to train the model and to test the model. We need to download the .gz file from S3 to Sage Maker’s public bucket
Prerequisite:
a. Convert all the train and test images into a .gz file separately with labels.
train-images-idx3-ubyte.gz
train-labels-idx1-ubyte.gz
test-images-idx3-ubyte.gz
test-labels-idx1-ubyte.gz
Code to convert images into a .gz file :
img = [cv2.resize(cv2.imread(file), (224, 224)) for file in glob.glob('*.png')]
img = np.array(img).reshape(-1, 224, 224, 3)
print(img)
f = gzip.GzipFile('test.gz','w')
np.save(f, img)
f.close()
b. Upload the files to the S3 bucket.
Import Boto3 package used to connect to AWS services such as S3, and download the files from the bucket and store it in tmp/data cache
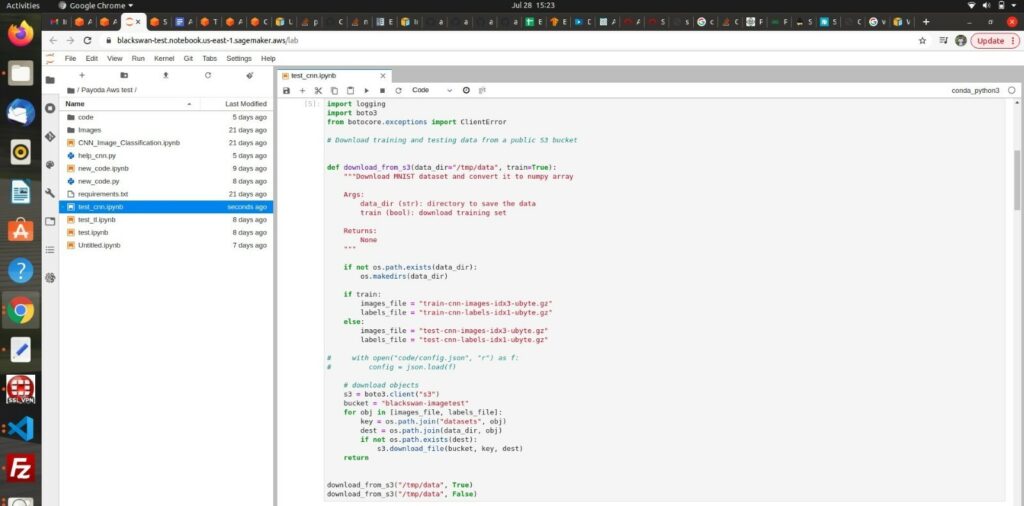
- Create a new Sage Maker public bucket and upload those downloaded files to this bucket. Next, set the channel with the training and testing location which is the Sage Maker’s public bucket location.
Using the defined estimator to fit the model, such as:
est.fit (inputs=channels) This will start the training of the model, from downloading the training images and preparing the instance. It might take some time to train the model. Normally the average time to train 30 images is around 145 seconds
- Save the model artifact, to create an endpoint to use the model for future uses.
tf_cnn_model_data = est.model_data
print ("Model artifact saved at:\n", tf_cnn_model_data)- Define the model now using TensorFlowModel function and passing the arguments, such as model and framework_version.
from sagemaker.tensorflow import TensorFlowModel
model = TensorFlowModel(

 role=role,
 model_data=tf_cnn_model_data,
 framework_version="2.3.1",
)
Next, deploy the model, using the deploy function and passing the arguments, such as instance type and instance count and store it as Predictor.
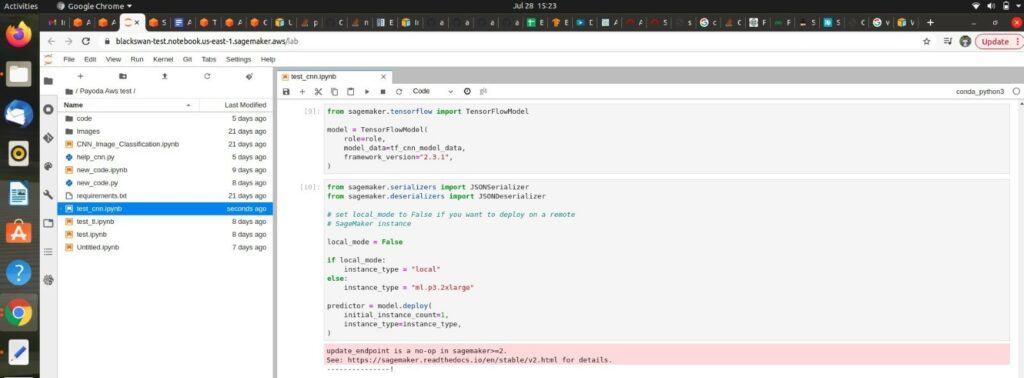
It might take a little time to deploy the model.
- Once the model is deployed, we need to test it with test images, so we need to do the pre-processing of these test images before passing it to the predict function to the model.
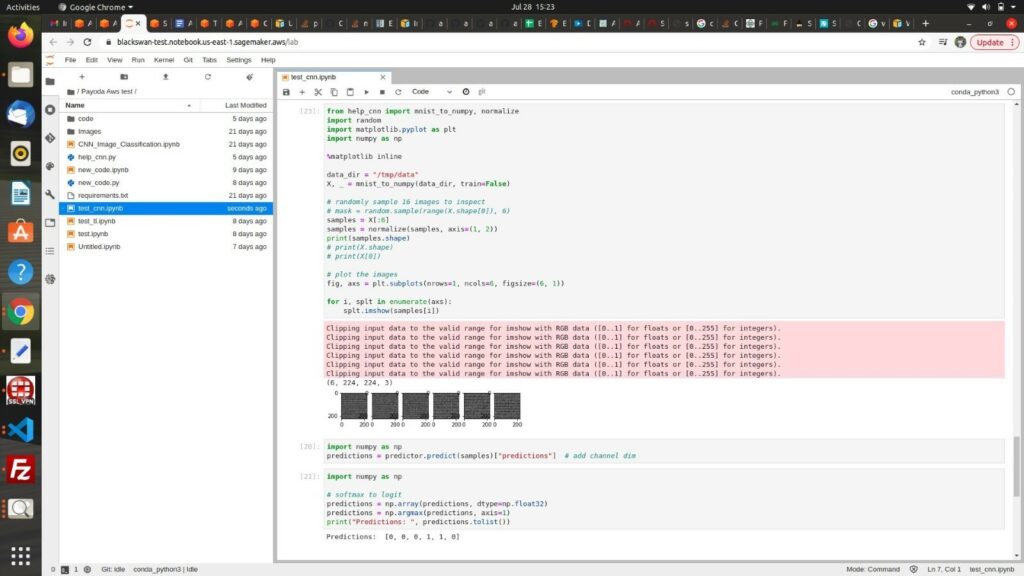
Predictions may differ from the actual test images based on the accuracy of the model.
- Finally, after training the script and predicting using SageMaker, we need to stop the service in the notebook instance dashboard, as charges apply for every second the instance runs.
Finally, the model can be predicted with multiple images by changing the .gz files in S3 bucket and updating the script file which is the entry point for the estimator.
If you do not plan to use the endpoint, you should delete it to free up some computational space. If you use local, you will need to manually delete the docker container bound at that specific port.