Hello, today we’ll be looking at creating a Timer Trigger function in Azure to capture RSS Feed data and display the captured information in Excel using Power Query.
Here are the list of things required before we get started:
- Valid Azure subscription
- Working Virtual Machine with Python and VS Code installed
- Storage account
- A Key Vault
- MS Excel
- Bitvise SSH Client
- Remote Desktop installed
- Python SDK for Azure
Make sure all the Azure services are in the same resource group.
In case you don’t have any of things mentioned in the list refer to the following links:
- Azure Subscription
- Virtual Machine with Python and VS Code
- Storage account
- Bitvise SSH Client
- Remote Desktop
- Python SDK Package for Azure
MS Excel is usually found in Windows and you can find the steps for Key Vault below.
Azure Key Vault
In this section I’ll be guiding you through to create a Key vault and store a secret key.
What is Azure Key Vault
As the name suggests, this is a cloud based key management and security service that enables in securing cryptographic keys, password and other secret services used by cloud applications and services.
Azure Key Vault primarily provides a secure cloud based key and secret services management platform for cloud applications and services. It is designed for security professionals, developers and auditors for deploying applications with keys URI, managing keys and monitoring access to keys.
Some common uses of Azure Key Vault are;
- Provides a central interface to store and manage keys, secrets and policies
- Enable in storing and managing key and password data for applications without directly giving them access to keys data
- Provides key storage and management platform for both on premises and cloud based apps and services
Creating a Key Vault
Now lets see how we can create a key vault in Azure.
Login into Azure and search for “Key Vault”

Click on the Key Vaults service which has a key icon

You should the above screen once you click on the key vaults
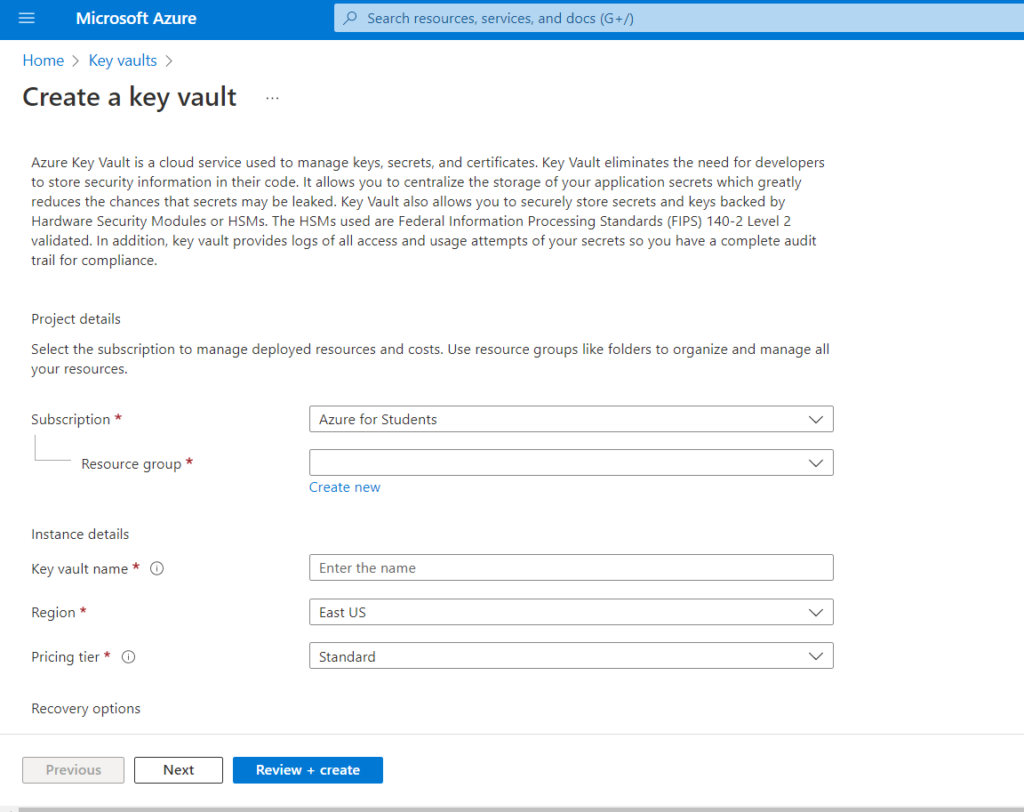
Click on create and you should be seeing the above screen.
Select the resource group (make sure it is the same as the VM and storage account) and give it a name. Make sure the vault name is unique.

The rest of the sections can be set to default. Click on Review + create.
Once created, you should be able to access the key vault and it would look something like the below image

Now, lets add our storage connection string as a secret for us to use later.
For creating the secret, go to key vault -> objects -> secrets ->generate/import. Once you’ve done that you should see the below screen.

Name your secret and make sure you are able to identify it. For the secret value paste your Storage account connection string. This can be found under Storage Account -> Security + networking -> Access Keys.

You can select one of the connection strings and paste it. Once created it will be visible under Secrets.
With this, we have created our Key Vault and added a secret for the storage account.
Now, let’s start with the function.
Timer Trigger
In this section, we will look at what the Timer Trigger function is and how to get started with the function.
What is Timer Trigger?
The timer trigger lets you run the function and its process on a defined schedule. It uses cron expression to define the schedules of the function.
A cron expression is a string consisting of six or seven subexpressions (fields) that describe individual details of the schedule. These fields, separated by white space, can contain any of the allowed values with various combinations of the allowed characters for that field.
A cron expression has six fields:
{second} {minute} {hour} {day} {month} {day-of-week}
For more information on Cron expression you can refer the links:
Now let’s get started with creating the function.
Initializing with VS Code
In this section, we will cover how to initialize Azure within VS Code.
Assuming all the initial requirements are met, connect to the VM using Bitvise.
Once the Remote Desktop Program(RDP) is up and running, open the terminal and enter the below commands:
sudo apt update && sudo apt upgrade -yThis updates and upgrades any packages which are available.
mkdir <folder name>
cd <folder name>
code .
This creates a new directory and moves us into the directory. The code . command will open VS Code editor in the directory we just created, where we will store our function files.
Before we can create the function let’s add a few extensions which are required for developing functions in Azure.
Please make sure you have added the below extensions:
- Azure Tools – this will add most of the required extensions
- Azure account
Once these have been added, on the left most sidebar you’ll find a icon shaped like ‘A’. This is the section where we manage the Azure resources.

Make sure you sign in before you start with the application.
If having issues after signing in within VS Code, log in to Azure using Mozilla in the VM outside the editor and then try signing in again from VS Code.
Once successfully signed in, the section would something like this:

Now we are good to go.
Creating the function
Now lets create the function.
To create a function, hover over to the workspace section and look for a the function icon
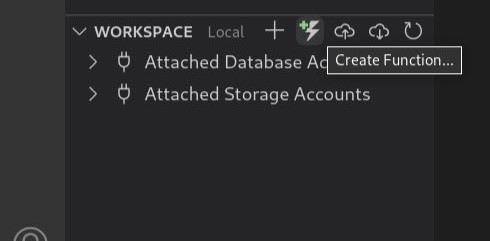
This will generate the following prompt in VS Code

After selecting the folder, select the language
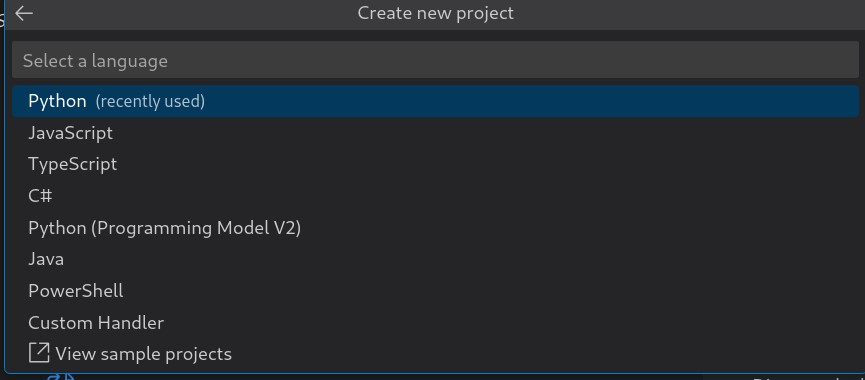
After selecting the language, pick the version of it

Once you have selected it, select the function type
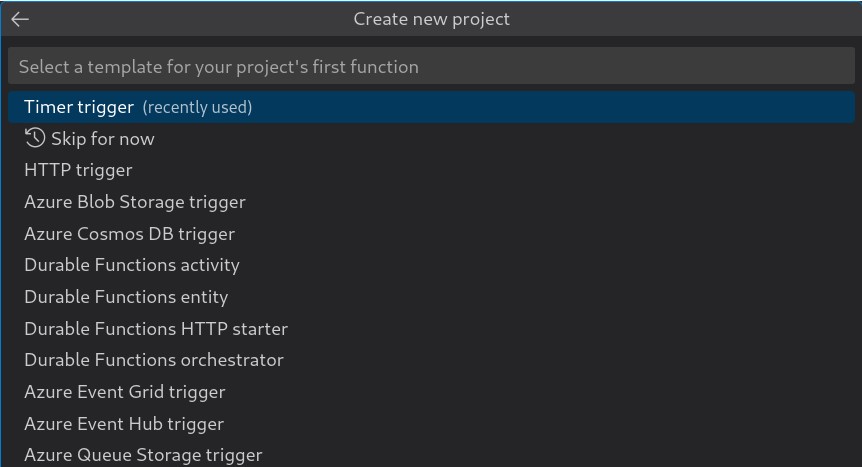
Once selected Timer Trigger, give it a name

Once done, the final step is to set the cron-expression

This expression says, to run the function every 30 seconds. This can be changed later as well.
Once done, you should the files as below in the folder
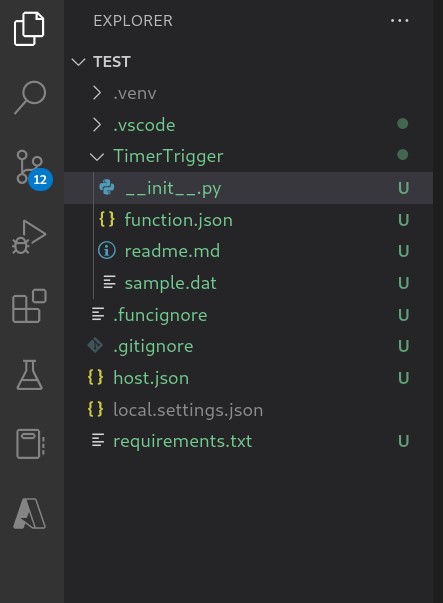
Now the function has been created successfully.
Working with the function
Now lets work with the function we just created.
For most of the part, we will be working with the init.py file.
Installing dependencies
First, let’s update the requirements.txt file with the required dependencies.
Open the requirements.txt file and add the below dependencies.
azure-functions
requests
msrest
msrestazure
azure-core
azure-common
azure-identity
azure-storage-blob
azure-keyvault-secrets
I’ll quickly go through the dependencies here. The msrest & msrestazure are used for error tracing, azure-core is for the packages for cross-platforms, azure-common is for common packages and sample code, azure-identity to be able to authenticate our applications, azure-storage-blob to be able to access our storage accounts and azure-key vault-secrets to be able to access the key vault and the secrets section.
After adding the dependencies, run the following command in the terminal window
pip install -r requirements.txtThis will install the dependencies in our environment.
Working with the python file
We will be working with the python file now.
Importing
Now let’s import the key components from the dependencies.
import json
import requests
import datetime
import logging
import xml.etree.ElementTree as ET
import azure.functions as func

from typing import List
from typing import Dict

from azure.storage.blob import ContainerClient
from azure.keyvault.secrets import SecretClient
from azure.identity import DefaultAzureCredential
Most of the imports are simple and self-explanatory. The ET library provides simple and efficient to build XML files documents and write them to files.
Parsing function
The function below will parse the string content and pass it back as a list of dictionaries.
def parse_feed(content: str) -> List[Dict]:

    blogs = []

    root = ET.fromstring(content)

    blogs_collection = root.findall("./channel/item")

    for article in blogs_collection:

        blog_dict = {}

        for elem in article.iter():

            blog_dict[elem.tag] = elem.text.strip()

            blogs.append(blog_dict)

    return blogs
The function finds anything with the HTML tag of item from the links we will be providing it.
Working with main function
We will be working with the main function now.
Hard-code URLs
Let’s give the URLs for the function to pull.
urls_to_pull = [
        'https://techcommunity.microsoft.com/plugins/custom/microsoft/o365/custom-blog-rss?tid=4471671567910783821&board=AzurePaaSBlog&size=25',
        'https://techcommunity.microsoft.com/plugins/custom/microsoft/o365/custom-blog-rss?tid=4471671567910783821&board=AzureNetworkSecurityBlog&size=25',
        'https://techcommunity.microsoft.com/plugins/custom/microsoft/o365/custom-blog-rss?tid=4471671567910783821&board=AzureStorageBlog&size=25',
        'https://techcommunity.microsoft.com/plugins/custom/microsoft/o365/custom-blog-rss?tid=4471671567910783821&board=AzureDevOps&size=25'
    ]
You can choose your own URLs but make sure to edit the function afterwards.
Authenticate account and connect to storage & secret from Key Vault
With the below code, we will be authenticating our Azure account, storage, and key vault
    default_credential = DefaultAzureCredential()

    secret_client = SecretClient(
        vault_url='<vault URI>',
        credential=default_credential
    )

    blob_conn_string = secret_client.get_secret(
        name='<secret name>'
    )

    container_client = ContainerClient.from_connection_string(
        conn_str=blob_conn_string.value,
        container_name='container name'
    )
Replace the values with ones suitable to yours
Initialize the list, call the function and create blob storage
Here we will be initializing the list and calling the function.
    blogs = []

    for url in urls_to_pull:

        response = requests.get(url=url)

        if response.ok:

            blogs_parsed = parse_feed(content=response.content)

            if blogs_parsed:
                blogs = blogs + blogs_parsed

    filename = "Microsoft RSS Feeds/articles_{ts}.json".format(
        ts=datetime.datetime.now().timestamp()
    )

    container_client.upload_blob(
        name=filename,
        data=json.dumps(obj=blogs, indent=4),
        blob_type="BlockBlob"
    )

    logging.info('File loaded to Azure Successfully...')
This will create the files and store them in a block blob storage.
Boilerplate
This is the boilerplate which is present during the function creation
    if mytimer.past_due:
        logging.info('The timer is past due!')

    logging.info('Python timer trigger function ran at %s', utc_timestamp)
Now we have our python code ready to be tested and deployed.
Testing
Now, we will test our function locally before deployment.
Let’s just run and debug the code to find any errors.
To run and debug, hit F5 button when inside the init.py program.
This would start with installing the dependencies and run the program once done.
If the program works properly, you should be able to see the values in the container of your storage account. You can also the storage explorer to check the live data being dumped under your storage account.
Now we can deploy our function to a function app.
Creating a Function App
Now, let us create a function app.
Go to Azure and search for Function App
You will be taken to the function app service.
Go to Create to create a new function app. Provide resource group, unique name, runtime stack, version, region and leave the rest as default. After that hit Review + create and then create.

You have your new function app created.
Deploying our function
We will be deploying our function now.
Head over to VS Code and click on the Azure icon present on the sidebar. Go to workspace and look for an icon shaped like cloud with an upwards arrow.
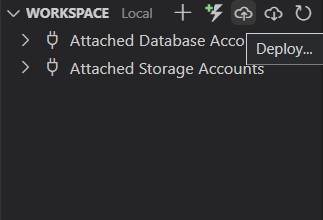
This would give the option to deploy to function apps. Select the one you created for this exercise. For a better depth understanding of the process, select output and select Azure functions under output.
Once the function has been successfully deployed, head to the portal -> Function app -> functions.

You should see the above screen.
Registering and Validating
Before we can run the app, we need to register the application and validate it to avoid errors.
First step is to turn on identity status in the function.
Navigate to Function App -> Identity and set the status to ON. Save the changes.
Next step is to set access to secrets in the key vault.
Navigate to Key Vault -> Access configuration.
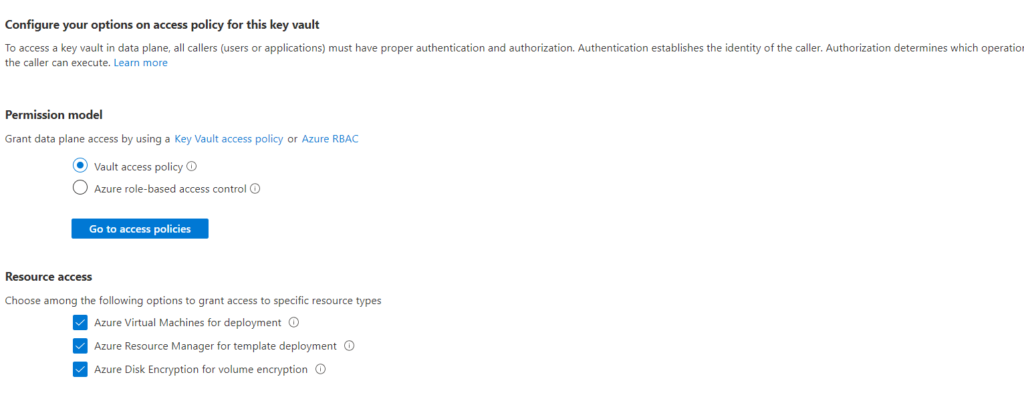
Click on Go to Access policies -> create. This will open up the below screen
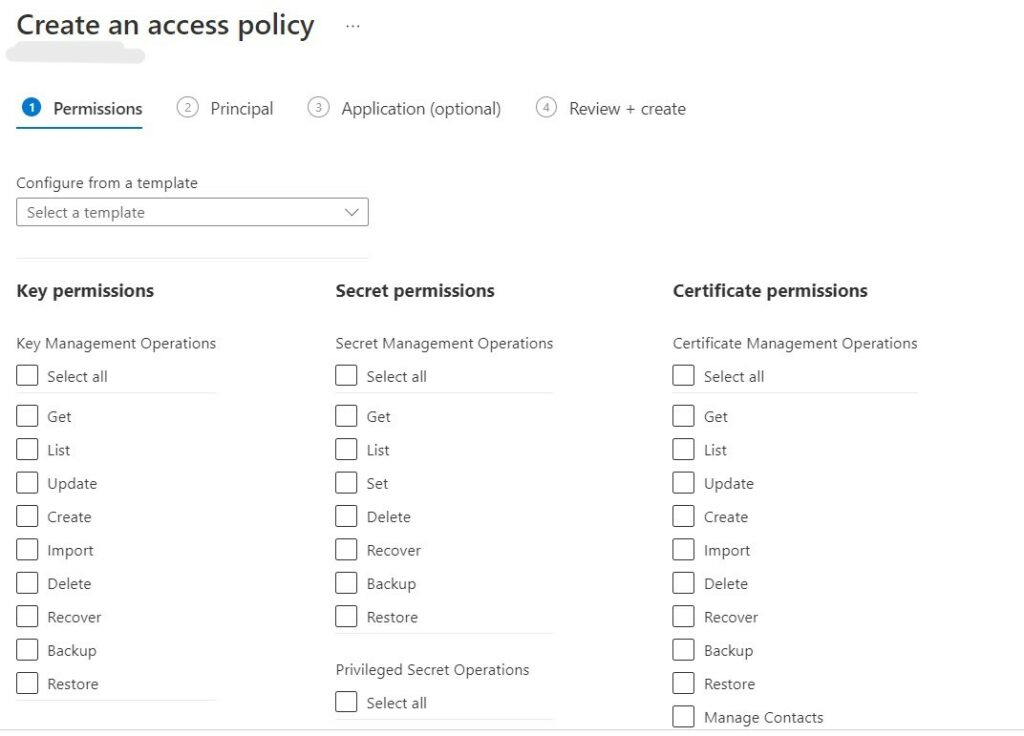
In template, select Key, Secret, & Certificate Management and click next.
In principal, search for the function app you just created. And then go to review + create.
This should complete the registering steps.
To validate, click on the function app -> function -> code + test -> test/run.
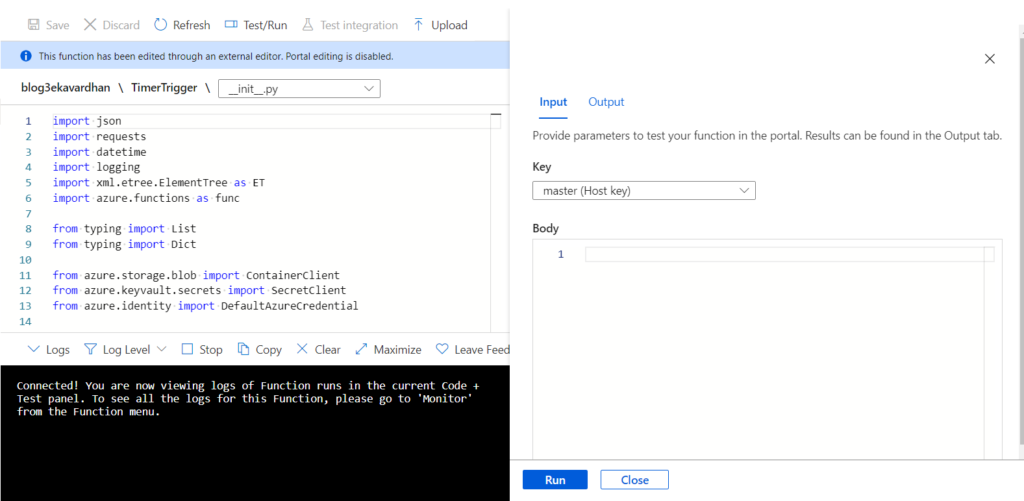
Select master key and click run
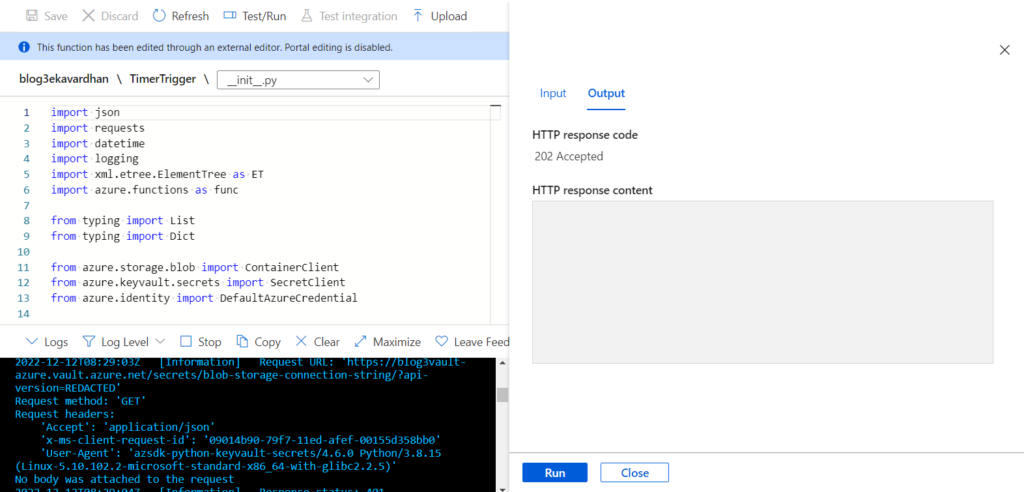
You should see the above response and data flowing into the storage, which we can see using storage explorer.
Working with Excel
This is the final step of the exercise.
Open Excel -> New workbook -> data -> get data -> from Azure -> from Azure blob storage.
You’ll be prompted to enter to storage account name. Once entered, it will access for access key, once provided you can look at the files under the storage, which is what we need.
Select the container and hit transform data. This will transform the JSON data into excel data.
Remove all the columns except “Content”, “Name”, & “Date Modified”. Set “is Latest” filter for “Date Modified” and save it.
The next step is to add a custom column.
On the top, navigate to add column -> custom column. It should open a window to create a custom column.
The name of the column can be anything. As for the formula, it should be Json.Document([Content[). This would add another column. Now delete the column “Content”.
Now click on the custom column created, select the filter icon -> expand to rows -> uncheck “Use original column as prefix”.
This would give us the excel sheet where we can see the blogs being updated in the Microsoft tech community sites that we selected. We can change the schedule in which the function runs to notice actual changes in the data being represented in the Excel sheet.
Conclusion
With this blog, we learned how to create a timer trigger function and deploy it. We also were able to create the function to capture RSS feed data into JSON and then display the data in Excel sheets using Power Query.