Have you ever wondered 🤔 how you can schedule Lambda functions in an easy way? well in many situations you need lambda functions running some background jobs in scheduled intervals or in specific days
In this blog, will see how to tackle this task using Amazon EventBridge, from which we can easily create rules for our functions and schedule them whenever we want 🏝. We will try to write a simple Bitcoin Price Tracker for our Lambda function and send email notifications through AWS SNS for price updates.
The main parts of this article:
- Create schedule through EventBridge and trigger Lambda function.
- Write the code for AWS Lambda function for our Bitcoin tracker using public api.
- Send email notifications through AWS SNS for price updates
Amazon EventBridge
EventBridge allows you to build event-driven architectures, which are loosely coupled and distributed. In this article we are going to focus on the scheduling part, however if you want to know more about EventBridge you can visit this link.
Let’s start with setting up our EventBridge Schedule.
Creating a new schedule using AWS EventBridge
- In the portal, navigate to the AWS EventBridge. Go to Scheduler section and select schedules -> Scroll down and create new schedule.
- Enter the name for your schedule (follow the rules written just below it).
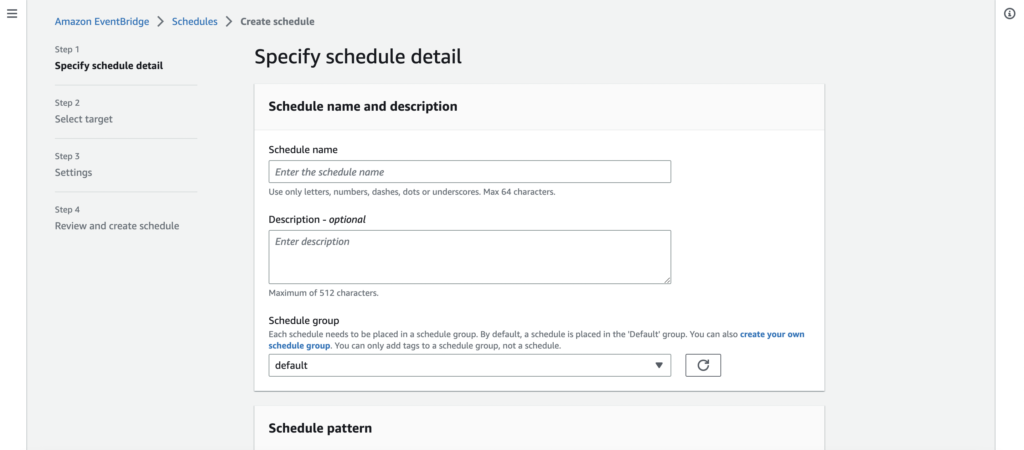
- Take the default schedule group -> Scroll down to Schedule Pattern section -> We will select do the recurring schedule -> For Schedule type we will go with Rate-based schedule (A schedule that runs at a regular rate, such as every 10 minutes) -> Input Rate expression for your to run (for minute, hour or days) Let’s go with every 3 minutes from a specific time.
- For the Flexible window just select the off.
- Scroll down to Timeframe -> enter the start date, time & end date, time when you want your schedule to run and end (Let’s go with today’s date & start in 20 minutes from current time and end in 15 minutes after that.
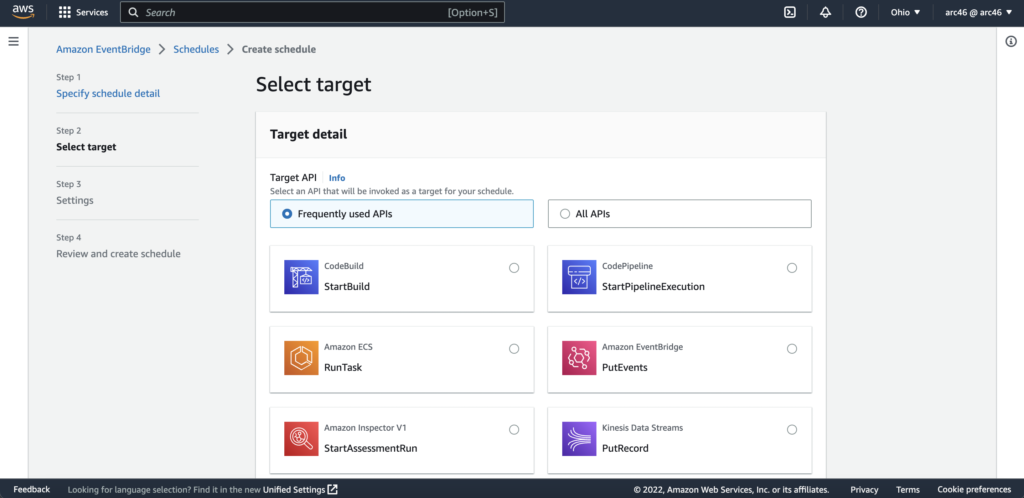
- Click Next -> Select target -> Choose AWS Lambda Invoke.
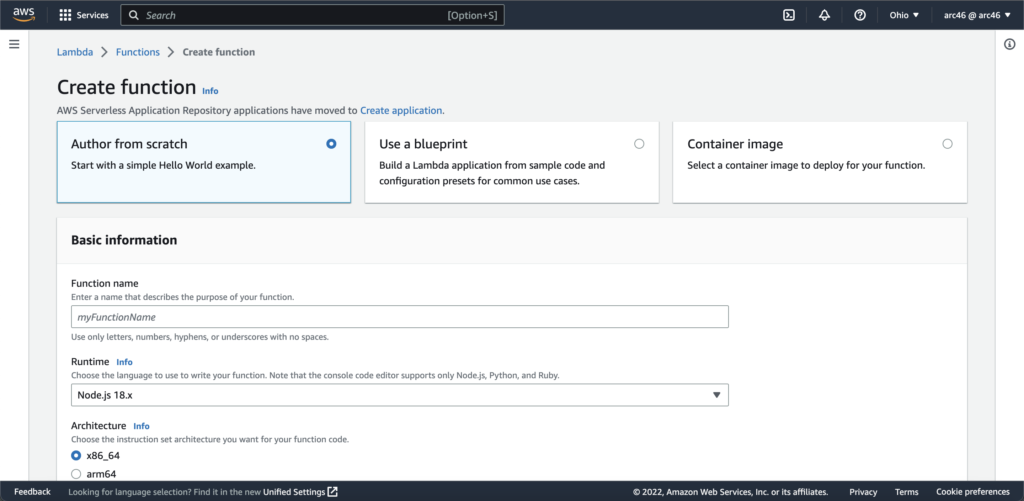
- Scroll down and select create new lambda function & go ahead create one lambda function with Python 3.8 runtime for our exercise.
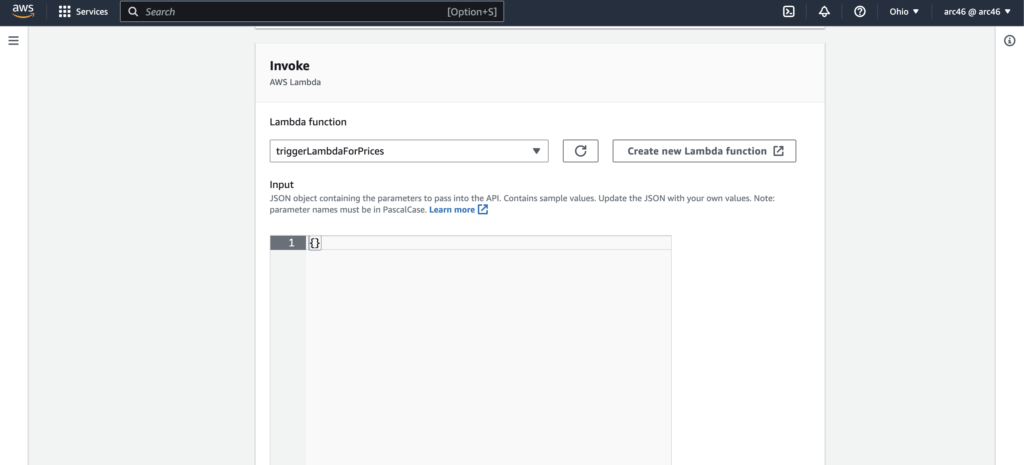
- Go back to Schedule target page and select your new created lambda function (It will create the trigger for that function).
- Click Next -> Permissions take the default -> Click Next -> Create schedule.
Now we have created a schedule that will start after 20 min and then invoke specific lambda function runs for every 3 minutes then ends in 15 mins after that.
Setup AWS SNS permission policies
Navigate to your lambda function page -> scroll down and select configuration tab -> In the Execution role section you will see the role name -> Navigate to your function permissions policies page by clicking it.
- Add Permissions -> Create Inline policy.
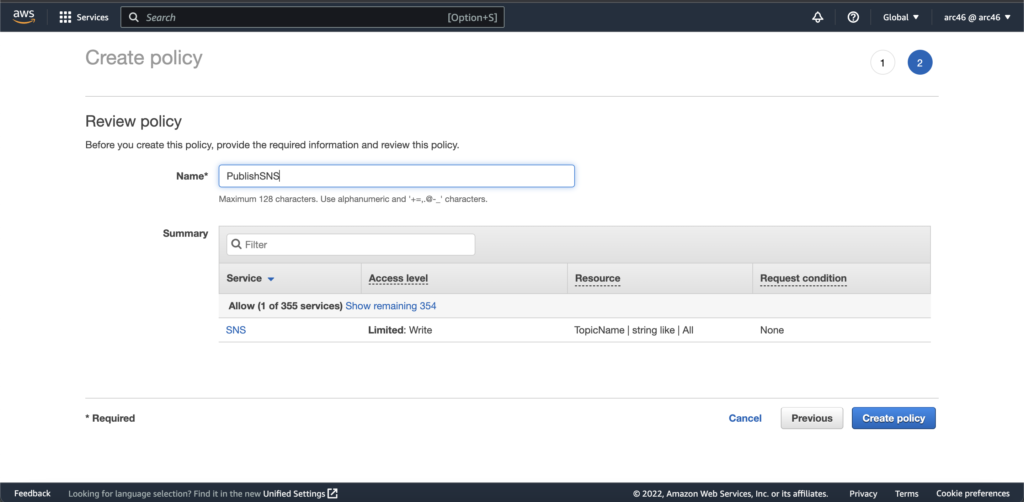
- Choose SNS from service list -> Add a write action (we only need publish and subscribe) -> Choose the resources from resource section -> Name it, review it and create the policy.
Create a Lambda function for the fetching the Bitcoin price from the public api
- Navigate to your newly Lambda function and scroll down to code section.
import json
import urllib3
http = urllib3.PoolManager()
def lambda_handler(event, context):
print("Bitcoin Price Tracker!")
response = http.request('GET', 'https://api.coindesk.com/v1/bpi/currentprice.json')
data = json.loads(response.data)
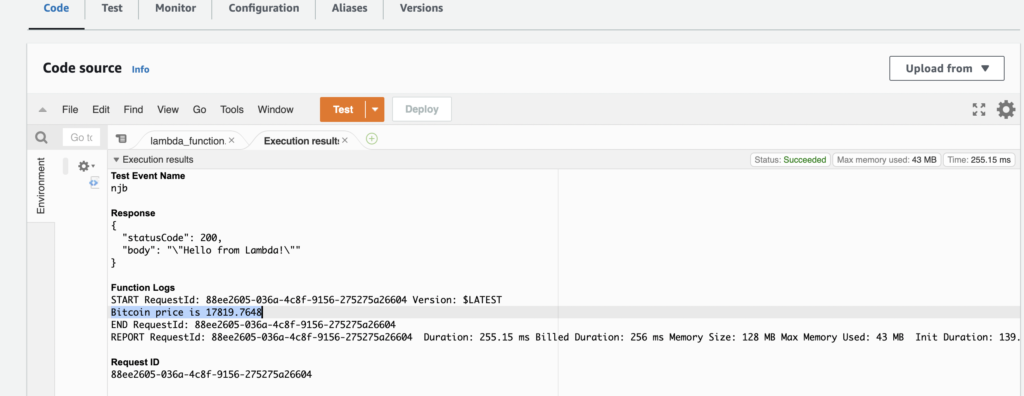
print("Bitcoin price is " + str(data["bpi"]["USD"]["rate_float"]))
print("This shows that the lambda_handler is triggered by EventBridge")
return
In the above code block we have lambda_handler() function. In that function as you can see we’re doing GET request to specific api for our crypto data that we need to track. So, we’re using urllib3 for GET request (because AWS Lambda doesn’t support requests package and also we can’t use the botocore vendor version of requests because it’s deprecated now) and loading the data through json.loads() and taking the bitcoin USD price from it.
Now deploy the function and test if it’s running fine and giving you data you need from the api.
Some are the important steps for creating a topic on AWS SNS and adding a subscriber to that topic includes:
Creating a topic
To get started, you’ll definitely need an aws account and you need to setup the iam user. Then from the AWS Management Console, please do the following:
- Navigate: Console Home –> SNS –> Create topic -> Enter topic name -> click next step.
- Select the standard type for this exercise. (because standard topics are better suited for use cases that require higher message publish and delivery throughput rates and fifo topics are a better fit for use cases that require message ordering and deduplication)
- Then you can enter display name for the SMS subscription that can be displayed on the subscribers end (i.e Mail-trap Team)
- Take the defaults for everything else. (feel free to play around and explore)
- Click create topic.
- Then you will see confirmation that the topic is created.
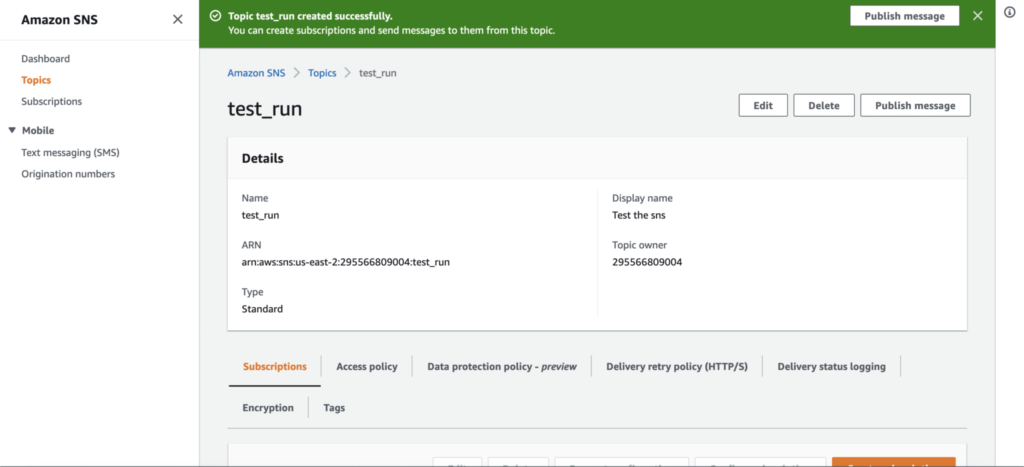
Adding subscribers to a topic
When a topic is created you will be redirected to its details (see above image) along with the dashboard displaying the list of subscribers. Now we need to add subscribers here, specifying their protocols and endpoints.
- Now we down on the same page and click on the create subscriptions button on the right. It will take us to the next page where we will fill out some details.
- Topic name can be selected here then we will select the protocol (The type of endpoint to subscribe) -> select email option for this excercise.
- Moving on to the main part: Endpoint (where a subscriber will receive the messages or notifications) -> enter the email that you want to subscribe to the topic selected above.
- Take the defaults for everything else.
- Click create subscriptions.
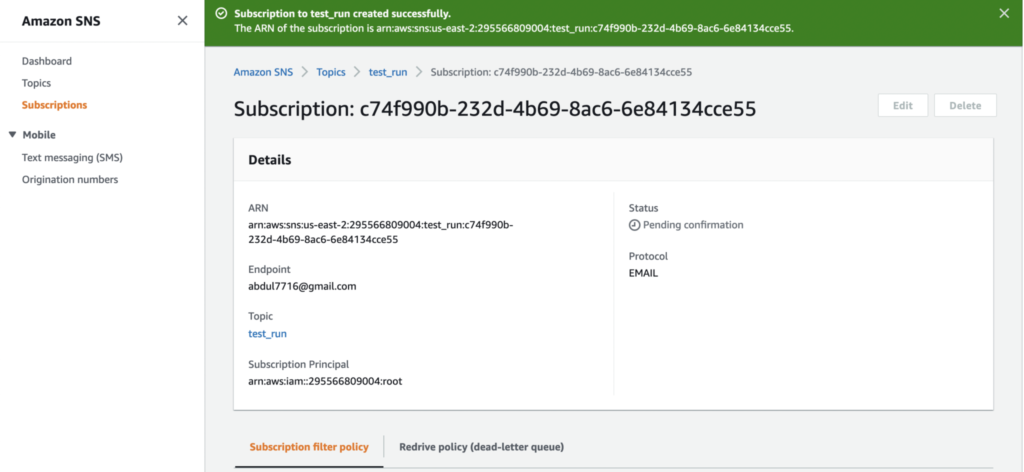
- When a subscription is created you will be redirected to its details. (see the below image)
- Now we can see the subscription status is pending because that email subscriber need to confirm by clicking on the link that we sent them to subscribe to the topic.
- Then we have to check the email to confirm the status of this subscription and confirm subscription -> you will be navigated to the aws subscription confirm tab where you can see the subscription’s id and you can unsubscribe, if you want to.
- After doing that, we can see status in subscription details it’s Confirmed!
- Check your spam folder, if you can’t able to find confirmation email.
Note we’re not going in detail here on creating a topic or subscriptions in this blog but you see step by step tutorial here.
Now add an alert through AWS SNS for the email notifications
import json
import urllib3
import boto3
http = urllib3.PoolManager()
def lambda_handler(event, context):
print("Bitcoin Price Tracker!")
response = http.request('GET', 'https://api.coindesk.com/v1/bpi/currentprice.json')
data = json.loads(response.data)
price = str(data["bpi"]["USD"]["rate_float"])
print("Bitcoin price is " + price)
print("This shows that the lambda_handler is triggered by EventBridge")
# we're using boto3 for sns
sns = boto3.client("sns")
try:
response = sns.publish(
TargetArn="arn:aws:sns:us-east-2:1235757575:mailtrap_new_users",
Message=json.dumps({
"Message" : price,
}),
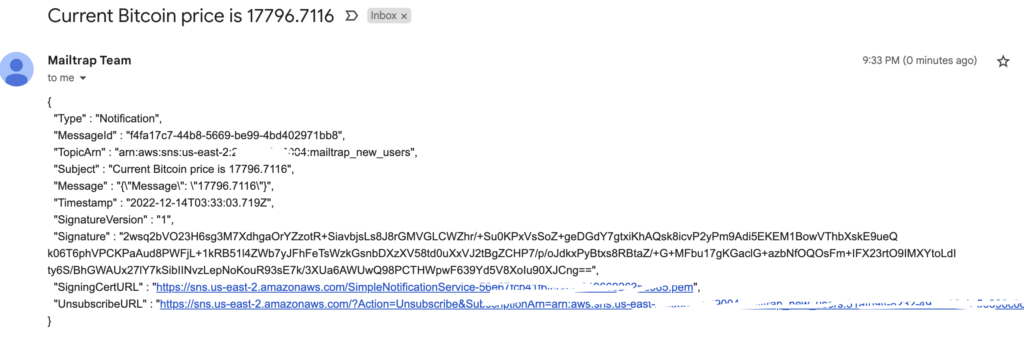
Subject='Current Bitcoin price is ' + price,
)['MessageId']
except Exception:
print("Error not published!")
raise
else:
return response
In above code block we have added the AWS SNS message publish code as you can see, one thing you just need to change is your topic TargetArn; you can find it on AWS SNS -> Topics -> select your topic name -> copy the ARN from details page and paste it in the above TargetArn.
We’re all set and ready to Deploy.
Let’s go and Deploy!!!

Conclusion
In this article we saw how to schedule a Lambda function using EventBridge and build a simple bitcoin tracker and send notifications through AWS SNS for the price updates. In many scenarios you need this feature, which helps you tackle real life problems which need cron jobs or scheduled tasks.
Download the Lambda function source and SNS permissions policies
Here’s the file for lambda and SNS policy for you to explore it yourself.
More About EventBridge
You can find more about the EventBridge on this link.
Thank you!